There comes a day in the life of every laptop when it simply isn’t running as efficiently as it could be. This day came to my 2010 MacBook Pro recently when I looked to see that it only had about 18 GB of hard drive space left and the battery was only able to hold a charge for about an hour and a half. There are many things that you can do to breath a bit of extra life into your laptop. You can add more RAM which always provides additional help. You can delete files to free up hard drive space but sometimes that is a daunting task. For me, I decide it was time to add some new hardware so that is what this how-to is about: how to install a new hard drive and battery into a 2010 MacBook Pro.
This article won’t go into all of the steps involved in the process. Instead, I created this 14 minute video that walks through the install of a new hard drive and battery on a 2010 MacBook Pro. However, this article provides some additional information in terms of prepping for the installation process as well as some post-installation tips.
First, I would like to thank iFixit.com for not only providing me with the fantastic installation guides that I used, but also for the hard drive, battery and tools that were used.
The installation process, from my experience, was not that difficult. I have, however, had a lot of practice installing hard drives and batteries into a variety of devices: PC laptops, Macs and iPhones. That being said, the most important things you can do prior to embarking on an upgrade like this are:
- Make a full backup of your system and hard drive
- Read the instructions a few times
- Watch any videos that walk through the process
Pre-Installation & Tools
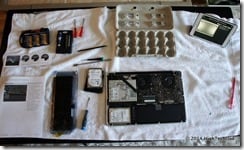
Here are the items that I used in the install process. Be sure that you have the proper items or you may get caught in a bind like not having the correct screwdriver, for example.
- iFixIt guide (they have iOS apps as well) – Install a new Hard Drive on a 2010 MacBook Pro (note: there is one specific to the battery as well but it is incorporated in the hard drive replacement)
- Phillips #00 screwdriver
- Tri-wing Y1 screwdriver
- T6 Torx screwdriver
- Tweezers
- External USB hard drive enclosure (you can get the Hard Drive replacement kit which includes this)
- 8 GB USB thumb drive (optional: if you want to install Mavericks on it first to set up your hard drive)
- Egg carton with numbered compartments (for storing tiny screws) – see my video
- iFixit (or other) Hard Drive replacement kit – 1 TB Seagate Hybrid SSD drive kit
- iFixit (or other) Battery – aftermarket Battery
I typically set up an environment for my installs that is well lit and is on a towel to prevent tiny screws from bouncing into oblivion.
There is some optional pre-work that you can do once you decide that you want to perform these upgrades. Here is what I did:
- Perform a full-backup or clone of the hard drive you want to replace. For this, I recommend using Carbon Copy Cloner. You can use the full-featured product for free for 30 days.
- Create a Mavericks install USB drive. This makes it really easy to install Mavericks on your new hard drive. MacWorld has the best guide for doing this in my opinion. Follow their directions for the “createinstallmedia”.

- Install Mavericks onto the new hard drive. Prior to installing the new hard drive in your MacBook Pro, you can install Mavericks on the new drive (and then use Migration Assistant once the new hard drive is installed). For tips on how to properly set up the drive for a bootable option, see this Apple Support page.
I decided that I would do a clean install of Mavericks first and then migrate over my apps and data. You could, on the other hand, just use Carbon Copy Cloner to clone your old drive over on to the new drive. If you do that, you wouldn’t need to install Mavericks on the new hard drive.
Once you have completed the prep work, you can go into the fun process of installing the hard drive and battery.
Install a new Hard Drive and Battery
Now that you have completed the pre-work and have read through all of the instructions and have the proper tools, it’s time to roll up your sleeves and install the hard drive and battery. Instead of walking through the process step-by-step, I recommend carefully following the iFixit guide on this. My video below (also available directly on YouTube) follows these directions.
[youtube http://youtu.be/jIdY27Y7wsE]
Some quick tips:
- Don’t drink a lot of coffee prior to attempting this! Shaky hands definitely don’t help.
- Don’t force anything. If a screw won’t go in, try resetting it.
- Don’t pull things out without checking to see how they are connected.
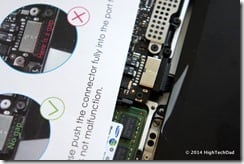
- When connecting the battery, be sure that the cable is fully pushed in.

- Don’t panic! If something confuses you, take a minute to read more about the process.
The entire process of installing a new hard drive and battery doesn’t actually take that long, especially if you know what you are doing. It’s the prep-work and the after-work that takes a lot of time.
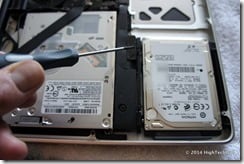
In the picture above, you can see the Tri-wing screwdriver (which came with the iFixit replacement battery). Be sure that you have one of these when replacing the battery otherwise you may be stuck in a bind!
Despite what people say, Apple actually does do a good job laying things out and the process is fairly logical.
Post-Installation Tips
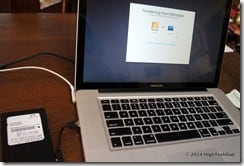
Once you get through the install process, you still have some work to do. Plug in your laptop and power it up. If you have chosen to install Mavericks on the hard drive a head of time, you now get the fun task of using Migration Assistant to get all of your data over to the new hard drive.
Some things you will want to do at some point (either before or after migrating your data):
- Reset the SMC (System Management Controller) – you may find that your battery and power manager are a bit confused – won’t charge or issues similar. Follow this Apple Support doc for details on how to reset the SMC.
- Zap the PRAM – it is often helpful to zap the PRAM when you do installs like this. Follow this Apple Support doc on how to zap the PRAM.
- Repair Permissions – launch the Disk Utility app and repair the permissions on your new hard drive (do this once you migrate your data).
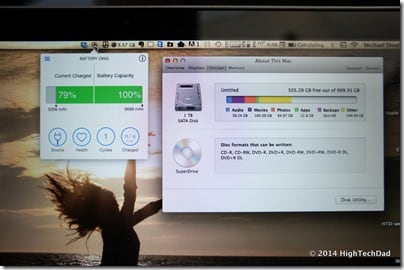
In the end, assuming everything is successful, you will have a MacBook Pro with a lot more breathing room and the ability to be unplugged a bit longer!
If you do this upgrade, be sure to leave a comment and let me know how it went. Share this article and video. There is nothing better than doing this type of thing yourself – it gives you a great sense of accomplishment!
Disclosure Text : I have a material connection because I received a gift or sample of a product for consideration in preparing to write this content. I was/am not expected to return this item or gift after my review period. All opinions within this article are my own. More information can be found in my About page as well as here.
HTD says: Give your MacBook Pro some new life with this relatively easy upgrade – install a new hard drive and battery!



1 comment
hannahlucy07
this is the way i’m getting motivationg… Great work!
Free Help Desk
Software