There is a little WiFi “bug” going around that is affecting some Mac OS 10.10 (Yosemite) users. It seems that some people’s machines (both old and new) who upgraded to Yosemite are having issues connecting to their WiFi environment. It turns out that I have one machine (one that I just repaired) that is affected by #WiFiGate where WiFi connections are being dropped or have incredibly slow (dial-up speed) connections. While I have been testing just about every “fix” that people are posting, I finally just wanted a reliable connection to the MacBook Pro. That’s where the NETGEAR AC750 WiFi Range Extender came into play and solve my Yosemite WiFi Problems.
The Yosemite WiFi issue is extremely annoying and there is one thread on Apple Discussions that I have been following that is already over 140 pages long The “fixes” differ widely and work for some people and don’t for others, or even worse, work for an hour or a day or so and then stop working. I won’t bore you with the details. But I realized that there are other ways to be “mobile” with a laptop and not use a wireless connection.
I knew that I wouldn’t have issues with a wired connection (e.g., using Ethernet). But the problem is, I didn’t have Ethernet jacks throughout my home. I wanted to be able to roam around, relatively untethered. I figured out an easy solution that involved 3 items:
- A Thunderbolt to Gigabit Ethernet Connector ($28 on Amazon)
- An Ethernet cable
- A NETGEAR AC750 WiFi Range Extender ($79 on Amazon)
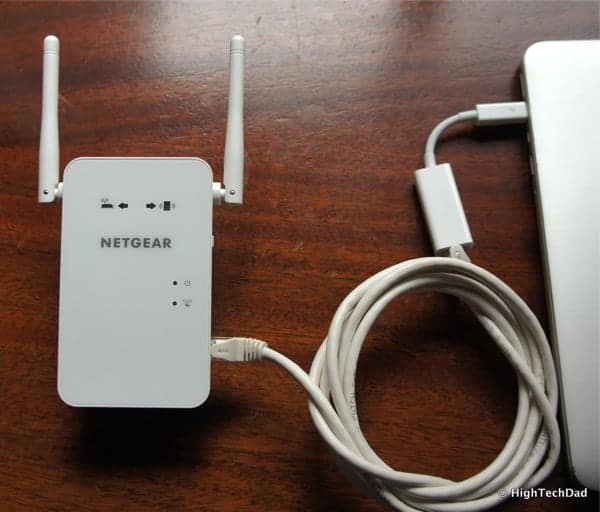
Cutting to the chase here, I configured the NETGEAR AC750 WiFi Range Extender (details below), plugged in the Thunderbolt to Ethernet Connector into the MacBook Pro and then just disabled the WiFi on the MacBook Pro. So, I had a stable and fast Ethernet connection that was also mobile.
Read on the for the details.
What the NETGEAR AC750 WiFi Range Extender Does
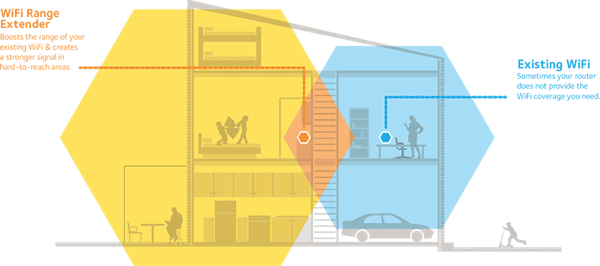
If you have WiFi in your house, you probably have some dead spots. Also you may have some devices or gadgets that do not have WiFi built into them but do have Ethernet connections. The NETGEAR AC750 WiFi Range Extender can elimiate those dead or bad coverage spots as well as allow you to connect other devices.
You use the NETGEAR extender to piggyback on top of your existing WiFi and then create a new network to broadcast even further. It’s important to remember, if you are on the very fringe of your existing WiFi network, your connectivity might not be as fast as if when you are closer so it is better to extend a stronger signal than a weaker one.
The NETGEAR extender can create new wireless networks (with their own unique SSIDs) and/or connect via an Ethernet cable.
Setting Up the NETGEAR AC750 WiFi Range Extender
The setup process for the NETGEAR AC750 WiFi Range Extender is extremely simple. First, you need to be sure that you are within range of a good, reliable WiFi connection (obviously, one that you manage so that you can enter in the SSID password).
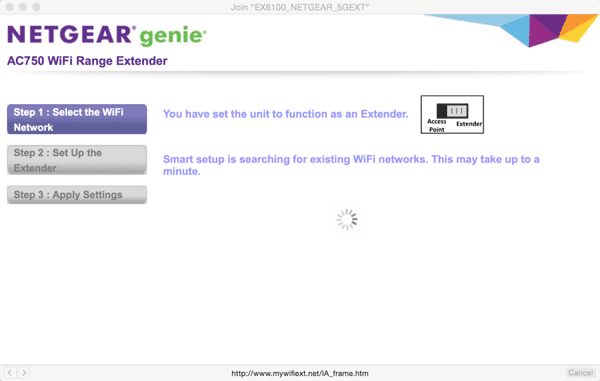
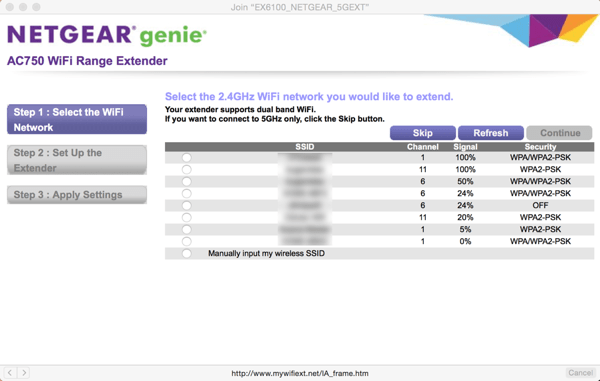
You start up the connection wizard (this is set in Extender mode). The next step is to connect with a 2.4 GHz network.
It will show the connection strength and channel and SSID name.
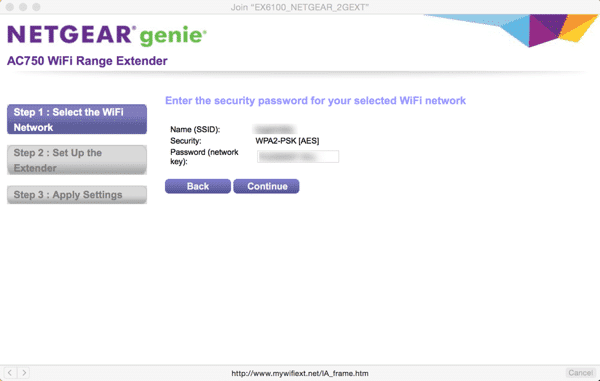
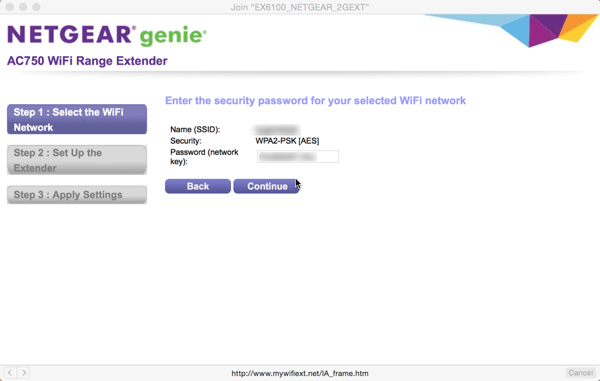
Enter in the password.
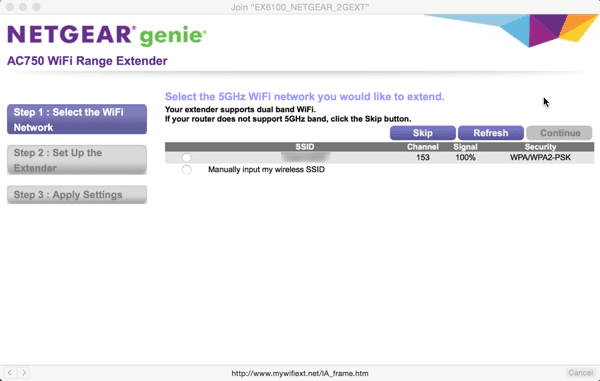
Then (optionally) do the same for the 5 GHz network.
And enter the password for that network.
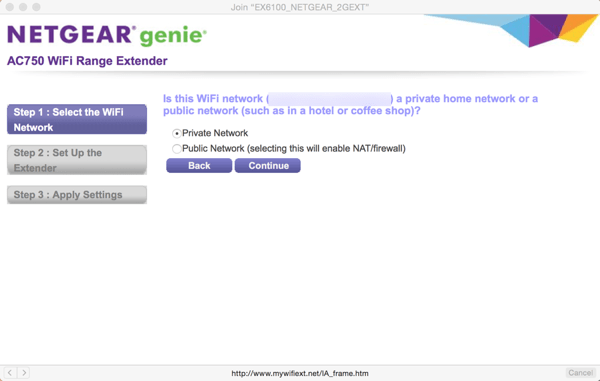
You can then set up your extender to be public or private.
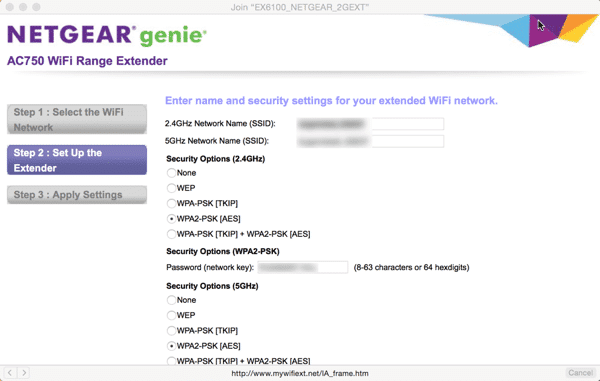
Then set up the security for the new WiFi connections. Once you are done with this, your NETGEAR extender is ready to accept connections.
Tweaking the Settings for Ethernet-only Connections
My house already has way too many WiFi signals, so I wanted to be sure that my connection would just be Ethernet. Also, because the computer I wanted to connect to was having Yosemite WiFi connection issues, I wasn’t going to use WiFi to connect to it.
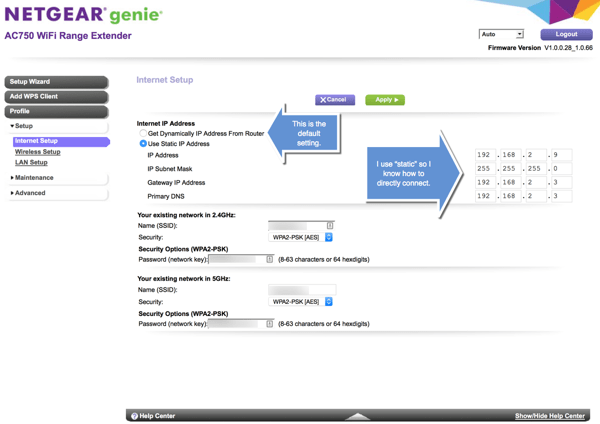
There were a couple of things I wanted to do: 1) set up a static IP address for the NETGEAR extender so that I always knew how to access it via a web browser and 2) turn off the WiFi radios so that it wasn’t allowing outbound WiFi.
Setting up a static IP address is easy. First, just be sure that you have it on the same network as your router and then use an IP address that is not within the DHCP allocation range (to avoid conflicts).
Once you set a static IP address, be sure to remember it as the “easier” method of going to a specificly spelled out website (on your local network) probably won’t work. Also, once you disable your WiFi networks on the extender, you won’t be able to connect to it via a WiFi connection.
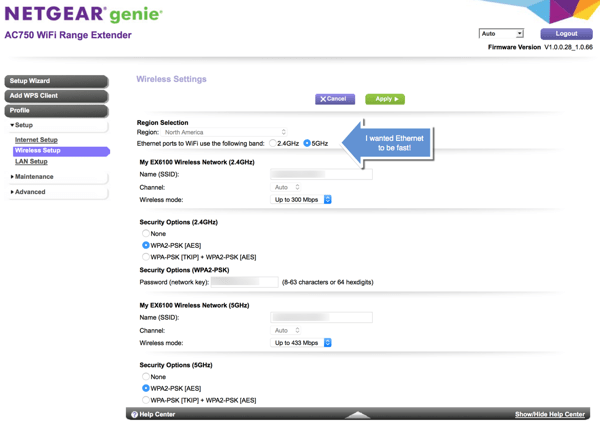
Another tweak that I did, since I connected to a 5 GHz network was to make sure the Ethernet connection used the faster WiFi.
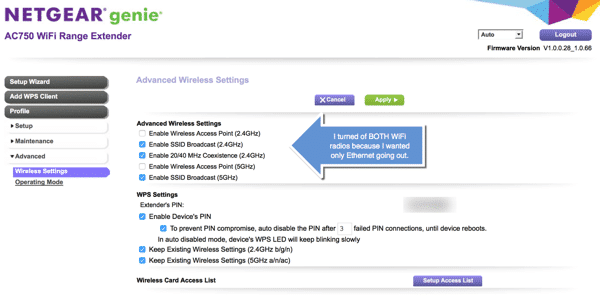
To disable with wireless radios (and this doesn’t stop the connection to your other WiFi account because the repeater needs those WiFi connetions to get connectivity), you need to go to the extender’s Advanced Wireless settings and just un-check the “Enable Wireless Access Points” for both the 2.4GHz and 5GHz networks.
Once you do these settings, the NETGEAR WiFi extender is set to only give out connectivity via the Ethernet port. From there you just connect your MacBook Pro (or actually any device that has an Ethernet port) to the Ethernet port (the MBP used the Thunderbolt to Gigabit Ethernet Connector).
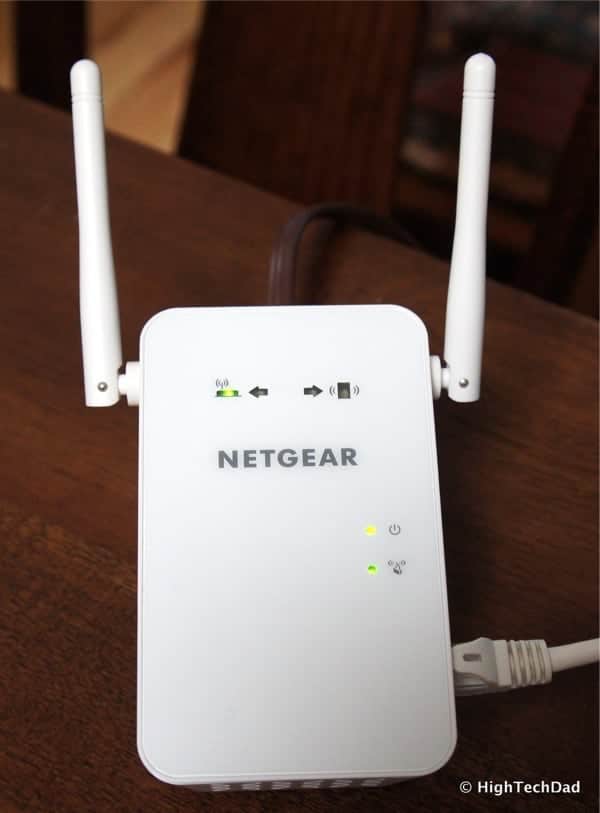
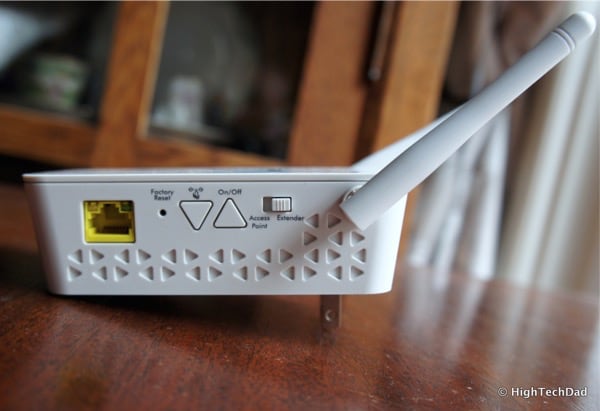
There are ways to use the NETGEAR extender to determine the best signal strength (of the WiFi networks it’s connected to) as well as turn on and off the extender. The up arrow button turns it on and off and the down arrow button allows you to find the best placement for the extender (using the LEDs on the front).
Overall, I found the NETGEAR AC750 WiFi Range Extender (model: EX6100) to be extremely easy to set up and configure, and I liked how I could modify the settings to match the exact scenario I was hoping to have, that of an Ethernet-only connection that I could move around my house easily, without needing to be physically plugged into a wall Ethernet jack.
Disclosure Text : I have a material connection because I received a gift or sample of a product for consideration in preparing to write this content. I was/am not expected to return this item or gift after my review period. All opinions within this article are my own. More information can be found in my About page.
HTD says: The NETGEAR AC750 WiFi Range Extender actually extended my sanity when dealing with a stubborn Yosemite WiFi connectivity issue!


2 comments
Herpret
Why Mac? PCs are cheaper, more featured, stronger (superior hardware through upgrades / builds that macs do not offer) and more compatible. Unless you need it for a specific field, its simply ridiculous.
lalit kumar
Great and Thanks for this information to sharing with us..
find more : http://www.geeksonsite.co.nz/