If you work in an office, you have probably gone to a conference room to watch or give a presentation. And, as part of the presentation process, you probably had to figure out how to connect to the projector or the big screen monitor or watch someone struggle to do so. You need to find the right port, the right cable, and figure out which Input you need to use. Wouldn’t it be nice to just attach an HDMI (or USB Type-C) dongle to your laptop and have it magically appear on the screen with no cables snaking across the table? And also not have to install any type of software for the connection to be enabled? And just as easily, hand the dongle off to the next presenter and have them connected in around 6 seconds? Well, you can with the BenQ InstaShow. And guess what? You can use this technology just as easily at home with a variety of devices. (*Disclosure below.)
What I described is something that I have personally encountered at various workplaces. While IT departments have worked hard to hard-wire display connections, and have all of the available documentation and connection cables available, all too often the displays simply don’t connect. What you really want to do is just plug something in and focus on delivering your presentation in the best way possible, and not worry about whether your presentation will even display on the screen.
BenQ has taken this connectivity problem and fixed it with the InstaShow hardware solution. You keep your presentation table clutter-free as there are no cables snaking around. And users don’t have to worry about whether their computer is compliant from a software perspective. As long as they have an HDMI port (or a USB Type-C port), they can use the InstaShow via a simple plug & play method.
And, while wireless presentation or video streaming is fantastic, when you are in a business environment, you need to ensure that the wireless connection is secure to potentially eliminate threats of someone stealing or eavesdropping on the wireless connection and watching the show. The BenQ InstaShow has 128-bit AES encryption between the connection dongle that attaches to the computer and the receiving base station that is connected to the monitor screen or the projector.
I received a BenQ InstaShow to test out. But not in a business environment, but rather, in my home. I figured that if it works in my complex home network (at least I think it is complex but compared to enterprise environments, it’s probably much more straightforward), it would work “at work.” I decided to test out a few scenarios. And, I even brought the InstaShow over to my friend’s house to test it out in his larger home, particularly for range and quality of signal. After my non-scientific tests, I remain impressed.
What is the BenQ InstaShow?
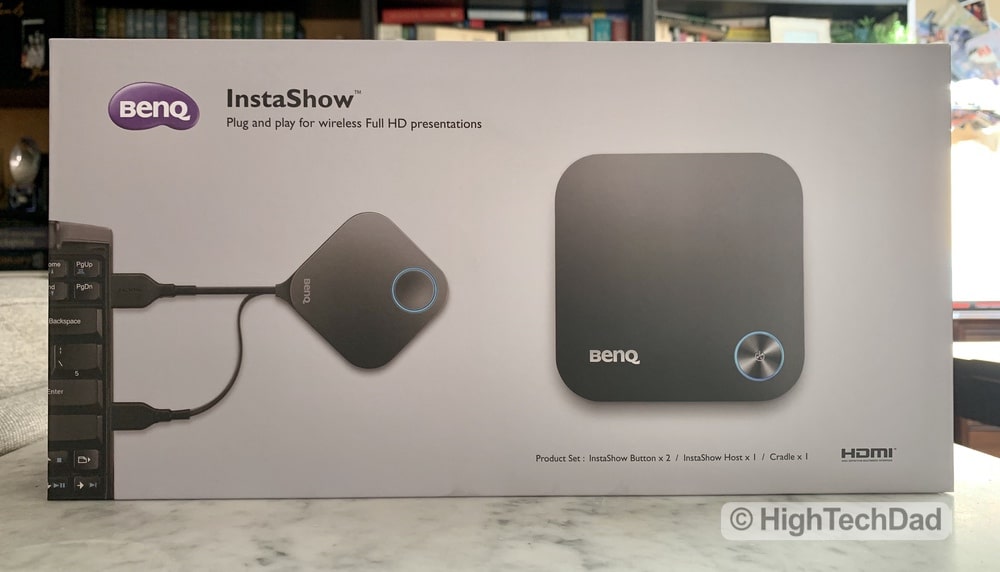
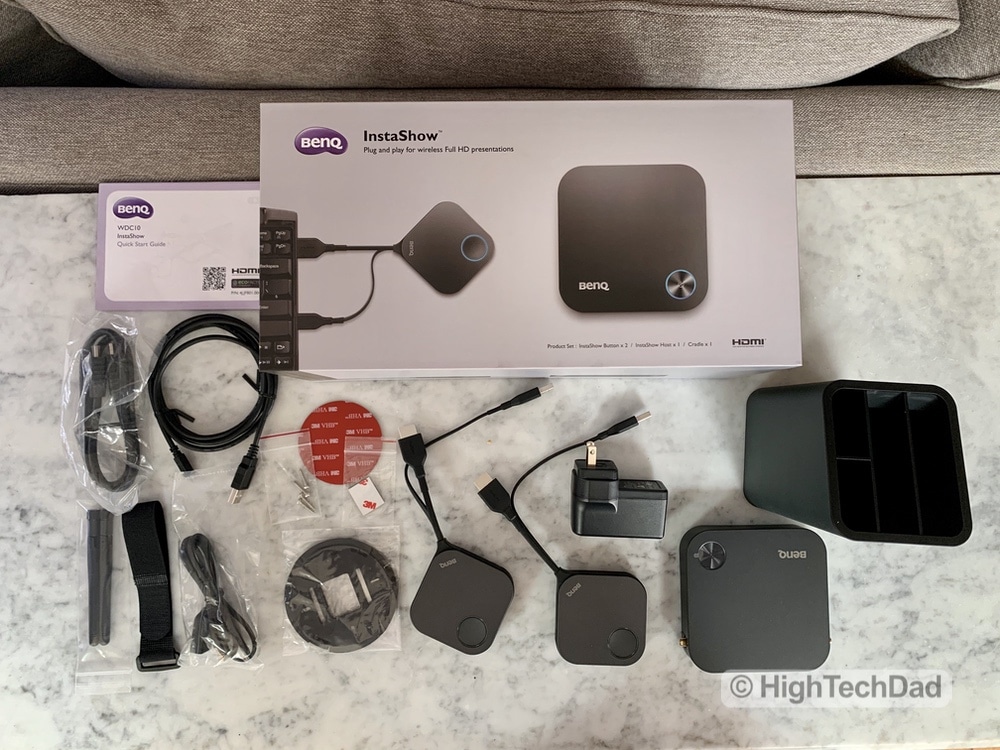
While I have generally described what the InstaShow is, I want to provide some more specifics to be precise. The InstaShow consists of a transmitter (what I call the HDMI/USB Type-C dongle) and the receiver (what attaches to the video source – a TV, monitor, projector, etc.). The magic of wireless video/presentation transmission takes place between these two hardware devices.
And let’s talk about that “magic” a bit. The InstaShow is engineered to eliminate the need for installing software on devices in general. It is truly designed as a plug-and-play solution. But there is a tiny bit of setup required.
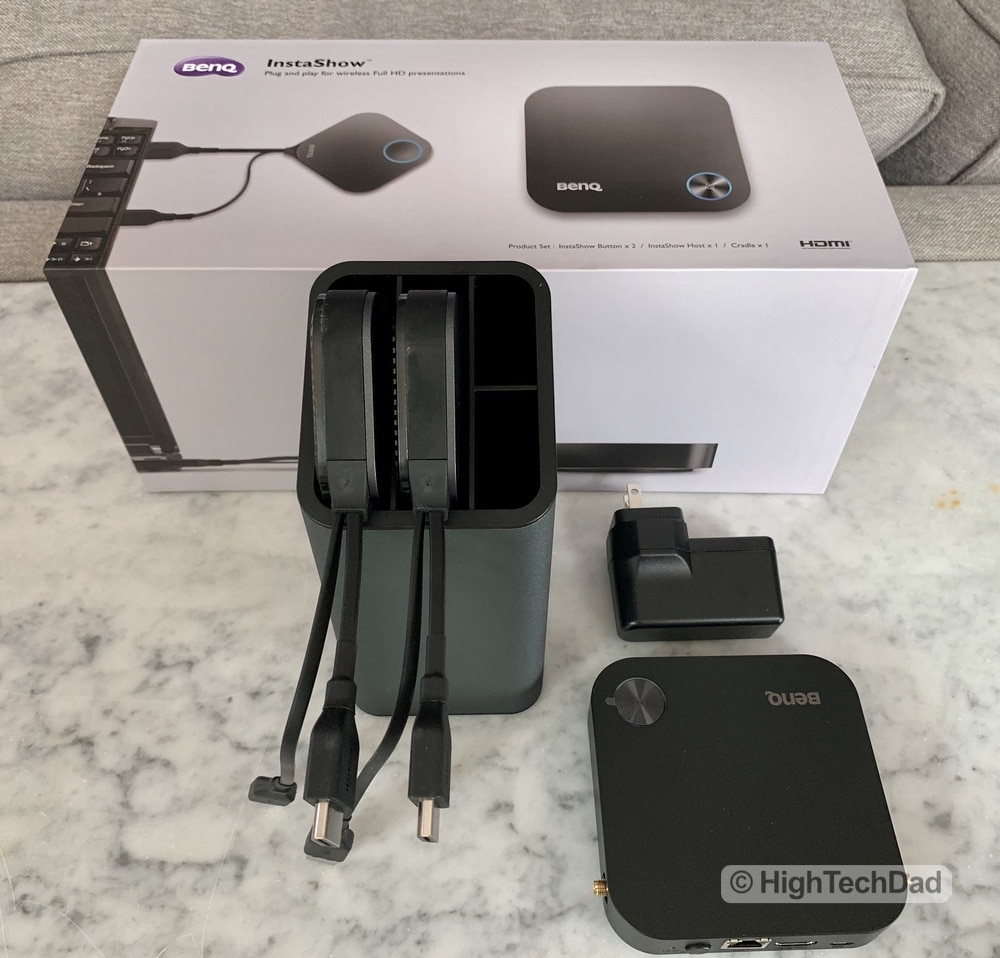
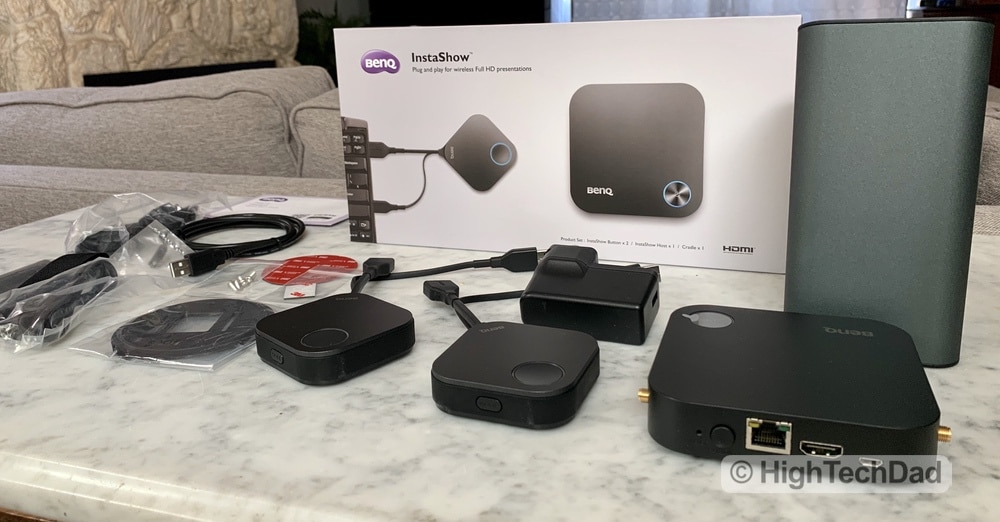
First, you need to attach the hardware receiver to the monitor/TV/projector. You do this by connecting the included HDMI cable to the video receiver. Then you need to provide power to that receiver. There is an included USB cable that provides the power for the receiver. You can plug that USB cable into an open USB 3.0 port on your TV/Monitor/Project (e.g., the “video receiver”), or you can use the included USB wall plug (and use the USB extender cable if needed) to plug the hardware receiver into the wall or a surge protector.
BenQ provides a variety of ways you can semi-permanently mount the hardware receiver. You can attach it to the back of the monitor, or to a pole, or just leave it sitting on a table. I elected to keep my hardware receiver “loose” so that it could be portable and could connect to a variety of video receivers around my home. Once the BenQ hardware receiver is attached to the video receiver and powered up, you can pretty much forget about it. This would be true within a business environment as well, and given that the BenQ hardware receiver has a reasonably small footprint, you can easily tuck and hide it away.
Next, you have the BenQ hardware transmitter. This is the device that will plug into your laptop or another video source. BenQ has a couple of transmitter options available: HDMI or USB Type-C. For my testing, I had the HDMI transmitters, two of them in fact. For my home, this made the most sense. I could, for example, easily connect any HDMI device like a game console or BluRay player or laptop. I actually came up with an even more “complex” connection, which I will go into a bit later.
In terms of connecting the BenQ hardware transmitter, as I said, you just need to plug it into the HDMI port of your device. There are no software drivers or anything that you need to install. And this is particularly great for those non-computer video sources like DVD players or game consoles or video streaming devices as you cannot interact with those devices directly for software.
Essentially, the BenQ hardware transmitter acts like just a plain old HDMI cable, only without the cable part.
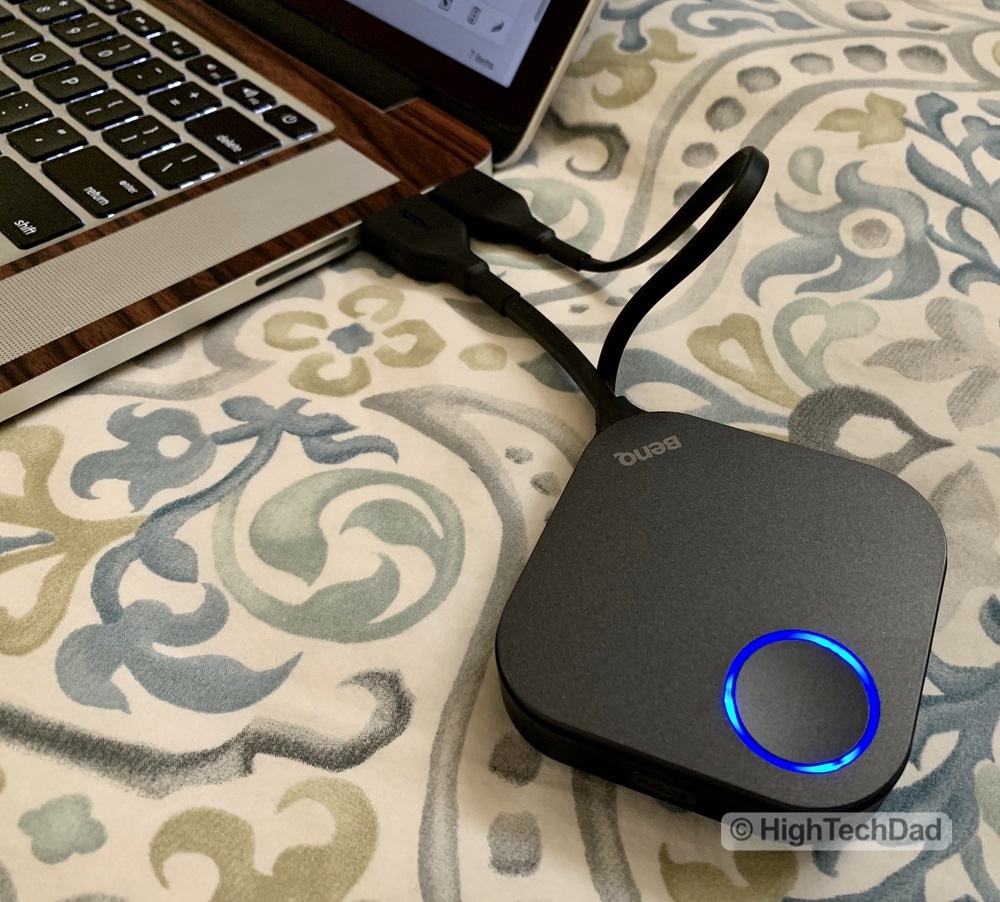
The hardware transmitter does need power though. And this is achieved through a built-in USB type-A cable (there are two cables that come out of the transmitting hardware – HDMI and a USB Type-A). You plug the USB cable into a spare port of your laptop or other device and also plug in the HDMI cable. If you don’t have an available USB Type-A port, you can simply connect it to a USB wall charger.
Note: if you have the USB Type-C transmitter, you can power and send video through just the USB Type-C cable alone which is quite convenient (but I haven’t tested that).
Regardless of which transmitter you have, the “dongle” (it’s actually called the InstaShow Button, so I will call it that) needs to be attached and have power. The InstaShow Button measures 84.5mm x 189.55mm x 19.9mm and weighs a mere 100 grams.
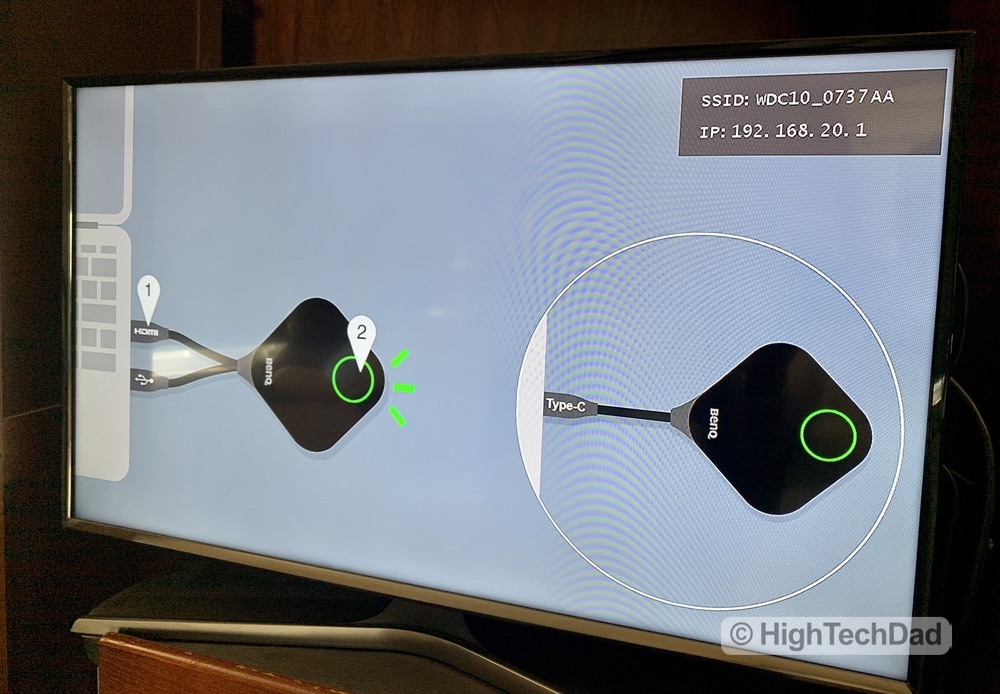
Once the Button is powered, connecting to the InstaShow receiver (the WDC10 or the “Host” – which measures 110mm x 110mm x 27mm, not including the antennae) is extremely easy. Since the Host (receiver) should be on first, you just plug the “Button” into your video source. After 7-10 seconds, the LED ring, which is red initially, will turn green. The green button ring indicates that a connection between the Button and the Host has been made successfully. From there, you simply press the physical button on the Button transmitter, and it will turn a blue color when video is being transmitted. It’s that simple.
If someone else wants to present, just give them the Button and let them connect. The package that I received included two HDMI Buttons. So, conceivably, I could have two devices ready to present at any time, and just pressing the button on the Button would enable the presentation mode.
Simple. Straight-forward. Zero software. Fast, secure connectivity with just a button press.
How Well Does the BenQ InstaShow Work?
The setup and connection process I described in the previous section actually does work as written. The connection is fast and extremely easy. Again, I was NOT setting this up and testing in a corporate environment, truly where this hardware solution would thrive. I was doing this at home, connecting various devices to HDTVs around my house.
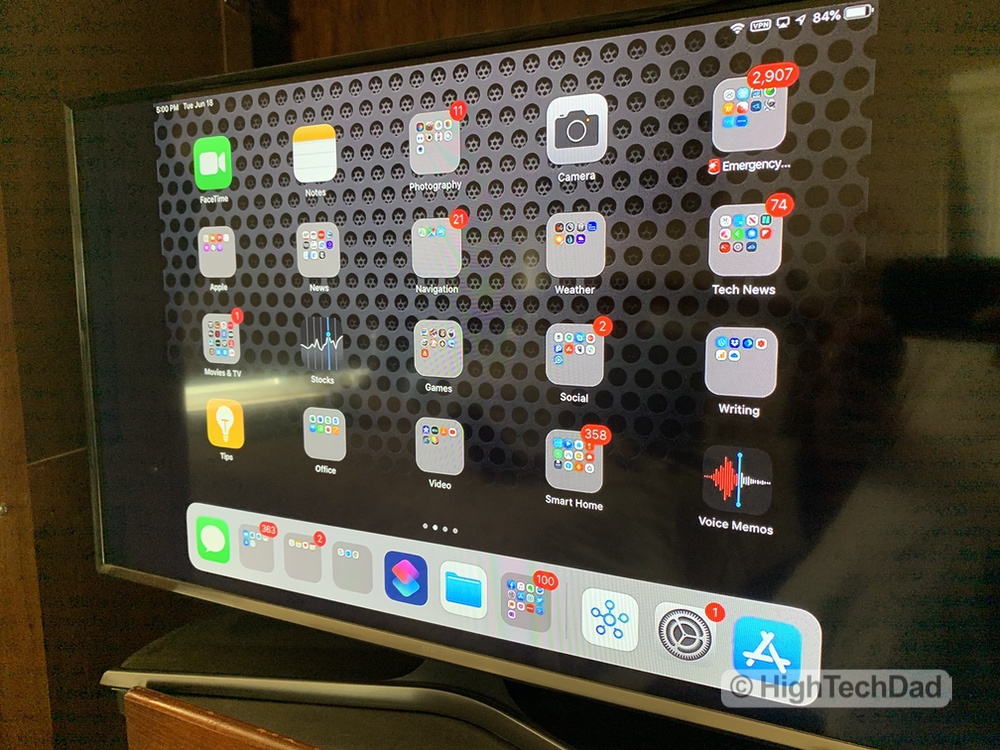
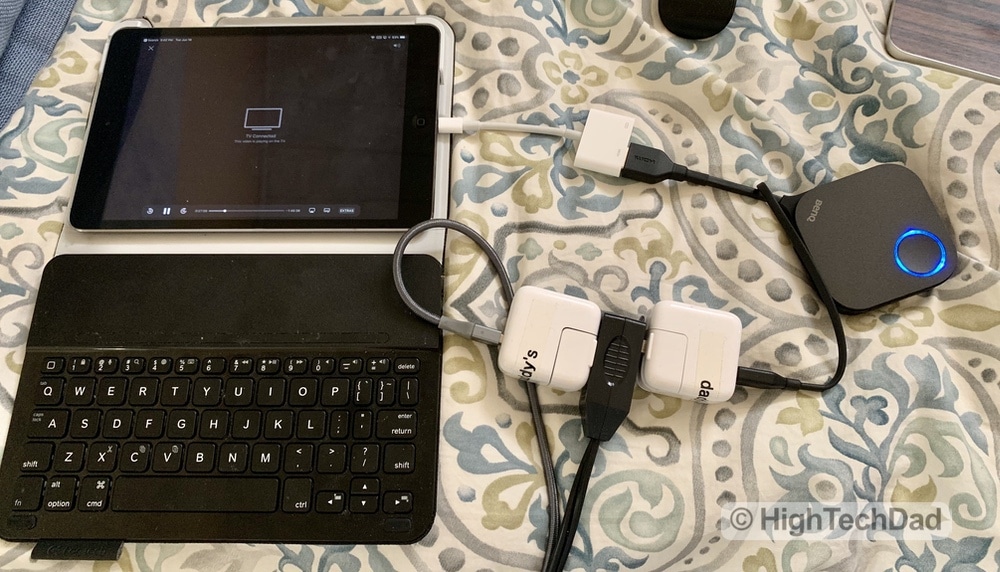
I decided to do a bit of an extreme use case just to see if it would work. I wanted to connect my iPad to my HDTV in my bedroom. I already had a solution I was using for this (which I use at hotels, for example) which simply consists of a really long HDMI cable and an Apple Lightning to Digital AV Adapter. This simple connection allows me to plug in my iOS device to any TV, monitor, or projector that has an HDMI port. And, I can keep my iOS device charged and powered during the process.
BUT, there is a limitation to this solution, namely the long HDMI cable. These cables can be expensive as well as heavy and bulky. And having a long HDMI cable snaking around the floor is not very visually appealing.
So, I decided to use the same Apple Lightning to Digital AV Adapter to power a wireless video transmission using the InstaShow. And it worked flawlessly. But there are some things to know about this which might not make it ideal for everyone.
For starters, if you have an Apple TV, you can simply use Apple AirPlay to achieve pretty much the same thing. But, this goes back to the “zero software” feature of the InstaShow. For AirPlay, you need iOS and an iOS device and an Apple TV. And you would have to move the Apple TV around to make this work.
Also, you still need to find power for the InstaShow button. In my case, I had an extension cord which had two USB plugs; one I used to power the iPad and one to power the InstaShow button. But the easy Button click connective worked as expected, and I was able to stream video from Netflix, HBO, and Amazon Prime, without issue. However, Dish didn’t want to cooperate as it had a warning that said it doesn’t work with “video capture” devices.
If you had an Android tablet or smartphone, with the proper adapters, you could probably easily video stream using the BenQ InstaShow, but this is not something I tested.
My next informal test consisted of going to my neighbor’s house and using his laptop and 4K TV. I wanted to test the ease of setup as well as the transmission range and resilience as his home is much larger than mine. I wanted to see how rooms and distance may cause interference or signal dropping. Again, this was NOT a scientific test.
So I let him connect the InstaShow receiver, the Hub, to his TV. I didn’t really give any instruction, and he was able to do it reasonably quickly. Then we just connected his MacBook Pro to the button and started testing. We decided to stream 4K content from YouTube to really push things. We were looking for pixelation, color quality, and delay between the source (the laptop) and the 4K TV.
One thing that we didn’t realize until later is that on the side of the Button, there is another button that you can toggle video or presentation playback. We just used the standard playback.
Once we had things streaming (and the audio streamed from the laptop to the HDTV as well, by the way), I decided to take the laptop around his home and out into the garden. His TV was upstairs, and I was able to take the laptop several rooms away downstairs without any signal degradation or dropping. This was through both floors and several walls.
Then I took the laptop outside and went to the edge of his property, several hundred feet. While this had a clearer line of sight to the Host receiver, at a greater distance than the indoor test, the blue ring on the Button turned red as the signal was lost. But I simply needed to get a bit closer, and it automatically reconnected.
Again, two non-scientific tests but potentially equating to real-world home tests. And they seemed to work quite well.
Other Notes and Observations about the BenQ InstaShow
The BenQ InstaShow is quite a compelling device, especially if you are in charge of setting up conference room AV equipment. The ease of use for plug-and-play wireless video connectivity saves your time and money for the configuration. Pretty much anyone can set it up, no expertise really needed. And you don’t have to worry about laying cable around tables or through walls since everything is wireless.
I did not test the security of the transmission of the video. I’m pretty much taking BenQ’s word for the device being secure as this is one of the primary selling points they promote. However, if you want to read an excellent write-up of the InstaShow security, I highly recommend checking out Caffeine Security’s post “BenQ InstaShow – Security Done Right” as the author Ben truly dives into the security of the device.
One thing that I did notice was that the Button does get quite hot as it transmits gobs of digital data wirelessly, as well as encryption and compression of this data. This is one thing to look out for. However, when I asked the BenQ folks about this, they assured me this was normal, and while the device does get hot, they have not had any failures because of this. And, this is probably because my tests involved streaming video which uses much more data than a simple presentation.
In terms of the transmission, video is, indeed high-definition with the top resolution being 1080P. The frame rate is 60 frames per second. And the data transmission rate it 867 Mbps. There is a slight lag between the presenting or video source and the actual video output on a TV or projector. This, again, is understandable as the video data is encrypted, compressed, and transmitted. So, if you are doing a presentation, this is really a non- issue. For streaming of video, also probably a non-issue. However, if you are a gamer, the lag may be important to you. The InstaShow is perhaps not for playing games but maybe for watching them as a spectator with the main gameplay occurring on the laptop.
If you want to fine-tune the configuration of the InstaShow, you can do that. The Caffeine Security post goes into the details on this. On the back of the InstaShow Host is an Ethernet port. You can plug a computer directly into that to do additional security hardening or other configurations like changing the on-screen text. The nice thing about plugging directly from a computer to the InstaShow is the fact that the InstaShow doesn’t have to actually attach to a corporate network, keeping it secure. I haven’t tested this yet, but I’m wondering if I could maybe put my logo on it…ha!
The price of the BenQ InstaShow is the one thing that may make home consumers balk a bit. It’s not inexpensive. In fact, this product is designed for corporations primarily so the price point it more in-line with that. But if you have a home business, small business, or are a consultant, it may be a good, portable wireless video streaming solution for you.
The BenQ InstaShow has two versions, as I mentioned. There is the HDMI and USB Type-A version (called the WDC10) and the USB Type-C version (called the WDC10C). Below are the retail and Amazon prices:
- WDC10 with 2 HDMI transmitters – currently $991.99 on Amazon
- WDC10C with 2 USB-C transmitters – currently $1026.95 on Amazon
- Extra HDMI Button – currently $499 on Amazon
Be sure you read the details of what you are ordering. The review version I received came with TWO HDMI Buttons, but there are some packages which only include one. Oh, and the Host can actually maintain connections with up to 16 Buttons at once so you could have some around the table with everyone plugged in, so you don’t have to share them.
Lastly, as I only have the HDMI/USB Type-A buttons to test, I’m not sure if you can mix and match buttons with the same Host. I’m going to assume that you can, simply because that would make the most sense.
Shop on HighTechDad
The product shown below (and related products that have been reviewed on HighTechDad) is available within the HighTechDad Shop. This review has all of the details about this particular product and you can order it directly by clicking on the Buy button or clicking on the image/title to view more. Be sure to review other products available in the HighTechDad Shop.
-
 BenQ InstaShow$1,028.51
While the BenQ InstaShow is primarily designed for a corporate environment, it definitely does play nicely at home as well. My rudimentary tests just around my home shows that wireless video connectivity is indeed easy and possible. So much so that I’m convinced if my kids wanted to watch YouTube on the big HDTV in our living room, they could easily connect their laptops to the BenQ Button and stream away. And while the InstaShow is not truly designed for high-definition wireless video streaming as part of an AV home theater environment, it can be used for that purpose. (There may be better products for that exact purpose though.)
But, for corporations or small businesses, or geeky dads like me, the InstaShow is ideal for quickly getting things from a small screen to a large screen without having to disconnect and reconnect wires or have cables running all over the place. It’s a wireless video solution that takes minutes to set up and literally seconds to connect and use.
Disclosure: I have a material connection because I received a sample of a product for consideration in preparing to review the product and write this content. I was/am not expected to return this item after my review period. All opinions within this article are my own and are typically not subject to editorial review from any 3rd party. Also, some of the links in the post above may be “affiliate” or “advertising” links. These may be automatically created or placed by me manually. This means if you click on the link and purchase the item (sometimes but not necessarily the product or service being reviewed), I will receive a small affiliate or advertising commission. More information can be found on my About page.
HTD says: Rarely have I encountered a device that actually lives up to an easy setup and even easier and faster use. For wirelessly connecting HDMI sources to other HDMI devices, the BenQ InstaShow is truly a champion – all with a highly secure transmission. Great at home or at work.
HighTechDad's Ratings
-
Ease-of-Use
-
Family-Friendly
-
Price Point
-
Features
Summary
Rarely have I encountered a device that actually lives up to an easy setup and even easier and faster use. For wirelessly connecting HDMI sources to other HDMI devices, the BenQ InstaShow is truly a champion – all with a highly secure transmission. Great at home or at work. The setup couldn’t be easier. Nothing to configure at all. Just need to plug into the video source’s HDMI port and then the USB into a spare port for power. Or, if you have the USB Type-C Button transmitter, all you need to do is just plug that in and it does video and power in one. For the Host receiver, just plug into HDMI and USB into port or wall plug for power. Then press a button to connect and transmit video (and audio) within second. Perfect for a work environment and definitely can be used at home. This solution is a bit pricey as it is designed for a business audience. But overall, just plug and play!
Pros
- Super easy to set up
- Even easier to use
- Very good quality video stream (up to 1080p)
Cons
- A bit pricey as a home solution
- Tiny lag does not make it good for gaming (but watching gaming it’s ok)
