There is an important distinction to make within the realm of smart homes and what truly defines “smart.” You can now easily get a “smart” plug or a “smart” switch or a “smart” lightbulb. My home, in fact, has many of different manufacturers. They are all controlled via a “smart” hub or some sort of a “smart” voice controller. I’ll be honest. I love the “smartness” of it all. But when you take a step back and really think about it, is it really “smart?” Or is it just connected and remotely controlled? Does that define what is “smart?” (Ok enough with the quotes around “smart” – you get the idea.) Noon Home has a different idea of what makes up a smart home. And yes, while they do make switches, these are not like any other smart switch that I have encountered. They don’t focus on the switch itself (although their switches are exquisitely designed). Instead, their goal is to create lighting scenes that fit the environment, all programmed and controlled by their intelligent switches (notice I upped it a level from smart?) Let me explain. (*Disclosure below.)
First, I need to step back a few months. I attended a local tech show for media that had various consumer electronics companies pitching their gadgets. After an hour or so, I had visited the 30 or so companies and pretty much talked to everyone. The last table was that of Noon Home (who I am going to just refer to as Noon). It was towards the end of the night and many folks had moved on. However, about an hour later, I realized that I had been geeking out with the folks at Noon, diving into the details of wiring switches, how different controllers work, the differences in lightbulb types, how some dimmers don’t play well with CFLs or LEDs, and how light truly should be thought about carefully. It turns out that Noon had come out of stealth mode that day, I believe, and had just announced their new products. Needless to say, I was captivated by what they were pitching.
Fast forward a month or so, I had the pleasure of having the Noon folks over to my house to install and demonstrate their intelligent switches. I had recently both had the electrical of my house replaced from knob and tube to Romex, a new circuit breaker, and new recessed lighting, and I had swapped out all of my incandescent bulbs for LEDs. I had become pretty well versed in things electrical and had also installed a few connected switches and light bulbs. But what Noon brought to my main living space was not just the ability to turn on or off the lights (or even control them remotely). They brought new lighting scenes that were custom-designed to activities, time of day, and comfort.
Here’s a quick video walkthrough:
Let’s talk about the intelligence of the Noon offering. This is important because it is pervasive from design to install to usage. For starters, the concept behind their switches is relatively simple. There are two types of switches, a Room Director and Extension Switches. The Room Director is the intelligent one as it has a display, is what communicates with your WiFi, and connects and controls the Extension Switches. The Switches and the Director talk to each other using a special communication protocol. And you need to have one Director per room that you want to have lighting control over. So, if you are looking to get Noon in your home, find a room that has lots of different lighting options (overhead, accent, chandeliers, recessed, etc.) as you will get the biggest benefit from Noon in those types of environments (which I will go into shortly).
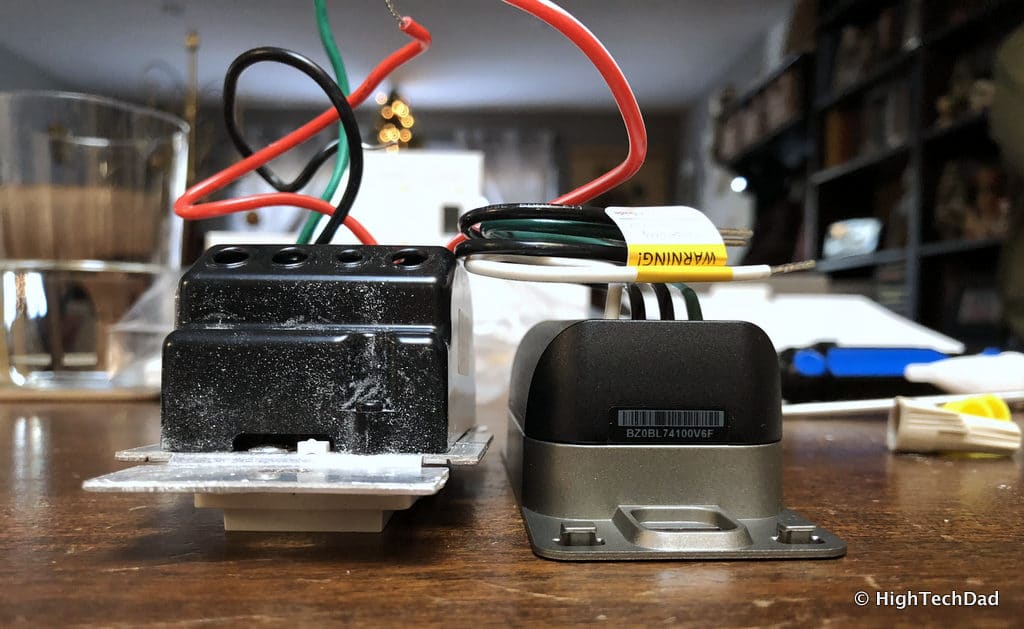
In terms of the design of the Noon products, there is incredible attention to detail – even for the installer. For example, if your switches are anything like mine, the electrical box that houses the switch is typically crammed tight with wires. One thing that I encountered installing other smart light switches is that the “brains” tend to take up a lot of space so getting them to fit into the box can be tricky. The Noon designers thought about this common occurrence and designed their brains to have the smallest form factor as possible. This was a big thing for me, even if you only encounter this once during installation.
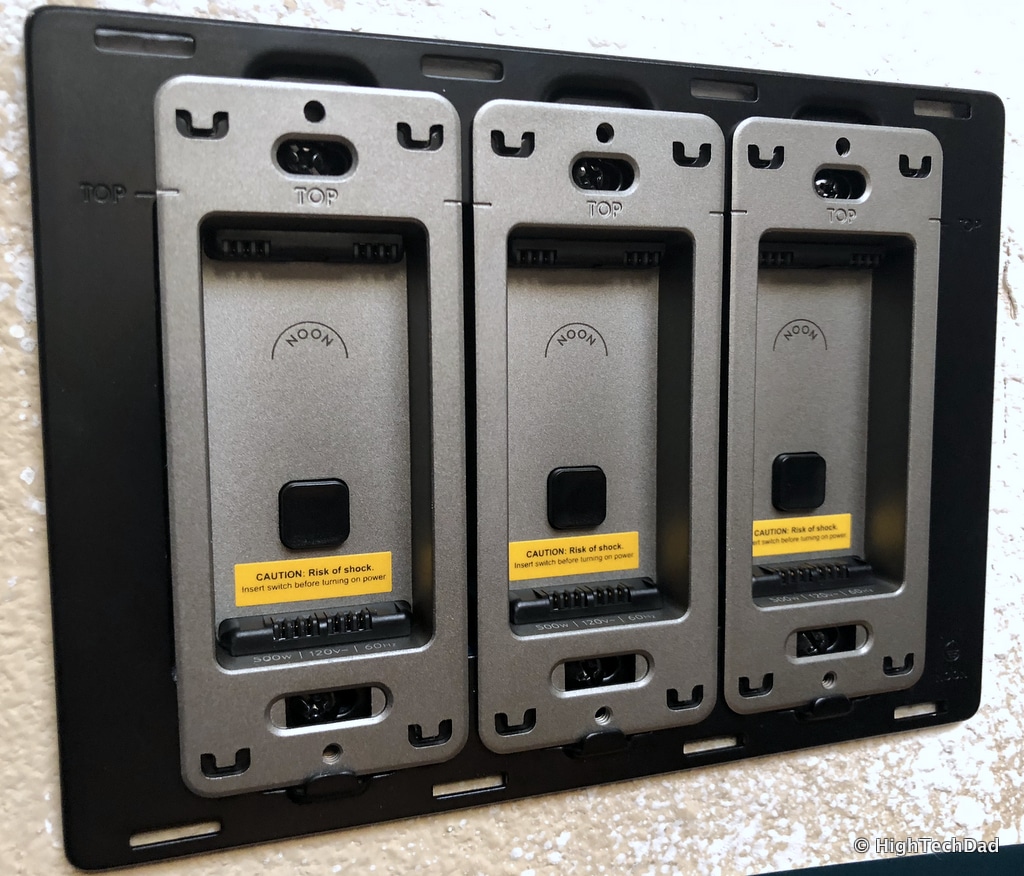
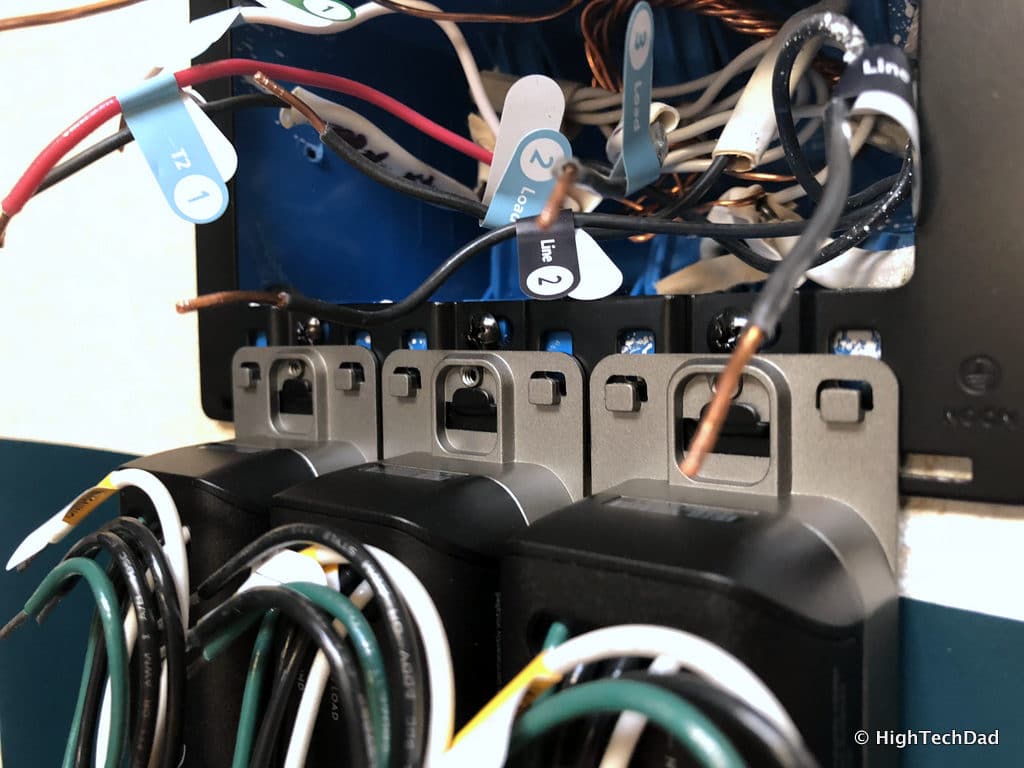
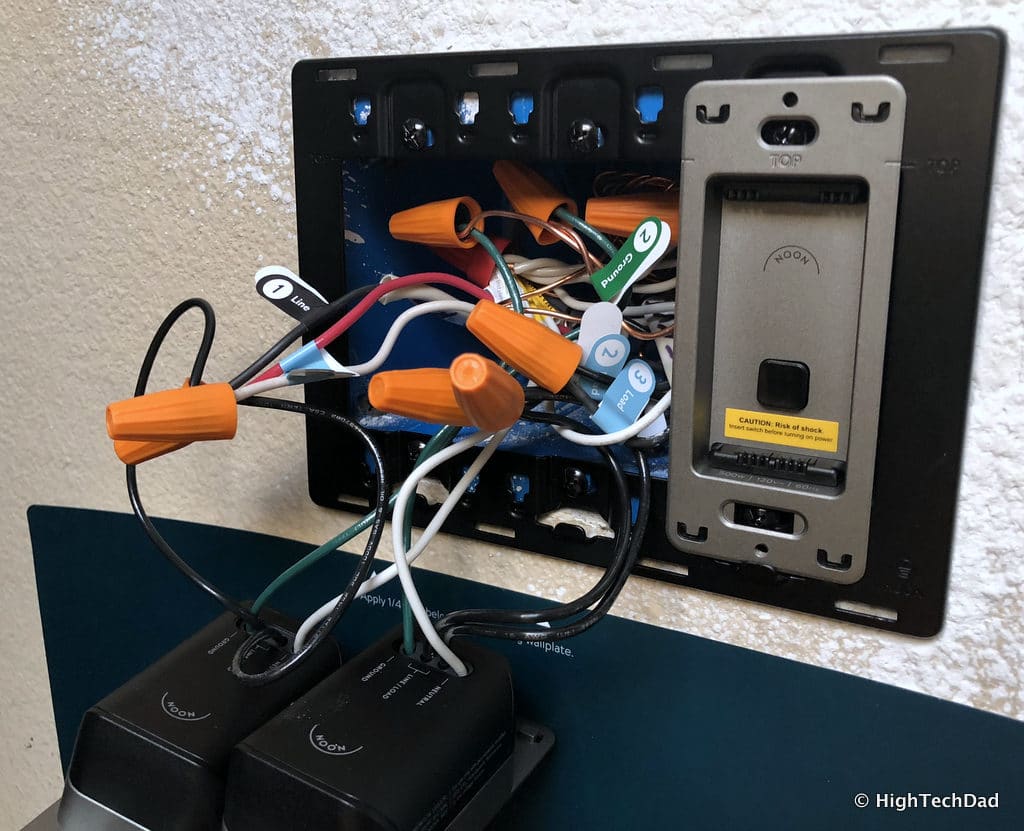
Another really nice design thought was how the Noon Director and Switches actually temporarily hook onto the wall plate while you are connecting the wires. So, instead of having your switches hanging at all sorts of angles, you can methodically hang and organize all of the wires prior to screwing them in. Another win in the installer category!
Our Home Environment
Since I’m talking about the installation here, let’s go into some details about where I had my Noon installed. Our house is not big. But we do have one room that has a dining room and living room in the space. When we had our electrical fixed, we installed recessed lighting above the dining area and table on one switch, and recessed lighting in the living room area above the sofa and TV viewing area, on a different switch. We also have a skylight box that has accent lighting inside the box on another switch. And lastly, one of the switches we have controls the front porch and walkway lights.
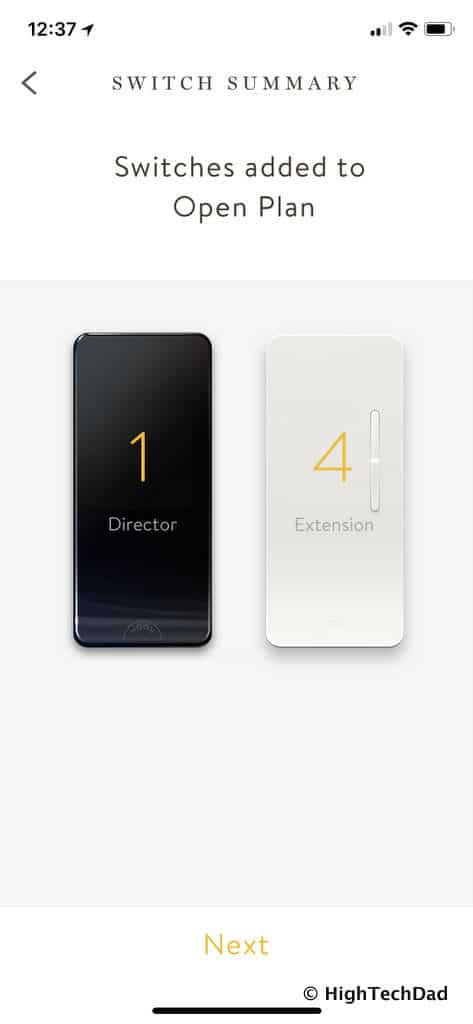
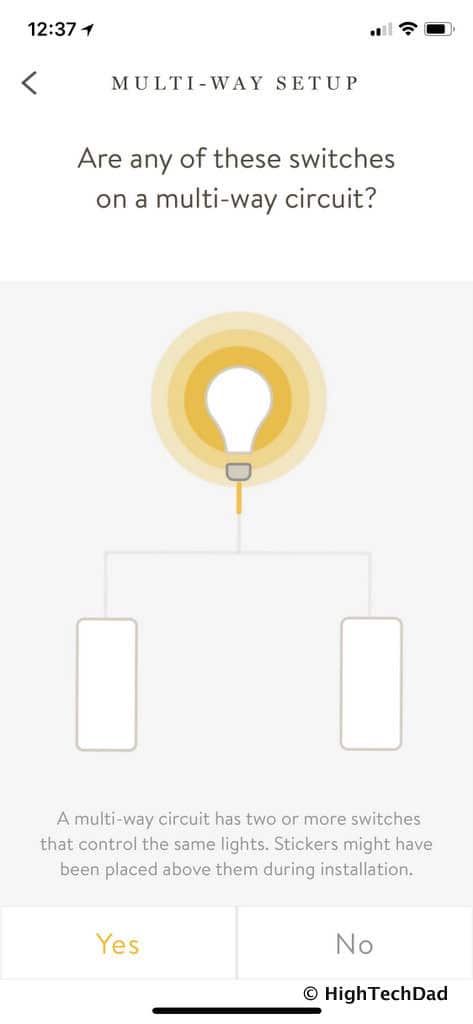
In total, however, we needed to swap out 5 light switches with one Noon Director and four Extension Switches. And, because we had a 2-pole switch for the living room area, we had to be sure that was part of the equation. Simply explained, a 2-pole switch means that the lights are controlled by two switches (actually there is more to it than that as the switch itself is slightly different). So, with our design, two switches would control the same lighting.
But I need to step back here for a second. I don’t want to get hung up on the idea of switches because, in fact, you don’t really use the Extension switches much (only to control the specific lights if you need to). You actually mainly use the Director to control your lighting scenes, which, in turn, will control the Extension Switches automatically to create the lighting scene you desire.
Our Noon Installation Process
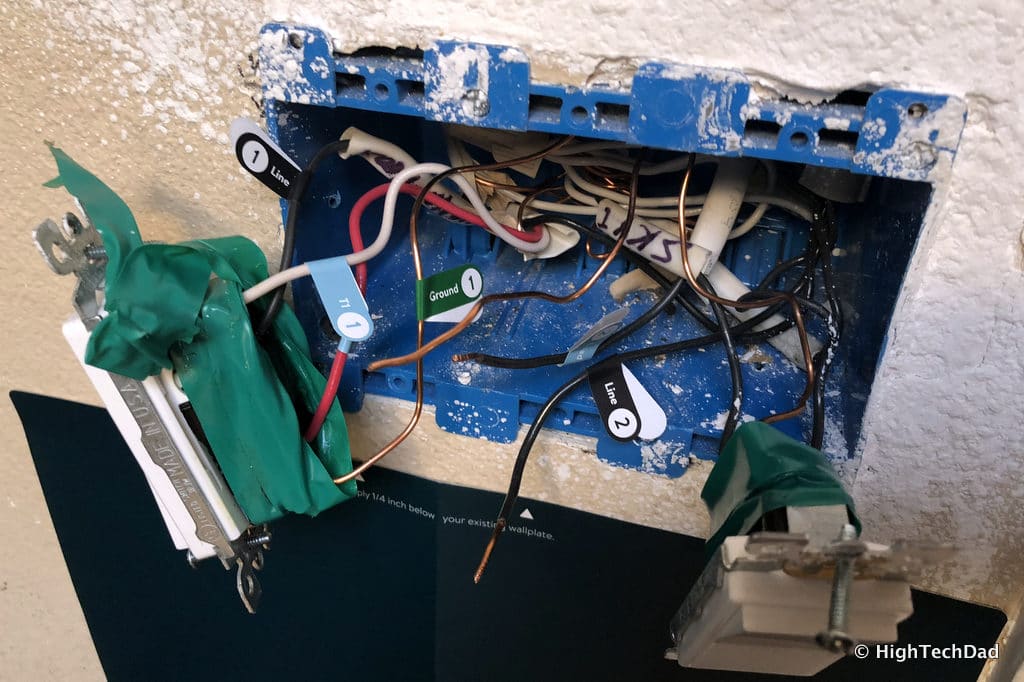
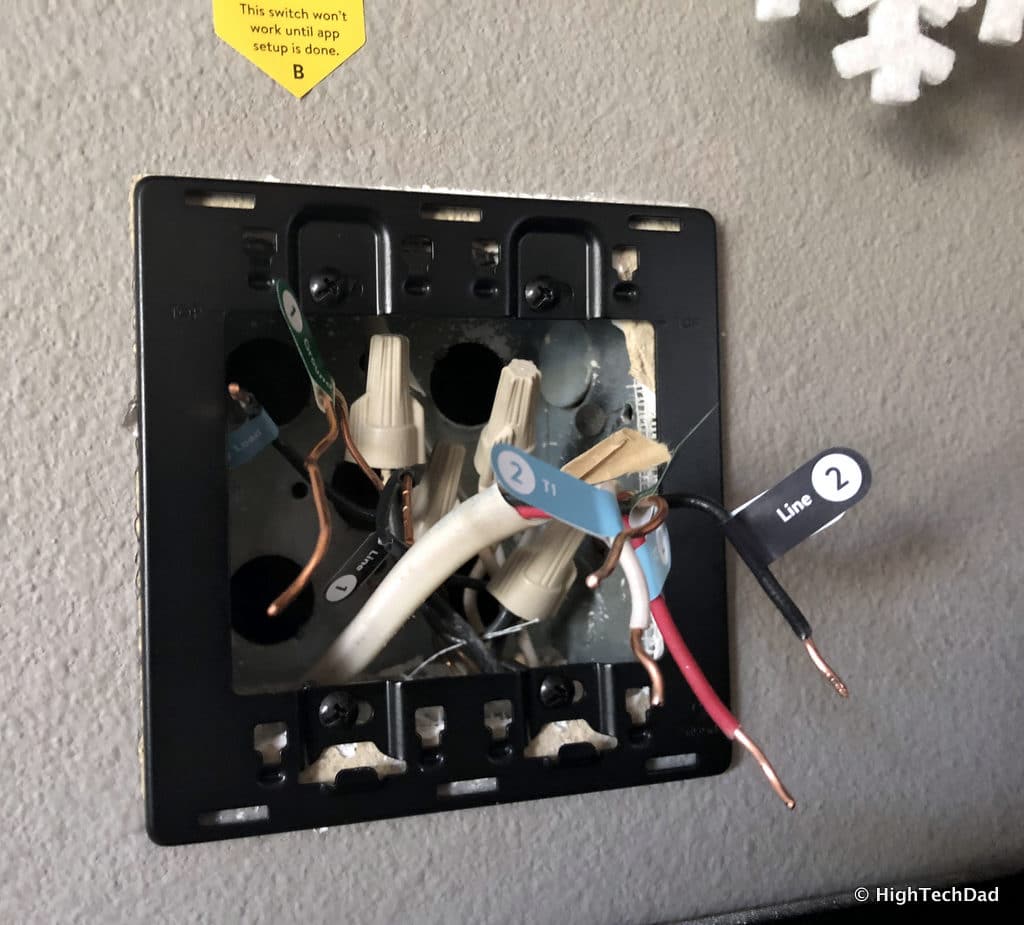
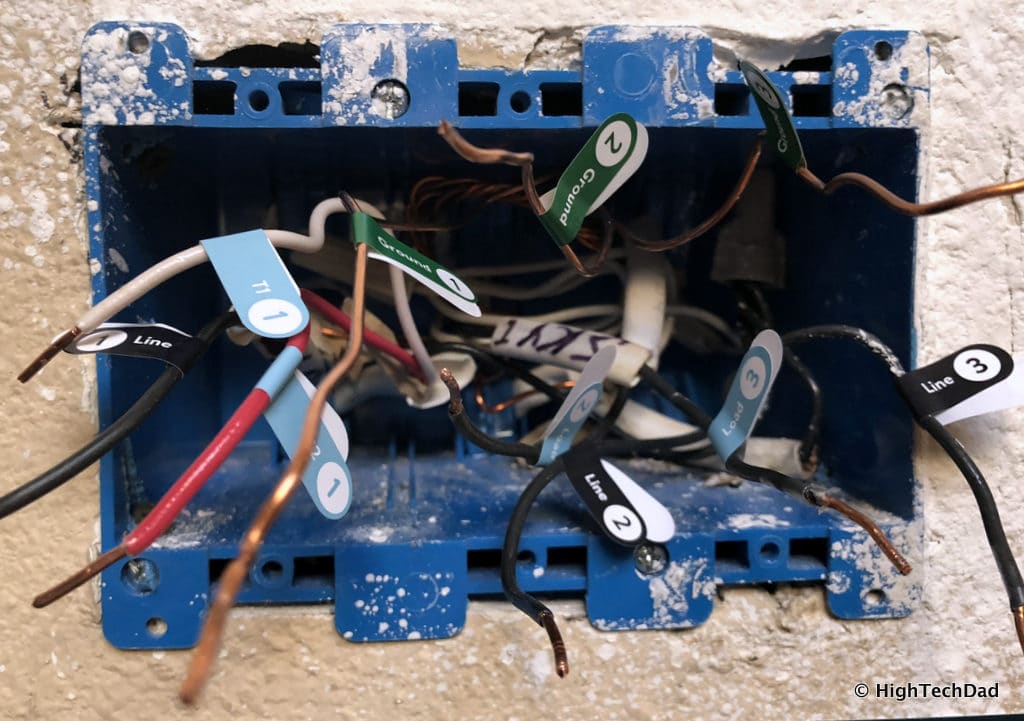
Let’s get back to the install process. (And, while I’m sure I could have easily done the install myself, I wanted to watch and learn and document the process.) I want to show some pictures now as they will better illustrate the process than my words.
There are 5 main steps to the installation:
- Remove the old switches
- Identify and label the wires
- Install the Noon Mounting Plate
- Install the Noon Base (which is what houses the Switches)
- Install the Noon Switches
I won’t go into all of the details here, as there are many steps and things to consider as you go through the main steps above. However, I do have to commend Noon for their Support site. I highly recommend that you read through the Guided Installation section as it is extremely well done and clearly illustrates the process with videos and animations. Even before you make a purchase, get familiar with what the install consists of.
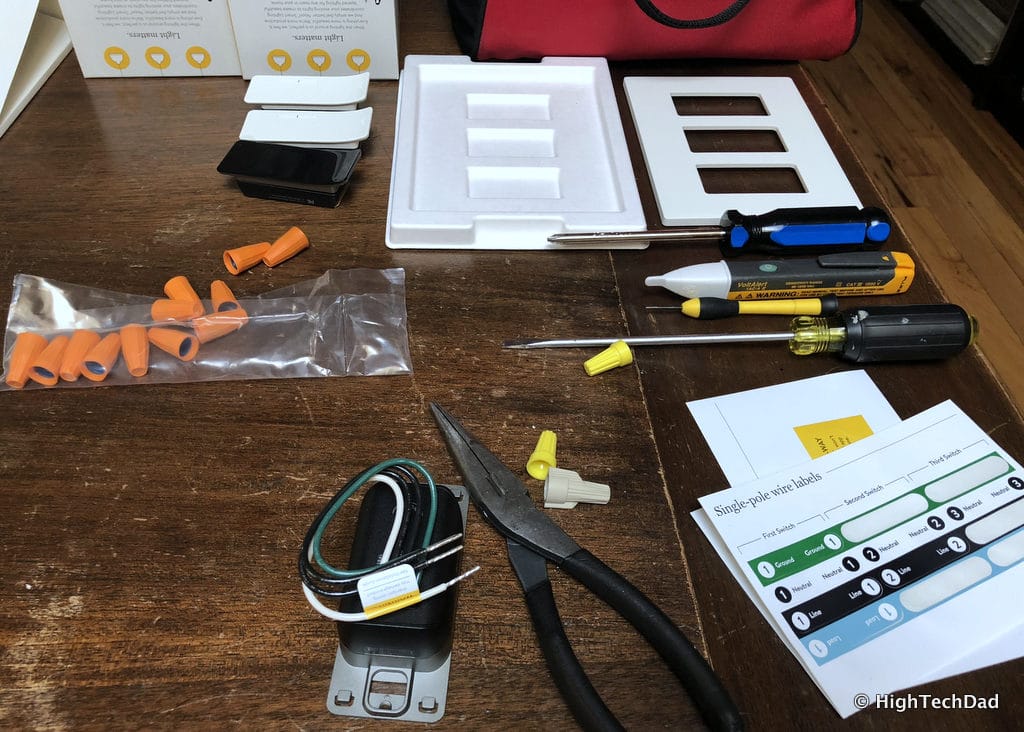
Before you do any installation, turn off the power at the circuit breaker and then use a voltage detector to ensure there is no power going through any of the power cables connected to the switches.
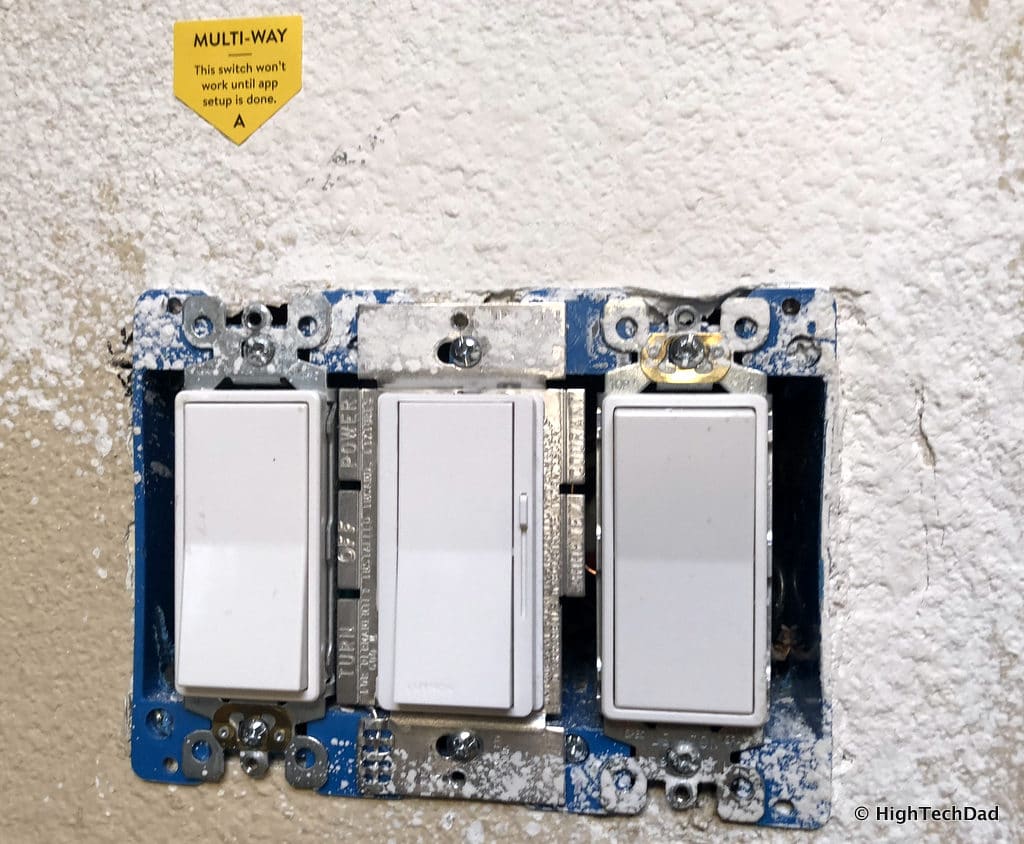
Now, on to my install. Here are my old switches. Pretty right? (And we still haven’t painted the walls since we had our electrical upgraded previously so things look a bit unfinished…because they are.)
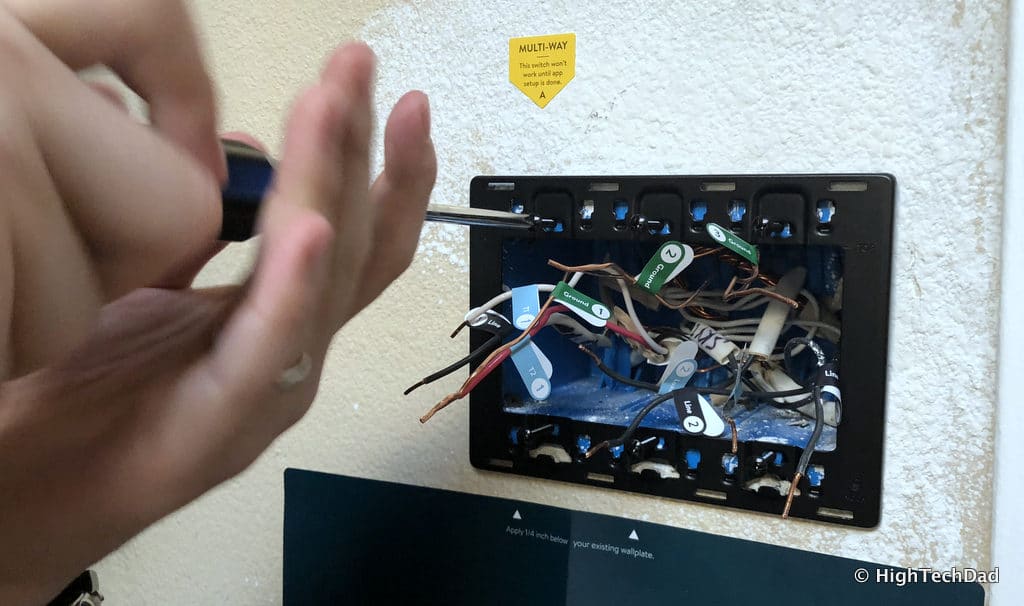
A wall liner was added to prevent damaging the wall during the install (didn’t really matter to us because ours was unpainted).
Labels were put above each switch to identify which was which and to clearly indicate which switches were the multi-way ones.
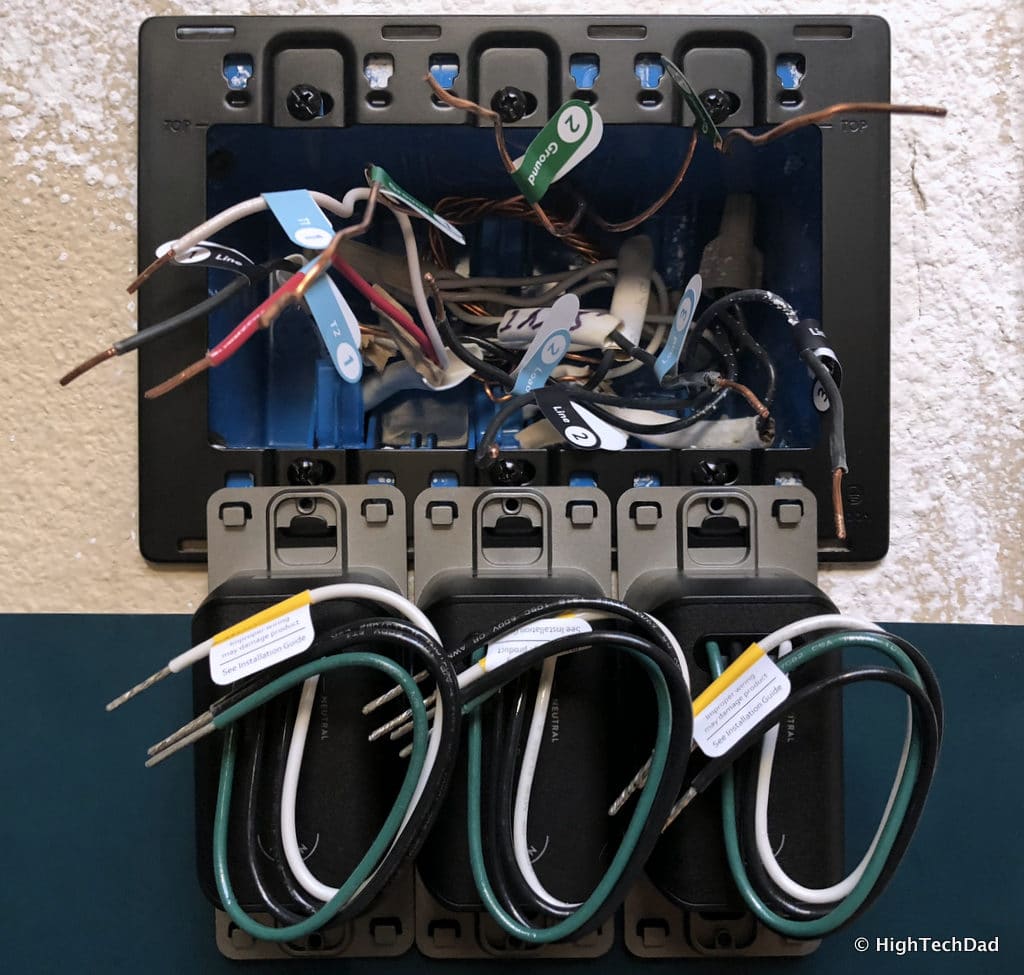
Once the old switches were removed from the wall, the wires were labeled with labels that come with the Noon.
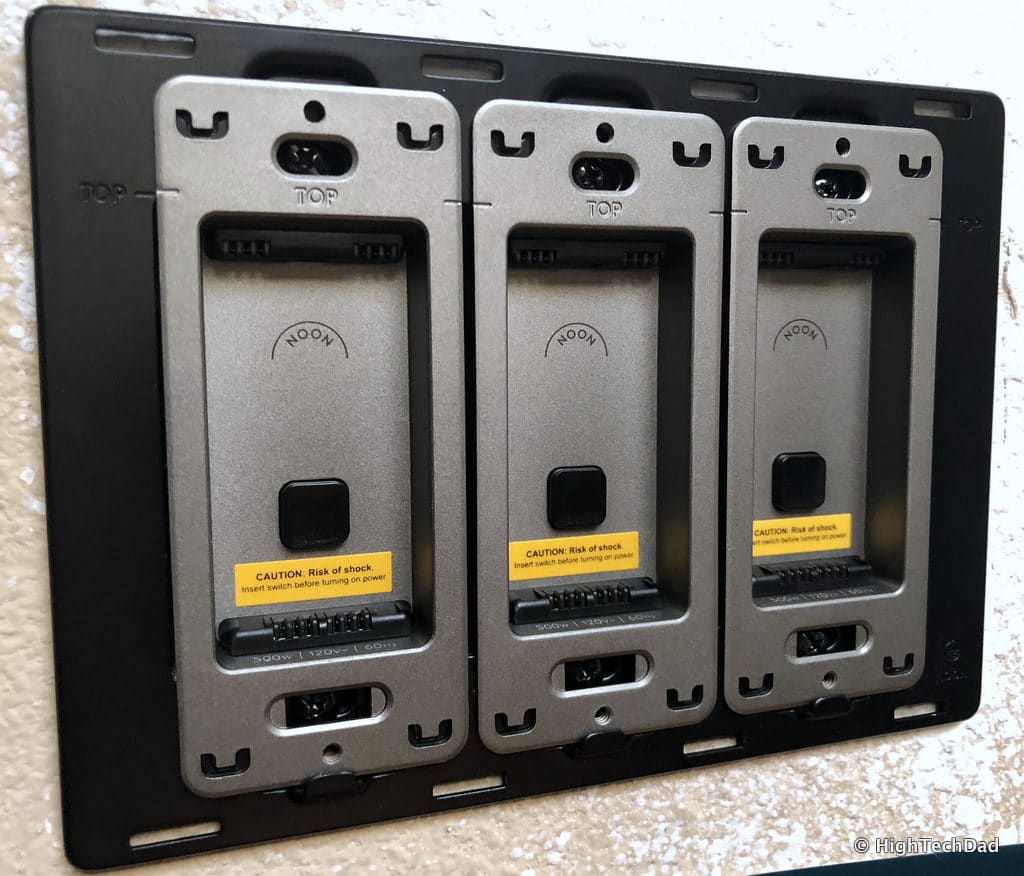
The next step was to remove the old wall plate and replace it with a Noon wall plate. Note: if you want, you can use your own wall plate but make sure it is compatible ahead of time. Remember, with the Noon wall plate, you can hang the switches off of them so that your hands are free to do the wiring!
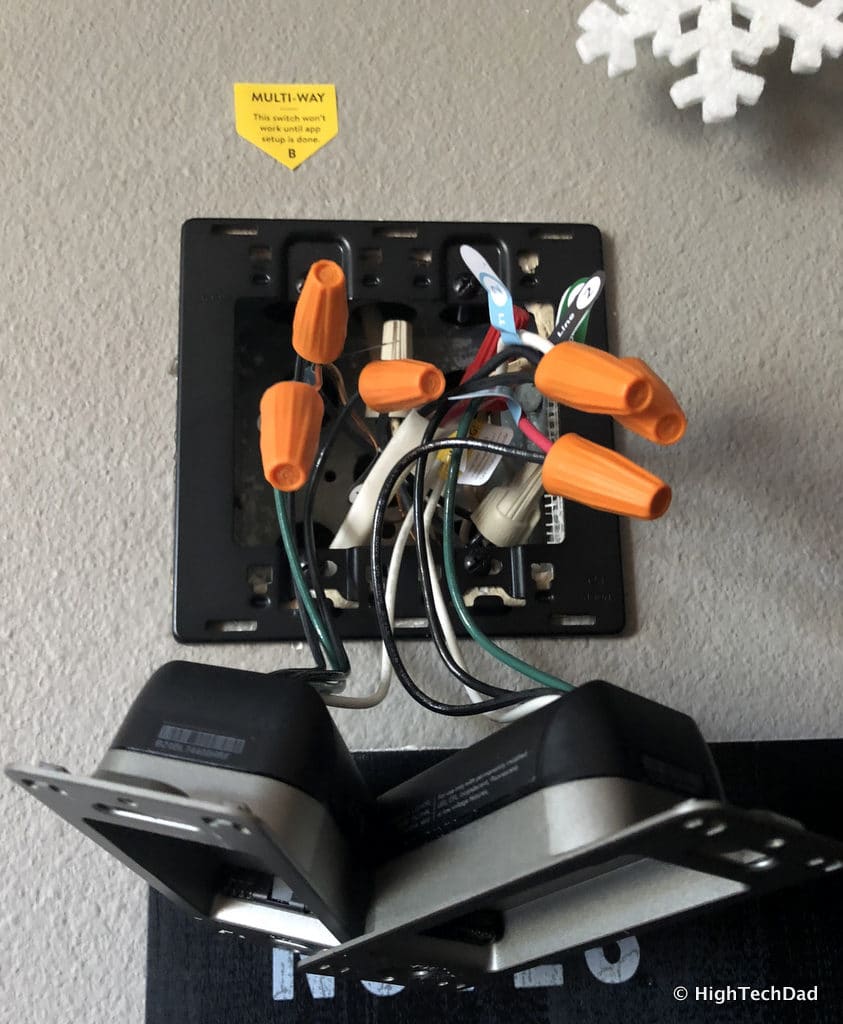
Next, you start wiring up all of the Noon Bases. There are actually two parts to a Noon switch: the Base which is what is wired in, and the Switch itself which is actually easily detachable from the base (no tools required).
Before you put the Bases into the wall, it’s a good idea to test out the switch to be sure everything is working. That way, if you have to tighten a connection, it’s a bit easier to do so with everything installed. Just be careful when you have the power on and the wires exposed!
Once you have tested all of the switches, you can screw them into the wall plate.
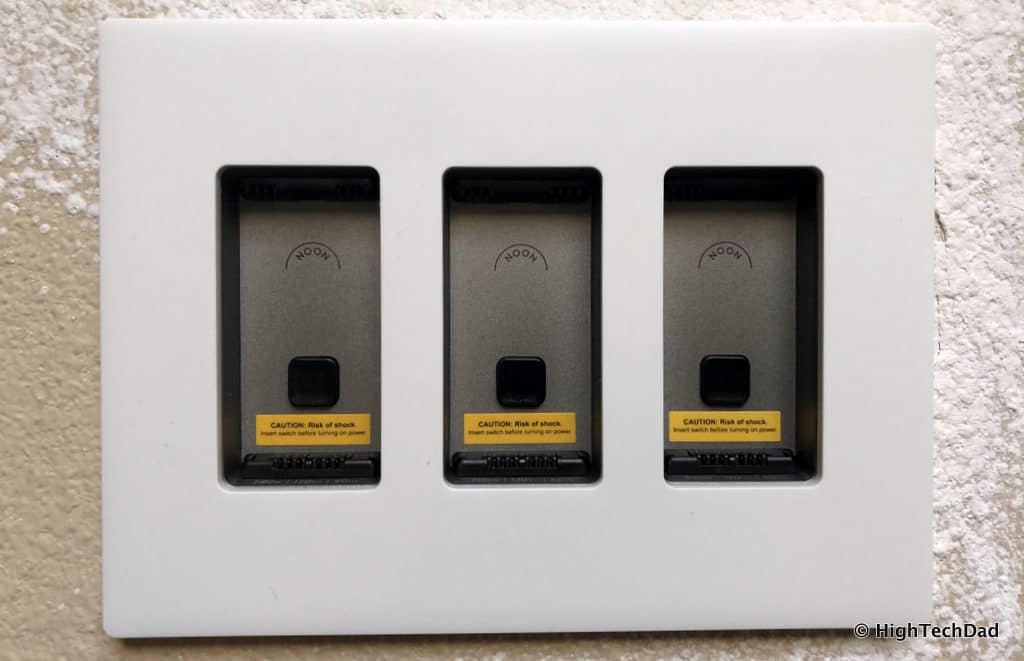
After that, just attach the faceplate to the wall plate.
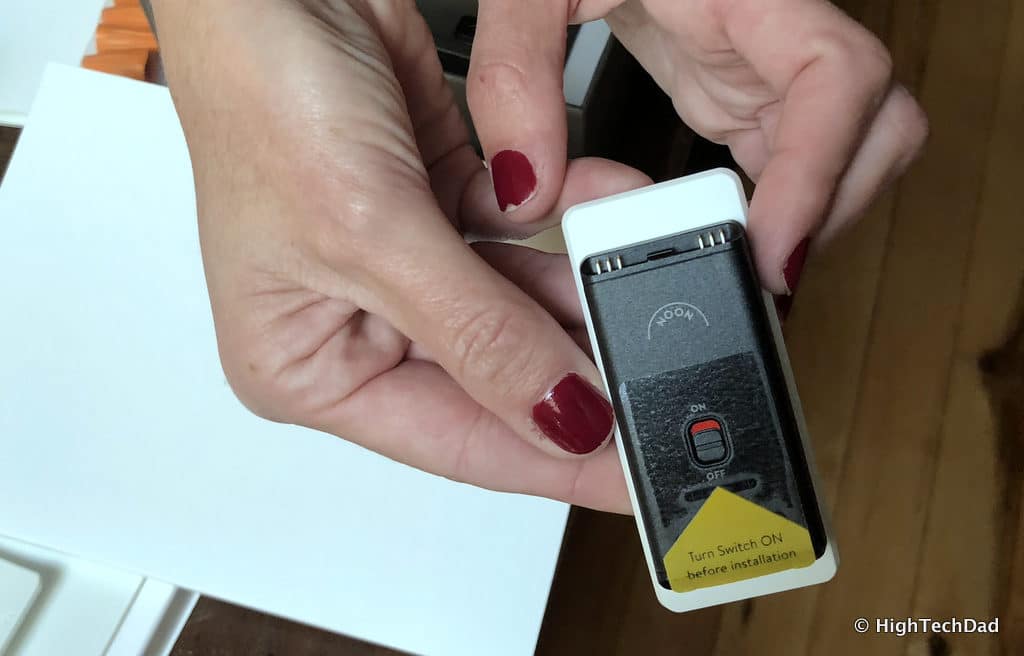
From there, you move on to the switches themselves. It’s important to note that on the back of the Noon switch (Director or Extension), there is also another switch. You must turn this switch on in order to have the switch controlled by the Director or to actually turn on the Director itself. Normally, you won’t need to turn the switch on the back on or off unless you need to reset it, or if you don’t want the Director to control it. In the second case, the Noon Switch will just act like a normal (dumb) switch. But initially, I would recommend turning on all of the switches on the back as they will be used in the light discovery process that I will go into shortly.
Once you turn on the back switches, you just snap the Noon switches into the wall plate. From there, you use the iOS or Android app to set up and configure your lighting scenes.
Intelligent Discovery via Noon
Remember I said earlier that the Noon is not a smart light switch but rather an intelligent light switch? Here is the next example of that intelligence. This is an important differentiator between other lights switches, dumb or smart. More often than not, you have different types of bulbs in your rooms (incandescent, LED, CFL, halogen, fluorescent, etc.). There are differences even within the same family of bulbs. Not all LEDs are the same, for example. And when you put dimmers (or the desire to dim lights) into the mix, things can get tricky if not maddening, to say the least.
I had installed a dimmer in one area of my house, only to find out that at low levels, my lights would flash on and off. In other cases, even when the dimmer was completely “off” the LEDs were still experiencing a trickle charge so one LED would have a barely perceptible glow and never really “off.” I had to change bulbs and switches around and, in some cases,, just gave up trying to have a dimmable environment.
This is where Noon truly shines.
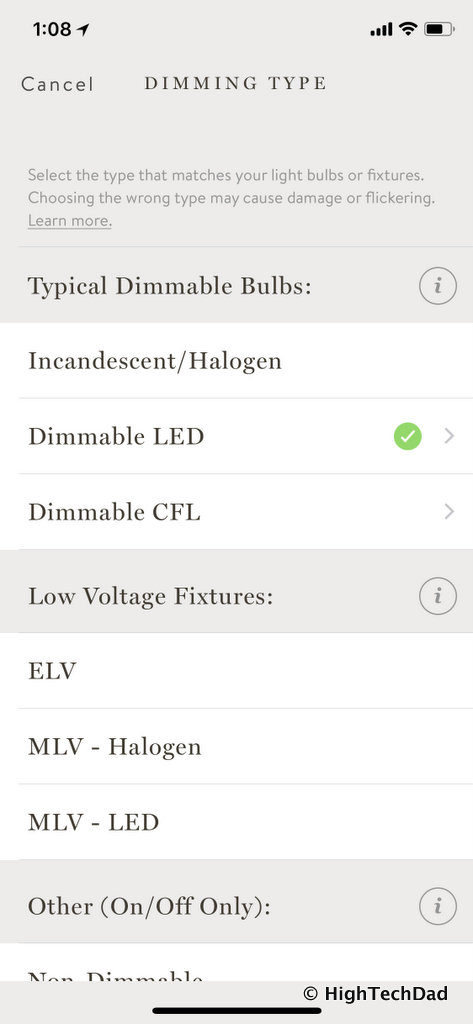
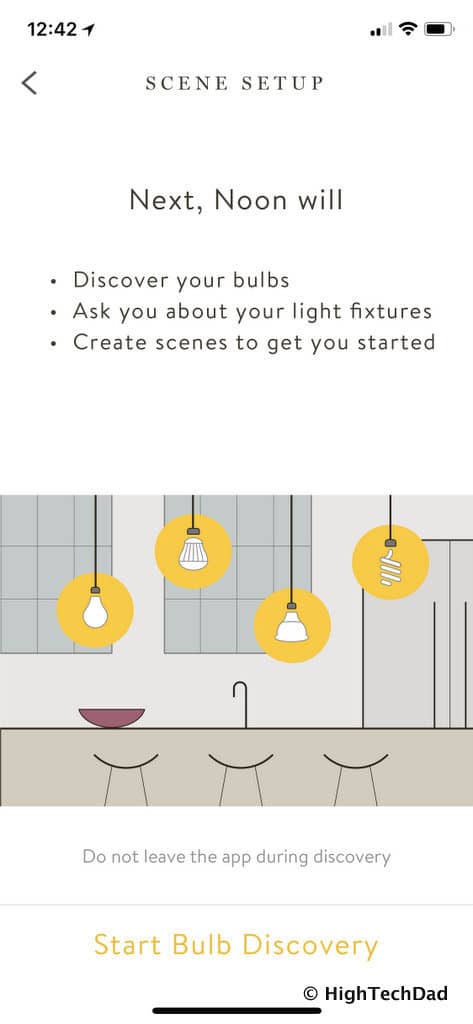
As part of the setup process, Noon will “discover” the types of bulbs that you have. And not just will it be able to differentiate between a CFL or incandescent or LED, but also the capabilities of the bulbs. This discovery process actually prevents many of the issues that I described above – the flickering or the glow or the inability to dim. It can detect the difference between ELV (electronic low voltage) and MLV (magnetic low voltage).
The bottom line here is, you don’t have to swap out your light bulbs, only your switches.
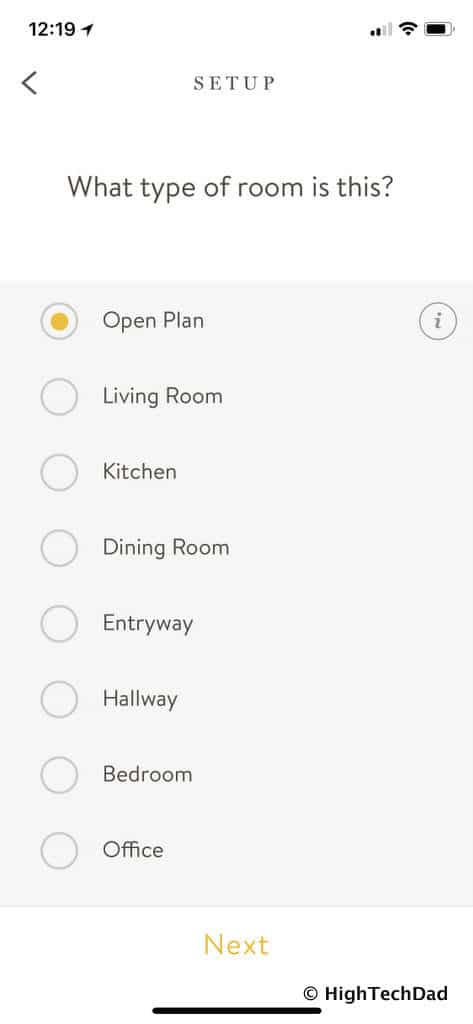
The setup process is quite painless. For starters, you define the type of room you have.
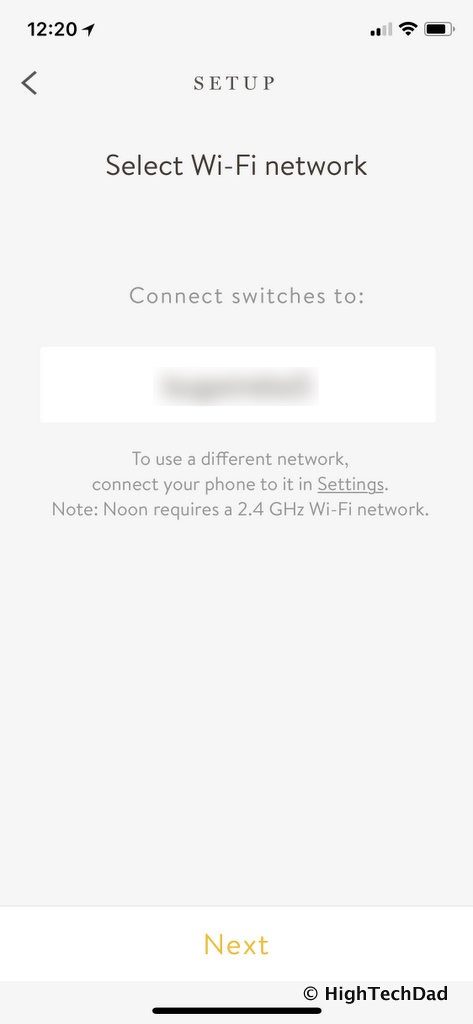
Then you connect to the Room Director to WiFi.
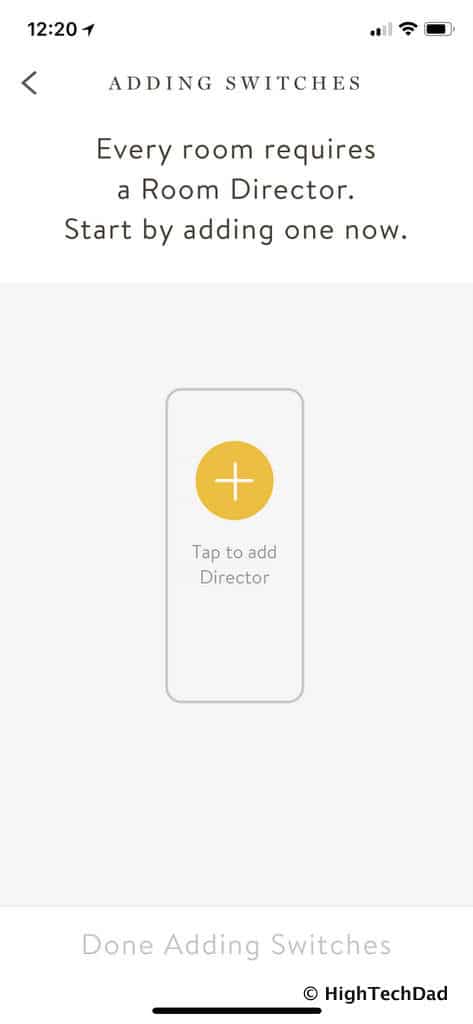
Next, you add a Room Director (you need one in every room).
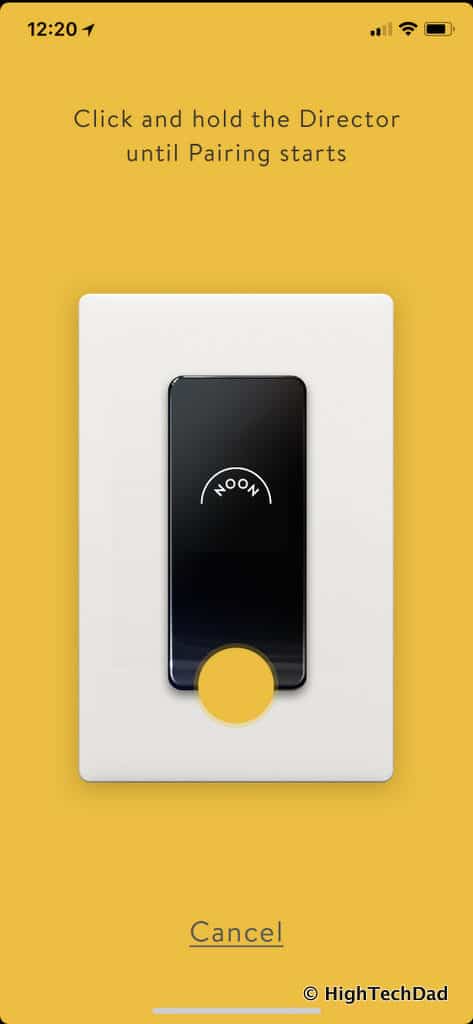
You then pair the Noon app with the Director.
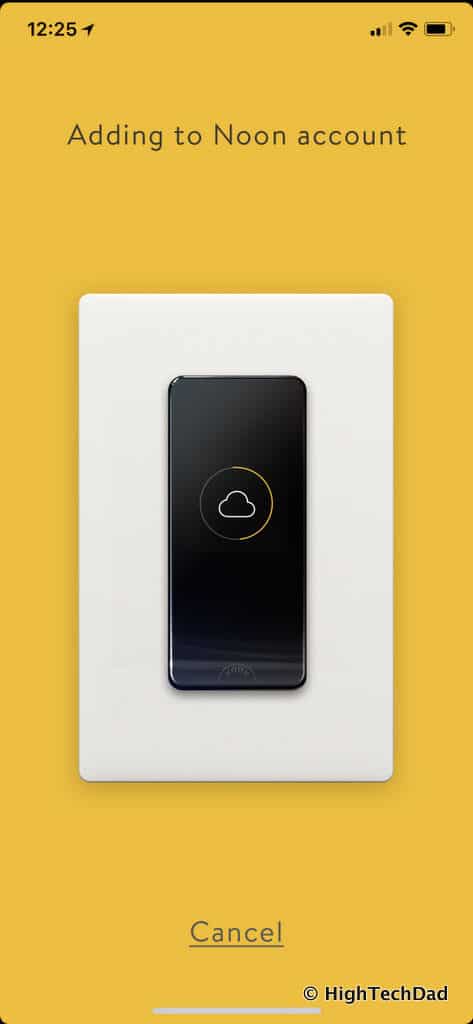
And add your Noon account.
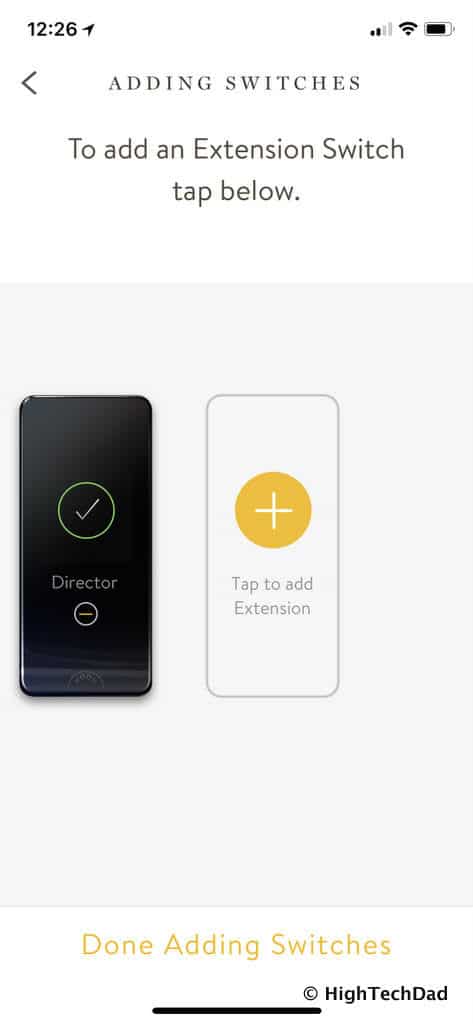
Once the Director is connected, you add the Extension switches.
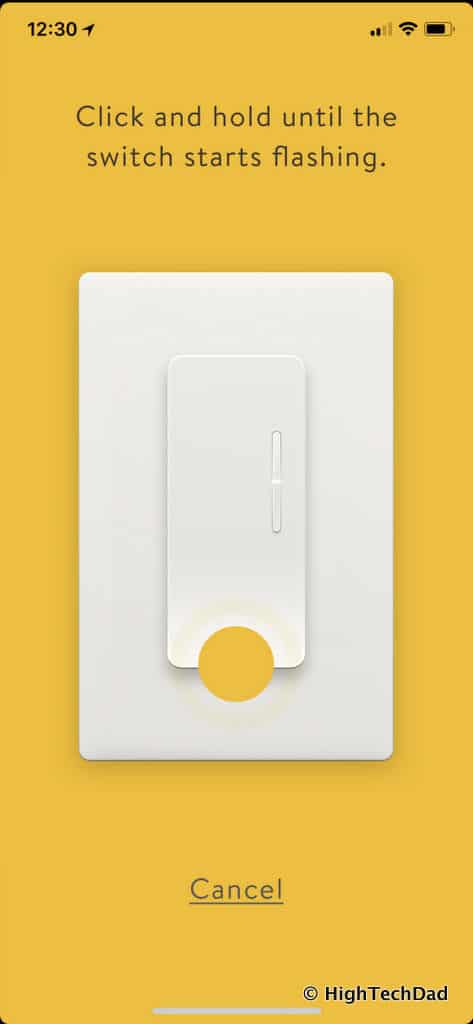
You do this by pressing the Extension switch until it starts flashing.
All switches should hopefully be detected. If not, you can turn the switch on the back off and on again and redo the pairing process.
After all of the Extensions are added, if you have a 2- or 3-way switch, you will need to pair them together so that they work in unison.
As soon as all of the extensions have been added to your room, Noon will go through the discovery process I mentioned earlier. During this stage, your lights will go on and off as Noon tests out the capabilities of the bulbs and tries to identify which ones you have.
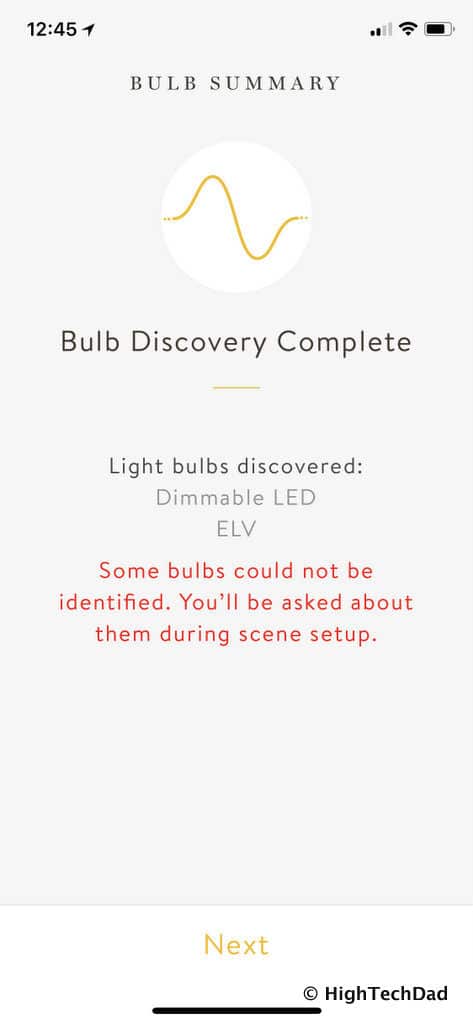
At the end of discovery, the Noon app will tell you what if found. In one case, since I actually had a CFL and an LED on the same circuit, it couldn’t identify the bulbs. So, wherever possible, try to have the same bulbs on the same light circuit to get the full benefits.
Setting Up the Intelligent Scenes
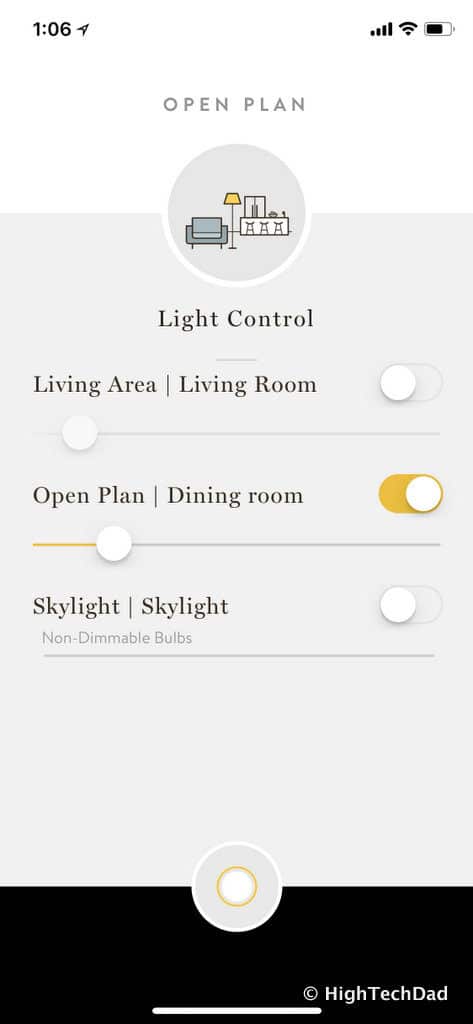
The last and most important step is setting up the Scenes for your room. Scenes truly work better if you have a variety of lighting options like overhead, recessed, accents, etc. and if any or all of those options are dimmable. The more options you have, the better for truly amazing, layered lighting environments.
I actually have played around a lot with my scenes. I have six scenes that I have named and configured to my liking. There are some that Noon will automatically set up for you based on the light types, the room, and other variables. I sort of organized and configured mine by activity and lighting brightness. They are:
- Bright – with this setting, all of my lights are on and at 100% brightness.
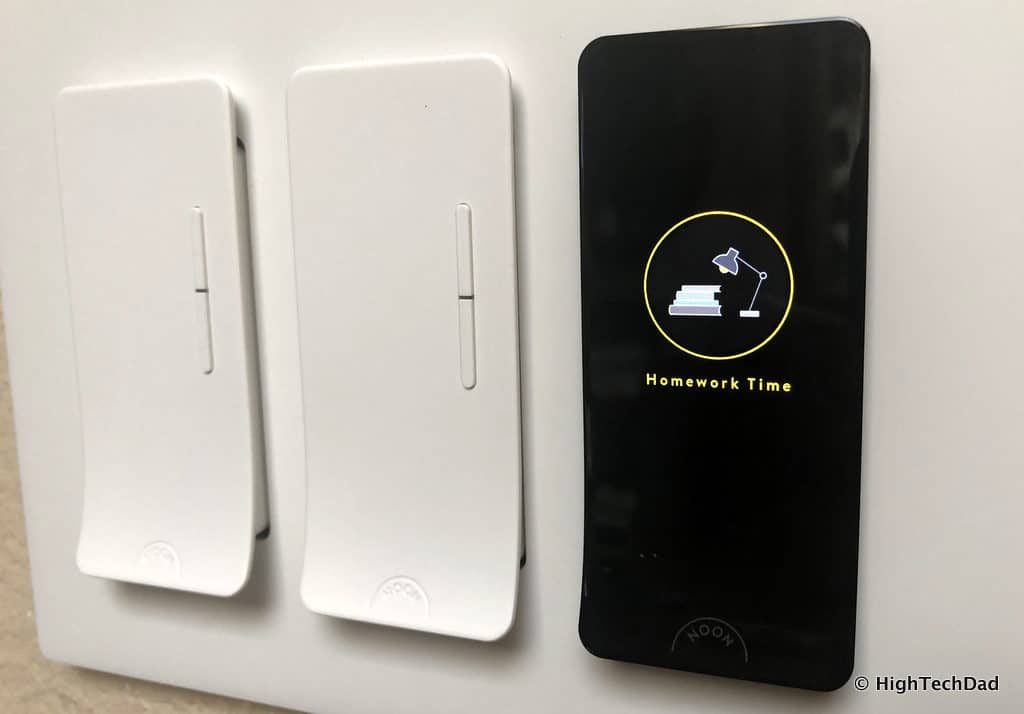
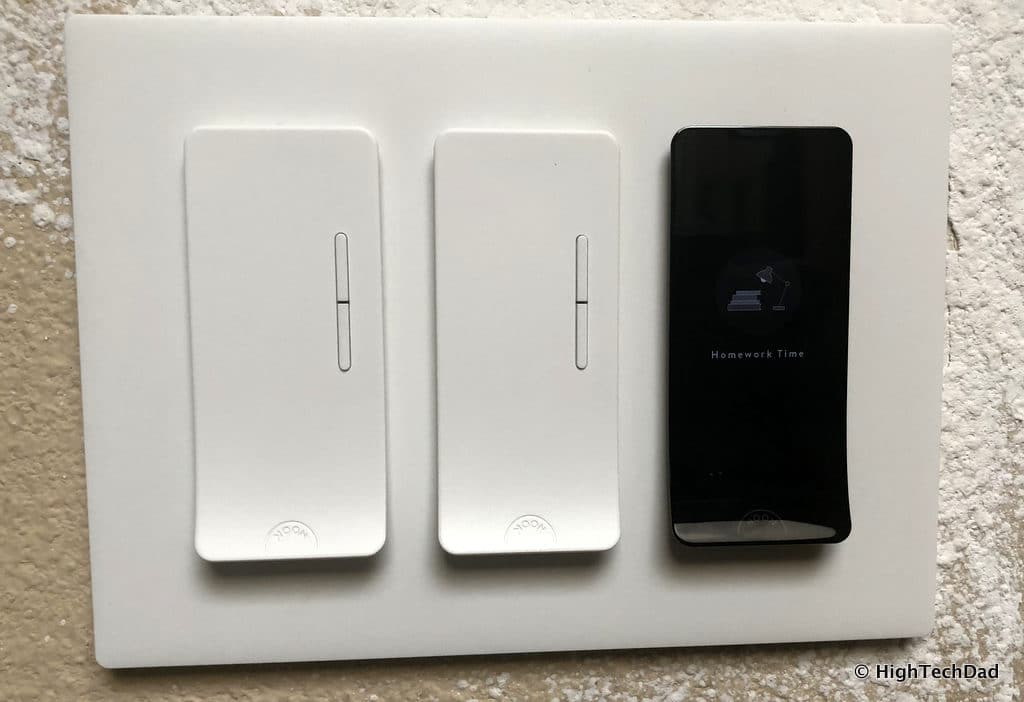
- Homework Time – for this one, since my kids do their homework at the dining room table, the lights just around the table are 100% brightness (so that they stay awake and focused)
- Everyday – this one has almost all of my lights on, but not at full brightness. They are bright, but not to the level as Bright above.
- Living Area – this turns on just the lights in the living room but at a comfortably dimmed level
- Relax – this puts the dining room and living room lights at a dim level which is great for entertaining
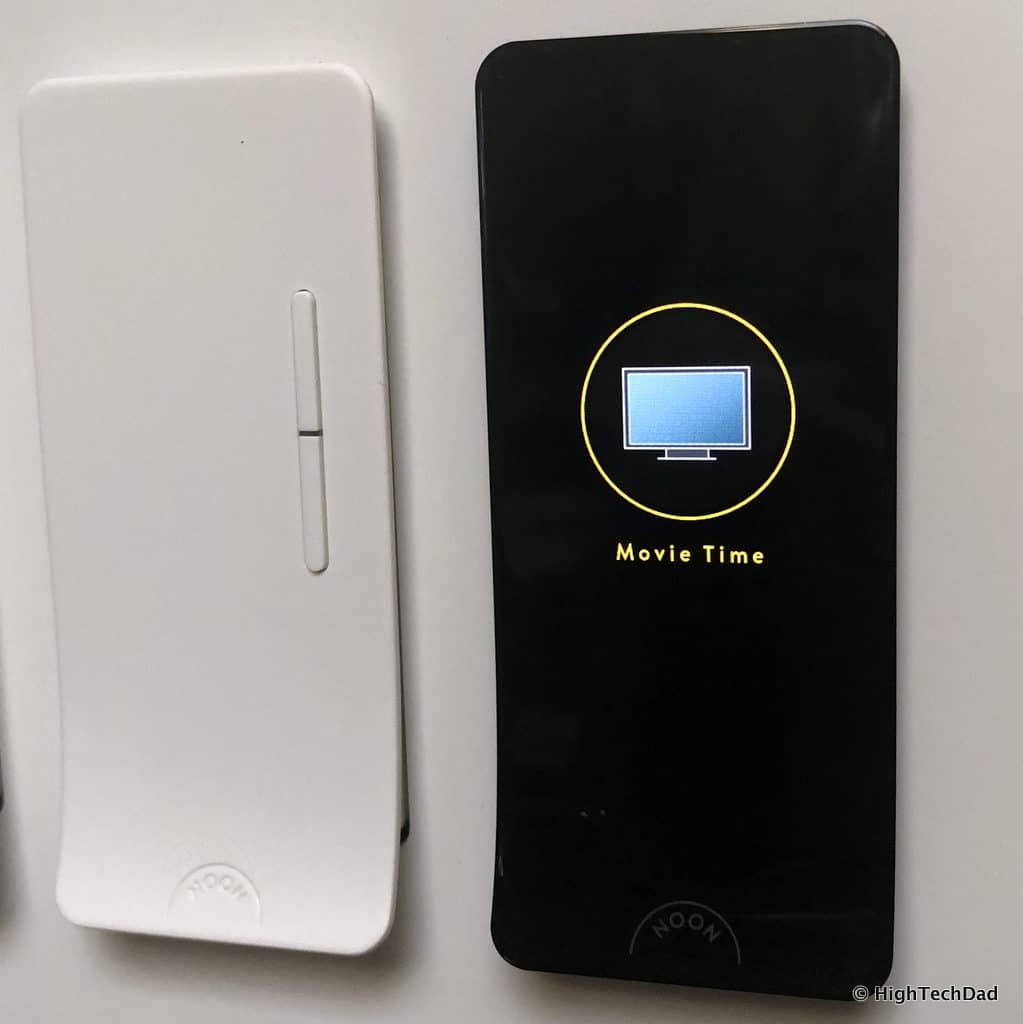
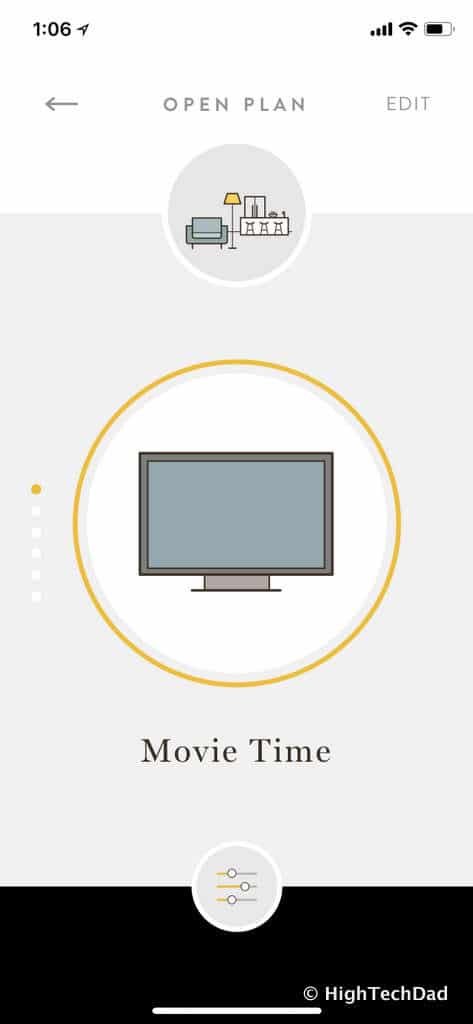
- Movie Time – this turns off the living room lights and puts the dining room lights very dim since they are in the background.
You can play around with the settings to your liking, and even set icons that equate to the scene. And whatever you configure on your smartphone, those scene names and icons will show up on the Room Directors screen.
Speaking of the Room Director, that is the main switch you will be interacting with so it should be in the most trafficked location. Normally, the screen is off until you approach it. Then, it will light up and show the scene that is selected and if that scene is on or off. To change scenes, you simply flick up or down on the switch itself. To turn on or off the scene, just press the Director switch.
You can turn on lights individually as well, outside of a scene. You do that by just pressing the Extension Switch to turn on or off. When you do that, the Room Director will say “paused.” To resume a scene, just press the Room Director again to enable it.
Integration, Pricing, and Other Thoughts
Earlier I mentioned a case where you might actually not want the Director controlling a switch. And to NOT have the Director control it, you need to take the switch out of the wall plate and turn the little switch off on the back so that it does not communicate. Remember I said that I had my front porch and walkway lights as part of the environment? Well, as it turns out, if you have it connected to the Director, when you change a scene, it turns off certain lights. In my case, it was continually turning on and off my front porch lights. So, I had to disconnect that particular switch.
I have mentioned this to Noon. It would be great to be able to have a Noon switch connected but not actually part of a scene. That way, you could still control the switch potentially from the Noon app (remotely) and maybe eventually, set that switch to a timer (e.g., the front porch could turn on and off at particular times). I’m hoping that in future software and firmware upgrades, this use case will be supported. Otherwise, that particular switch will have to remain detached from my Noon Director.
Also, the current firmware and software version of the Noon Director doesn’t allow for control or dimming of the actual switch it is installed on top of. But, I have been told that this functionality will be changed in an upcoming update.
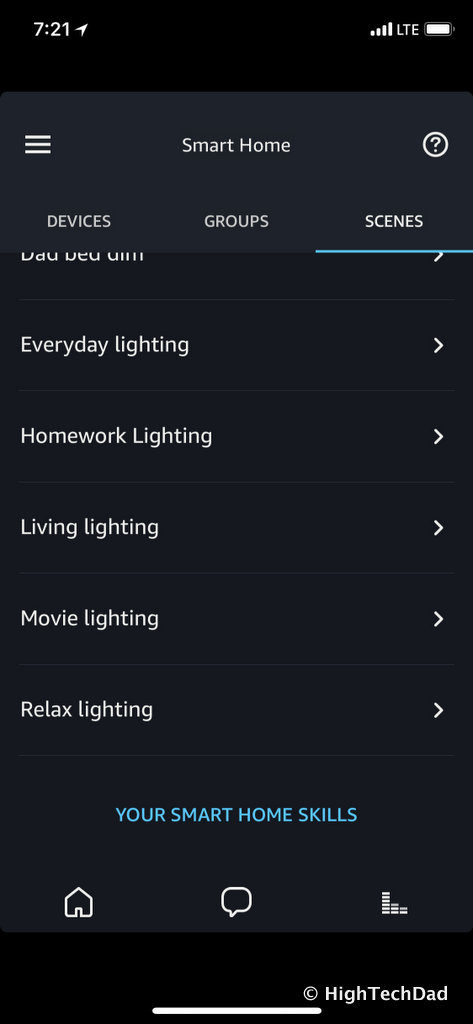
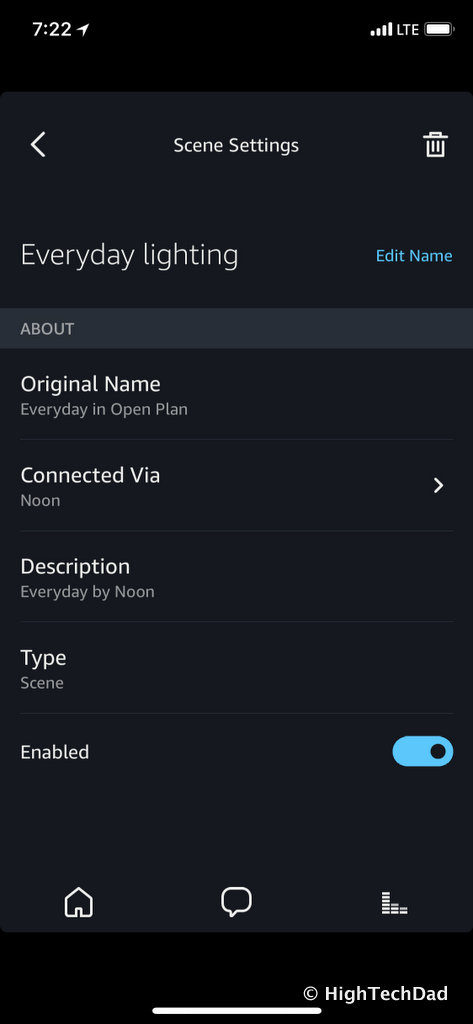
As I mentioned, you can control your Noon lighting scenes either via the Director switch itself by flicking through the various configured scenes or by using the Noon app on your smartphone. But, you can also configure integration with Amazon Alexa as well. Each of your scenes will show up within Amazon as “Scenes” automatically.
So now, my family or I simply say “Alexa, turn on Homework Time lighting” (or whatever scene we want) and our Noon lighting scene turns on. Similarly, we just say “Alexa, turn off Homework Time lighting” and that scene turns off. Also, Noon recently announced Google Home integration as well.
Noon Home pricing is very straightforward. There is no subscription fee. You simply buy the switches. Remember, you must have one Room Director per room. Then you simply get the proper number of Extension switches. Individual pricing is as follows:
- Room Director – $199.99 (Amazon price is $199.99 as well since this is a new product)
- Extension Switch – $99.99 (Amazon price is $99.99)
And you can get packages or bundles as needed as well as various faceplates (like the Starter Kit which includes the Director and two Extension switches for $344.77 on Amazon). While this may seem to be a bit pricey compared to some smart switches (which can be $100+), when you consider the intelligent bulb detection and automatic scene configuration that creates you layered lighting, as well as the simple design look, feel, and functionality, I feel it’s worth the premium price.
Noon Home had truly transformed the lighting in our living room and dining room. Where in the past we used to just “turn on the lights,” we have evolved to enabling layered lighting scenes based on activities. All lights are on and at 100% in the dining room when my kids are studying (to keep them awake and focused) but when we are relaxing or watching a movie, we slide into a dimmer lighting scene. It’s truly transformational.
Disclosure: I have a material connection because I received a sample of a product for consideration in preparing to review the product and write this content. I was/am not expected to return this item after my review period. All opinions within this article are my own and are typically not subject to editorial review from any 3rd party. Also, some of the links in the post above may be “affiliate” or “advertising” links. These may be automatically created or placed by me manually. This means if you click on the link and purchase the item (sometimes but not necessarily the product or service being reviewed), I will receive a small affiliate or advertising commission. More information can be found on my About page.
HTD says: Before you buy a smart light switch, consider getting a switch that gives you truly intelligent lighting scenes instead. From installation to configuration to usage, the Noon Home provides amazing layered lighting scenes designed to transform your living spaces.
HighTechDad's Rating
-
Ease-of-Use
-
Family-Friendly
-
Price Point
-
Features
Summary
Before you buy a smart light switch, consider getting a switch that gives you truly intelligent lighting scenes instead. From installation to configuration to usage, the Noon Home provides amazing layered lighting scenes designed to transform your living spaces. The Noon Home intelligent lighting switch earned 4 stars across the board. While not an inexpensive lighting solution, the clear attention to detail is obvious. And, as features are added to make this smart lighting solution even more useful, this product will only get better. I was extremely impressed by the attention to detail in the design of the hardware, especially from the standpoint of an installer. The software features make a lot of sense, and with a few enhancements, will make this offering quite powerful and compelling. I love flicking through the different scenes and fine-tuning how my lighting works. It truly has transformed my family’s living space into something richer. There is no more just “turning on the lights” in our home. It’s all about setting the mood!
