“Welcome to the hive!” That is the line often heard coming from the folks at ecobee. And a hive and bees are great metaphors for the ecobee3 smart home thermostat, it turns out. Believe it or not, bee hives have highly regulated temperatures, controlled by not one “heater bee” but by many. Similarly, the ecobee3 also uses multiple remote thermostats to control your own hive, your home. And the ecobee saying “for homes with more than one room” can be likened to the hive with multiple cells.
Yes, I probably could stretch the comparison between the ecobee hive and a regular bee hive on a bit more. According to TodayIFoundOut.com, it was recently discovered that a new “role” exists within the Honey bee hive, that of the “heater bees” whose job it is warm up the hive when the brood senses that the temperatures are too low. In much the same way, one of the unique features of the ecobee3 smart thermostat is that you can place multiple temperature and activity sensors around the house so that you get an average temperature. Bees slow down when the temperature drops too much – if the same thing happens at my home, all body movement seems to slow and remain cuddled beneath blankets.
But I digress. This article is not about Honey bees…it’s about ecobee, specifically the ecobee3.
Sure, there are quite a few smart thermostats on the market nowadays. I have tested out a few actually. I love the “smart” connected convenience of being able to turn on the heat or A/C from my bed, down the block or miles away. I love knowing how hot or cold it currently is at my home, or if I forgetfully left the heat or A/C on. Many of the so-called smart and connected thermostats do this.
But there are a few features about the ecobee3 that I specifically liked. Granted, many of the other top brands may have a few of these features. But I particularly liked the ecobee3’s sharp and crisp design, from the wall plate to the iPhone app to the web portal. There is very nice consistency across the board. But (and obviously this is a bit biased since it resides on the ecobee site), here is a comparison between the ecobee3, Google’s Nest and the Honeywell Lyric. (I haven’t tested the Nest nor the Lyric but have tested other Honeywell smart, connected thermostats).
There is a LOT to discuss about the ecobee3 and I honestly won’t be able to cover everything. Also, because of the numerous features and functions and since I only have been using the ecobee3 for a few weeks, I’m still learning. And, since it is hot weather time currently, I haven’t had the opportunity to test out the heating side of the equation. Lastly, there is a feature called Home IQ which I believe to be a differentiator. It takes a month for the data to be analyzed and I haven’t hit that point yet. Oh wait, and other differentiator in my opinion are the remote sensor which detect temperature and motion. More on that later.
Installing the ecobee3
I’m no stranger to installing thermostats. Once you have done one, swapping out for other ones it pretty straight forward. The hardest part is making sure you have the proper wiring to power the thermostat and control your HVAC equipment.
I took photos of just about every step of the install process but I don’t want to bore you with all of them. Also it is important to remember, there are different types of heating and cooling systems out there. Prior to installation, you should know what you have and the features. As part of the ecobee3 install process, you are asked a few questions along the way. Based on your answers, systems will be configured differently. For example, I have a 1-stage system (it’s on or off). It has a furnace and air conditioning. That’s about it. Other homes may have multiple systems, dehumidifiers, swamp coolers and other items. The ecobee3 can handle just about everything.
I do recommend that you watch some of the installation videos first as well as read through the manuals before you start doing anything. In fact, ecobee has a section dedicated to “Installation” which I recommend you visit. And before you get an ecobee3, be sure to try the compatibility tester!
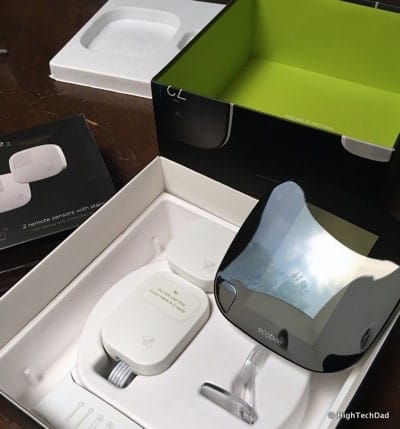
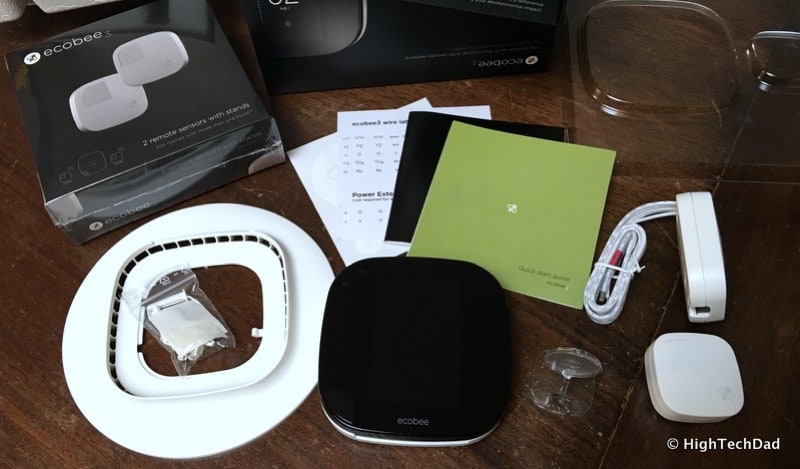
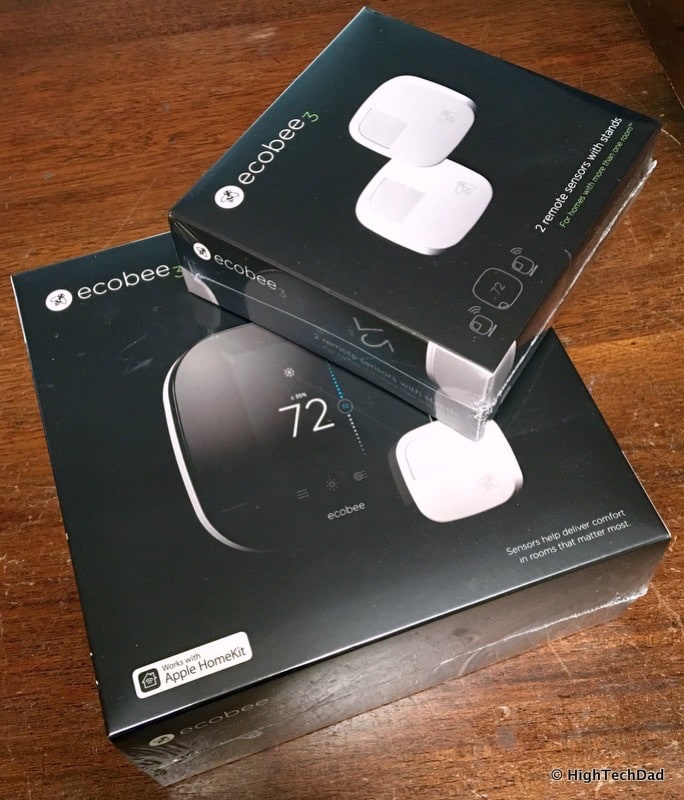
I will show a few photos of the install and setup. For starters, here is what came in my box (I also received two additional remote sensors). (This is specific to the ecobee3, HomeKit-Enabled version.) It comes with:
- ecobee3 thermostat
- One room sensor
- A Power Extender Kit (PEK)
- Screws & drywall plugs
- Standard and large trim plates
- Quick Start Guide
- Installation Guide and wire labels
As part of the Smarter Bundle, you get a total of three sensors (the more the better I say!).
There is a step ZERO before you do any type of install. You need to turn off your heating/cooling equipment. You can do this at the circuit breaker if it is easiest. On my system (and this doesn’t necessarily happen with other systems), when you open the front panel of my HVAC equipment, there is a pressure switch that automatically cuts the power to my equipment. You would remove your panel potentially to confirm proper wiring. I just did it to cut the power.
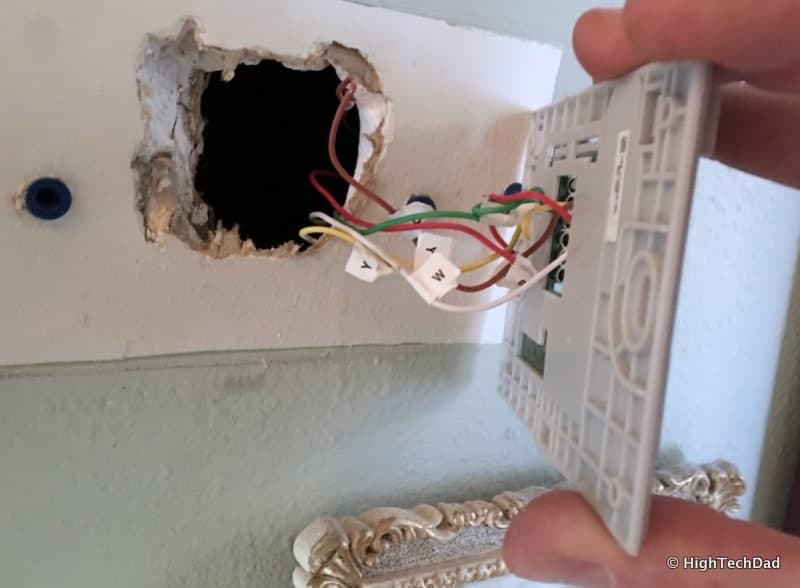
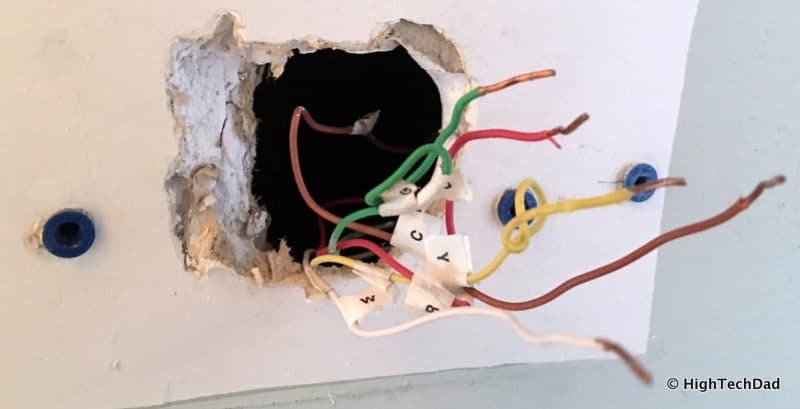
Once the power it off, you need to look at your thermostat’s current wiring. I recommend taking a picture of your old thermostat connected to the wires.
You can see that the labels from my previous installation efforts are still in place. YAY!
After that, remove your old thermostat (and make sure the wires don’t fall back in the wall).
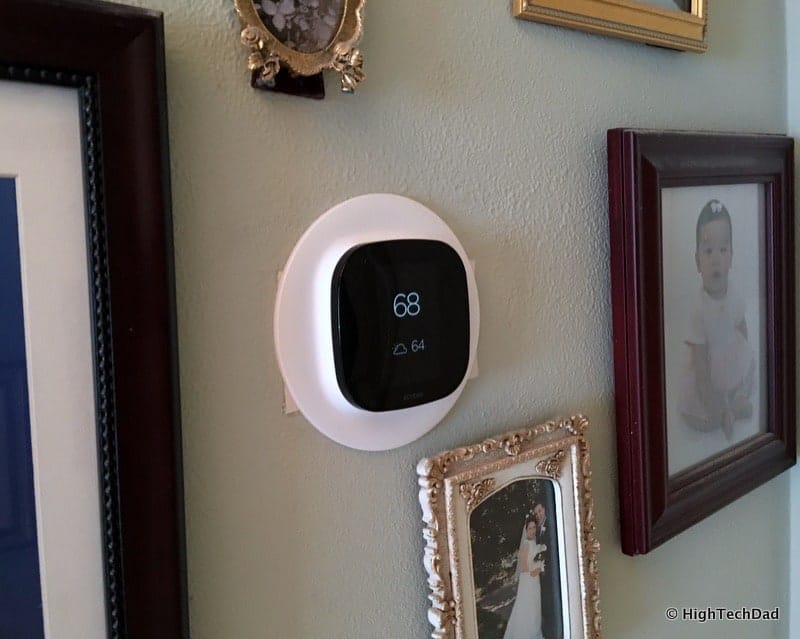
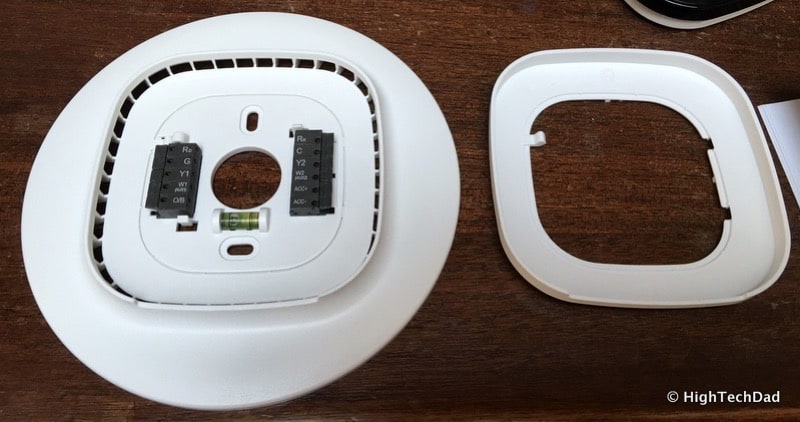
I decided, because the previous owner had painted around the old thermostat instead of taking it off and paint, to use the large trim plate to cover up the difference in paint color.
Easy enough to do and then most of the bad paint job is covered.
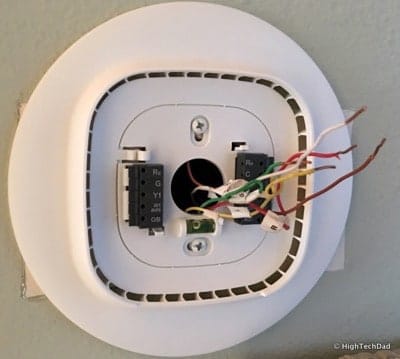
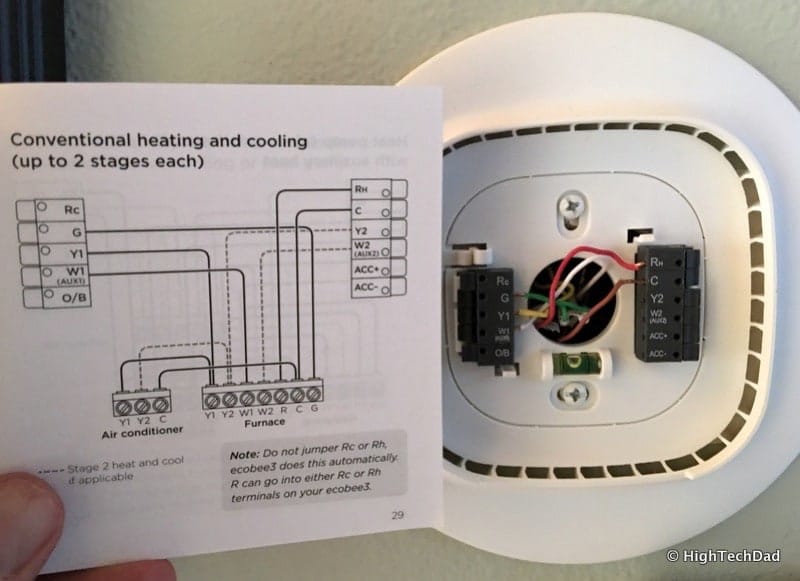
Next connect the wires appropriately based on your own system. Here’s my setup:
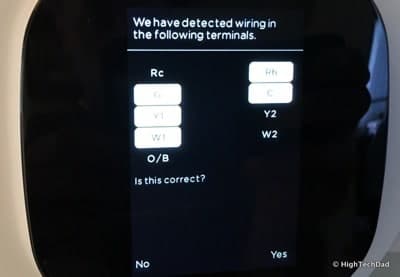
Once you are sure all of the wiring is correct, you can turn the power back on to the HVAC system and then the ecobee3 will initiate a series of setup steps. It does confirm the wiring…
Then you go through a series of other questions like:
- If you have accessories
- Temperature preference
- Equipment configuration
- Naming the ecobee3 thermostat
- Ideal home temperature during winter and summer
- Current mode of HVAC system
- If you want to enable Smart Home/Away
- Time zone
- Connection to WiFi (you really have to do this to get all of the benefits of a smart home thermostat)
- Registration
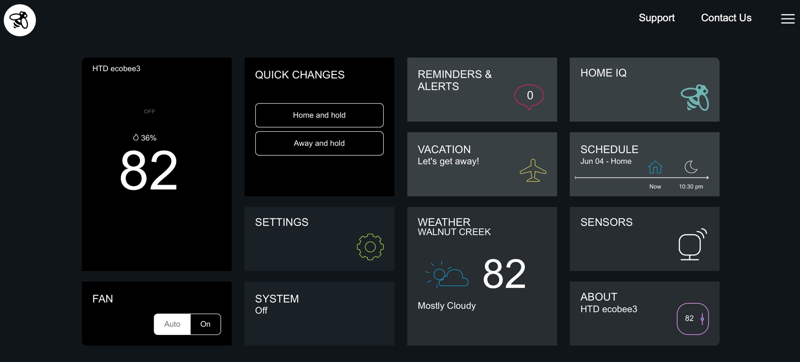
After you have successfully registered, you can use the smartphone or tablet app to control you system from anywhere. The wall plate interface is pretty much identical to what you get on your phone, tablet or even the website (although I prefer the web interface because of the additional functionality).
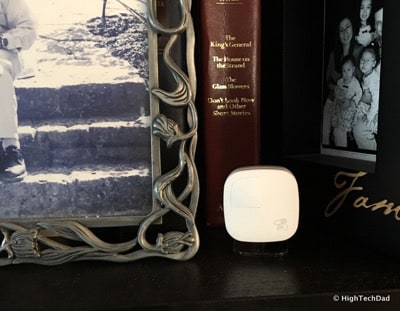
If you have extra sensors, you will want to place them at different areas around your home. We chose some bedrooms and our living room. Once you pull the plastic tab to connect the battery, just attach them to a wall or use the included plastic stand to place them on a bookcase or dresser (about a few feet off the ground and in a place where they can detect motion). As you pull the tabs and assuming the sensors are not too far away from the ecobee3 (they should be within 45 feet of the wall plate), you will see a prompt on the wall plate to connect the sensor and answer a few questions about those sensors.
The sensors are wireless so you can pretty much put them anywhere assuming they can be detected by the ecobee3.
Now that everything is set up, let’s move on to some of the ecobee3 usage.
Using the ecobee3
Keeping your home hive warm or cool and maintaining it within a comfortable range is what the ecobee3 smart thermostat so powerful. As I mentioned before, there are plenty of other smart and connected thermostats that do this, but I have found the ecobee3 to be different and excel in a few areas.
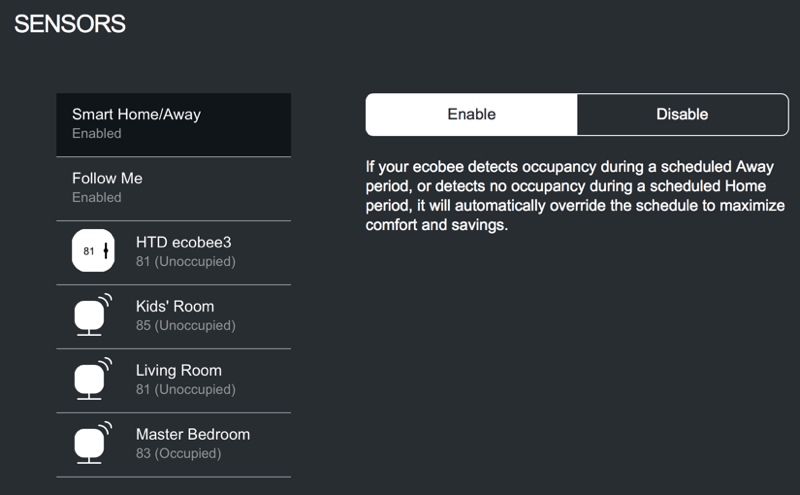
Since I was just discussing the sensors, I believe this to be one of the big differentiators. Unless you live in a single-room home or a studio, for the most part, temperatures vary from room to room. Those rooms with southern exposure, for example, tend to have more sunlight warming them up compared to those on the northern side. Also, homes may be insulated differently. Upstairs rooms may be warmer than those downstairs (heat rises, right?) Because of these facts, ecobee3 can connect multiple wireless temperature and motion sensors.
So why motion and temperatures? For starters, the system takes an average of active sensors to give you a more accurate reading. If one room is particularly warm, for example, but no one is in it, the ecobee3 system will “de-prioritize” it and use the active temperature sensors as the more important ones. But if you move into the warmer room and the ecobee3 sensor picks up activity, it will attempt to adjust the temperature accordingly (e.g., cool the warm and active room down). This is what they call the “Follow Me” function.
Also, with the motion detection aspect of the sensors and the wall plate itself, the ecobee3 knows if you are home or away and will adjust the temperature either for comfort or to conserve energy.
Another big differentiator I feel is the analytics that come with each account. For starters, ecobee stores up to 15 months of data so that you can compare performance over time. Other “smart” thermostats may only record a week’s worth of data…or not at all. As I mentioned earlier, there is a Home IQ feature which works with this gathered data. Unfortunately, it takes a minimum of one month to start getting true analytics so I cannot at this point give my opinion of this. It’s supposed to provide you with runtime, community comparisons and home efficiency reports.
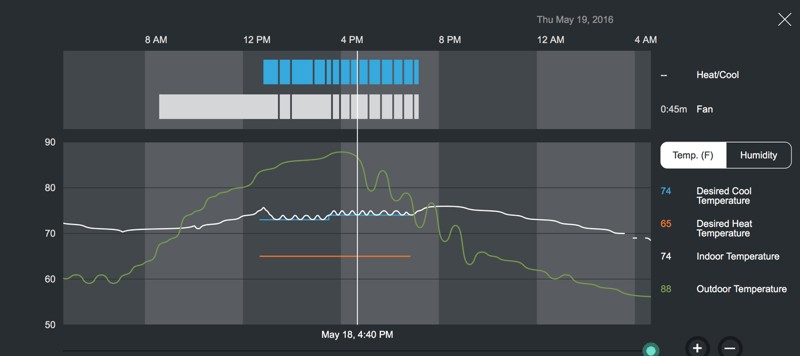
But there is another section of the Home IQ that is immediately available, that of System Monitor. Below is a snapshot from my System Monitor section.
At the top of the chart, you can see our cooling and fan usage. We ran the fan without the A/C on earlier in the morning when the temperature was a bit cooler. The green line shows how the outdoor temperature climbed fairly rapidly (not quite sure about the wavy outdoor temperature lines in the afternoon). You can then see when I turned on the “Auto” home control. The threshold high and low are marked (blue is desired cool and orange is the desired heat). And the white line is the measured indoor temperature. You can see how the ecobee3 would turn the A/C on and off to hit that desired cool temperature. When we did eventually turn off the system because the outdoor temperature had dropped enough, the indoor temperature did go up a bit but then trended downwards as our home naturally cooled.
You can scroll back in time to see your day-to-day usage, see how your schedule mapped with temperatures and usage, understand what rooms were picking up movement and see the average calculated temperature based on that activity, and see how the weather impacted the use of the HVAC (e.g., was it turned on or not).
This is some pretty powerful stuff and I’m looking forward to better understanding the system when more of my data is unlocked after a month.
Turning now towards usability. While I do believe that the ecobee3 is fairly easy to understand, there is always a learning curve involved with any new gadget or device. I do recommend reviewing some of their setup videos to help you get a better understanding of the settings and the knowledge base is fairly robust. I won’t touch on each and every feature. Below is the main interface:
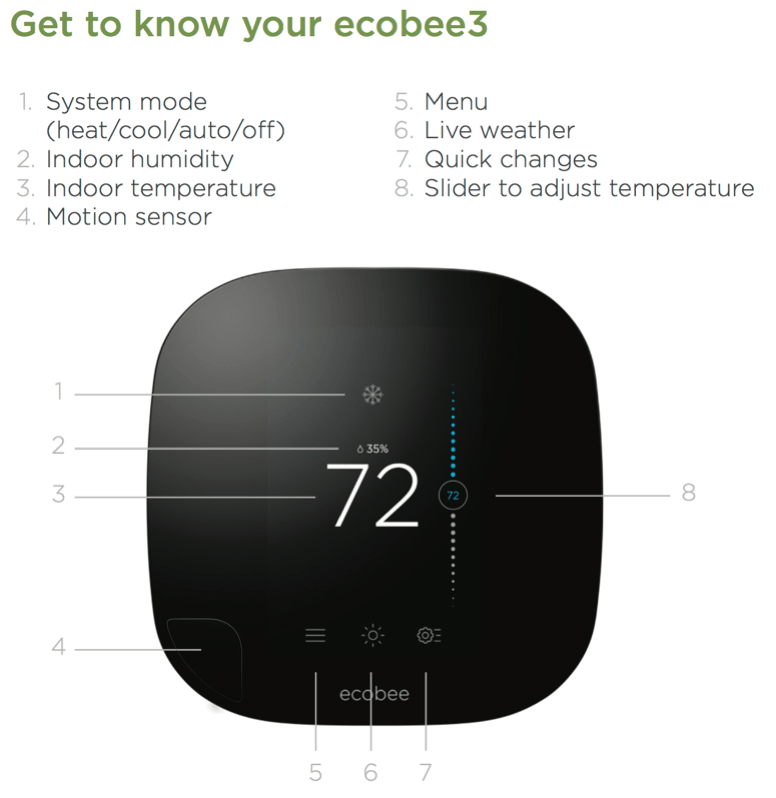
The mobile app and the face plate are extremely similar in terms of look and functionality. Briefly, tapping on area #1 will allow you to change the setting (heat/cool/auto/off). I actually tended to manually control when I wanted my A/C on so I would click on that to set it to “cool.” #3 shows the current measured (average) temperature. When the system is on, the temperature slider (#8) appears and you can manually adjust the desired temperature. When you do this, you will be prompted how long you want to hold that temperature. Tapping on #6 gives you the outdoor weather for your area (based on your setup configuration). And #7 lets you make some quick changes like turning on your fan. We used this function when we wanted to circulate the air. You can also says that you are home or away manually from this setting, instead of using a predefined schedule. On this Quick Changes screen, you can also see if any equipment is running. When you make a change, it is reflected on the home screen as well. To stop a Quick Change option, you can close it via the home screen (e.g., turn off the fan) and your schedule will resume.
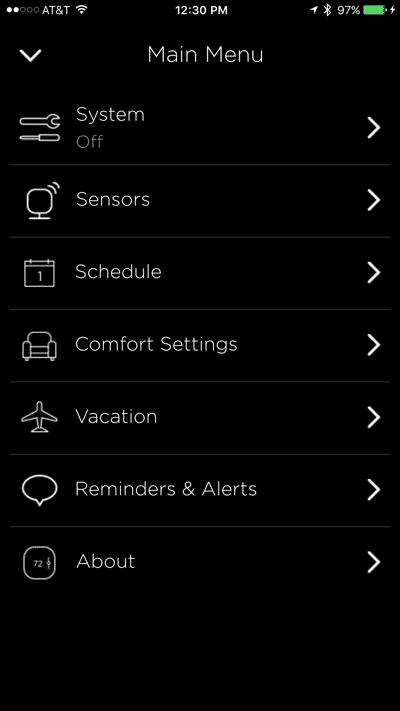
Lastly, tapping on #5 will give you access to a wide variety of configuration options and settings including: turning the system & fan on and off, checking the configuration and current readings of your sensors, defining and refining your schedule, adjusting your comfort settings (what the ideal heat/cool levels are and which sensors participate in that setting), setting up any vacation schedules, configuring alerts and reminders (don’t forget to change that air filter!), and information about your system.
The faceplate has a few more options under the settings for things like WiFi configuration and other system preferences.
Oh, and one thing I wish that the UI developers at ecobee would do is add the date and time onto the wall plate interface. It’s nice to be able to glance at the ecobee3 on the wall and know what time it is.
One kind of cool thing about the face plate (the brains of ecobee3) is that when it detects you are standing in front of it, the interface changes slightly to show you more menu items.
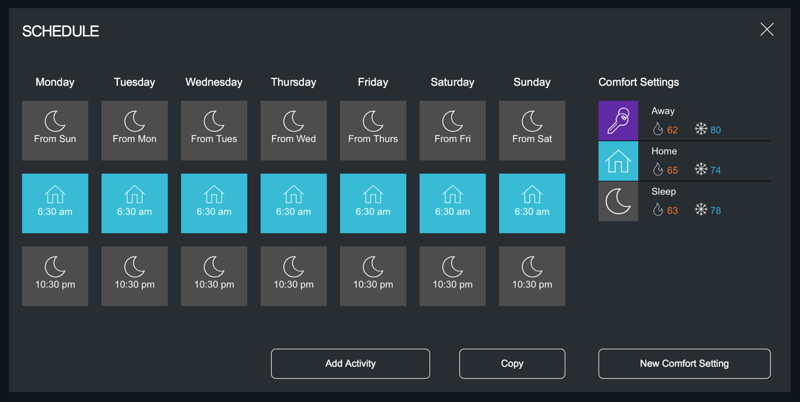
As I mentioned, the web interface is quite good. You can do pretty much everything via that interface. In fact, I found it almost easier to set up and tweak my Schedule using the web interface. For the schedule, you look at each day and decide which comfort setting should be applied to which time range. You have your configured comfort settings on the side and then the icons apply to those schedules. Since we usually have someone home throughout the day, we don’t have an Away schedule configured, just Home and Sleep. If you find a day that is set up to your liking, you can copy it to other days quite easily as well.
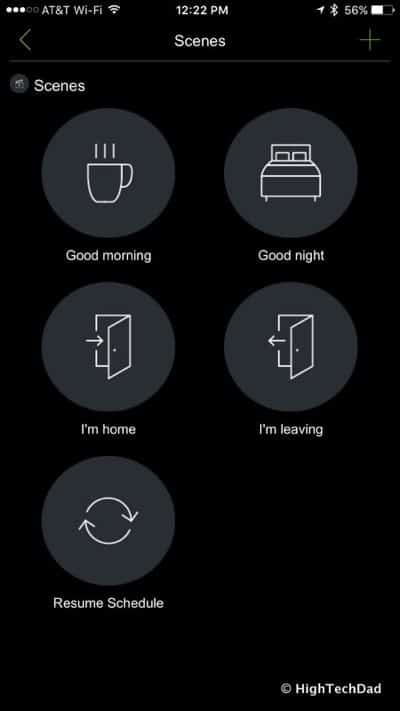
One thing that I almost forgot about is the fact that there is an Apple HomeKit-enabled version. This enables you to use the power of Siri and voice commands to control your home’s temperature and environment. Once connected to Apple HomeKit, you can set up and configure “Scenes” like “Good morning,” “Good night,” “I’m home,” “I’m leaving” or “Resume schedule” all with simple voice commands.
I haven’t played around that much with the HomeKit side of the control but the quick tests I did seemed to work just fine.
I feel that the ecobee3 system is one of the smarter thermostats on the market, especially given the ability to have a remote sensor in every room of your house. And, being able to look back in time (over a year) and do some comparisons on your home’s efficiency helps actually pay for the product. The ecobee3 (HomeKit enabled w/ one included sensor) retails for $249 and is available on Amazon for $249 as well. I do recommend getting more than one sensor. There is a bundle with 3 sensors for $313 which is available on Amazon for $316. When shopping, be sure you get the 2nd Generation version! You can also buy additional sensors 2-packs for $79 (or $67 on Amazon).
Disclosure Text : I have a material connection because I received sample of a product or service for consideration in preparing to review the product/service and write this content. I was/am not expected to return this item after my review period. All opinions within this article are my own and are typically not subject to the editorial review from any 3rd party. Also, some of the links in the post above may be “affiliate” or “advertising” links. These may be automatically created or placed by me manually. This means if you click on the link and purchase the item (sometimes but not necessarily the product or service being reviewed), I will receive a small affiliate or advertising commission. More information can be found in my About page.
HTD says: Keep your home hive properly climate controlled with the ecobee3 smart thermostat with remote activity and temperature sensors. You will be buzzing with joy in a comfortably temperature-regulated home.
HighTechDad's Ratings
-
Ease-of-Use
-
Family-Friendly
-
Price Point
-
Features
Summary
Keep your home hive properly climate controlled with the ecobee3 smart thermostat with remote activity and temperature sensors. You will be buzzing with joy in a comfortably temperature-regulated home. What is unique about the ecobee3 is the ability to monitor the temperature in multiple rooms and have your thermostat adjust based on that temperature and if there is activity in the room. The control panel is easy to use by all family members and the app mirrors the panel. The ability to integrate ecobee3 into a smart home hub is definitely a plus.
