Remember how a few years ago setting up a streaming webcam was something that you left to the geek in your house? And even then, it probably didn’t work all the time or required the webcam to be attached to a computer that was on all of the time? I sure do. I even remember when setting up a security webcam meant that you had to also configure an FTP server where the webcam would upload periodic pictures captured from the webcam. If you were lucky, you captured something “relevant” in that snapshot but most of the time, your FTP server simply got filled up with pictures of empty rooms or blurred movements. Let me tell you, it was a pain!
Fast forward to the modern day and suddenly you have a variety of streaming webcam options available and many of them work pretty well. But the features of these solutions vary widely so you need to shop around carefully. Here are some things to consider when looking for a security or streaming webcam solution for your home:
- Easy to set up
- Minimal configuration complications
- Ability to hook into your network
- Ability to see live videos via a website
- Ability to see live videos via a smartphone
- Ability to record videos for later playback
- Ability to take a snapshot from a video
- Ability to store videos for later viewing
- Night-vision enabled
- 1-way or 2-way audio
- Cordless
- Battery powered
- Scalable so that you can add more cameras to your network
- Remotely configurable
- Receive instant alerts when motion is detected
- High-Definition video
- Easily mount a camera anywhere
- Pan or zoom in on your videos
- Schedule when recordings should take place
Are those enough consideration points? And honestly, I haven’t come across any solutions (yet) that can have a “yes” placed next to the items above. However, I recently tested out the VueZone Personal Video Network solution and their offering comes pretty darn close. Since the list of “no’s” is shorter, I will list those out first (and who knows, perhaps their next version will mark those off the list). What the current VueZone CAN’T do is see in the complete dark (nigh-vision), have 1 or 2-way audio or provide HD video (you can take high resolution photos though). That’s pretty much it! Not bad, right?
Before I get into the details, I should point out that in order to get the most out of your VueZone camera, you really should sign up for one of their service plans. You can, if you want to, use their free basic plan which allows you to view the live streams on your computer and have up to 2 cameras in your network, but if you really want to take advantage of the enhanced features, choose one of the two available plans to be able to do more like view on your smart phone, store videos for later playback, get video email alerts, connect more than 2 cameras or pan and zoom digitally. The premium plans are fairly reasonable as well (approx $50 or $100 per year depending on the plan).
I found the setup to be very easy and understandable. Get all of your items out of the box (the exact content depends on the model you get) – mine consisted of:
- VueZone gateway – you plug this into your router or LAN connection
- VueZone camera – the one that I have is the indoor motion detection camera
- 2 Wall mounts – the 1/2 spheres that have adhesive on the back
- 2 Batteries – these are special, long lasting batteries; you will get more if you have more cameras in your package
- AC adapter – this is for the gateway only; the camera is battery powered
- Mounting screws – if you don’t want to use the adhesive
- Ethernet cable – to connect your gateway into your network
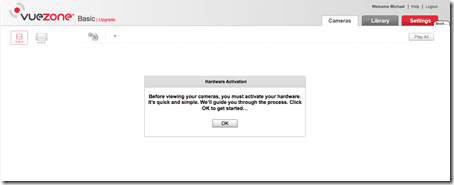
Note, you do need to have a high-speed Internet connection to view the video. Once you have all of the items out, you head over to the activation site and once you are there, you simply have to activate your cameras, set up an account, sync your camera to the gateway and that’s pretty much it. (Oh, and you should put the batteries in the camera prior to activation.)
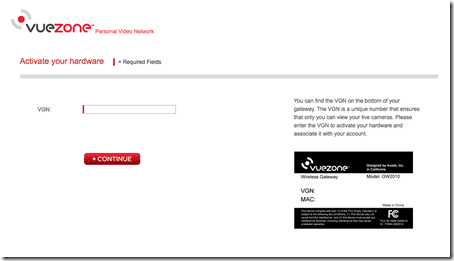
You just need the number from the bottom of the camera (once your gateway is connected to the internet).
This is the web-interface:
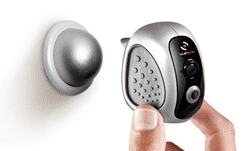
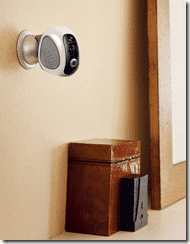
Once your camera is synced with the gateway, you are ready to mount the camera. This process is probably the easiest part of the process and I particularly liked the mounting possibilities. Each camera comes with the 1/2 spheres that you can stick (via the super-strong adhesive tape on the back) to the wall or you can mount traditionally with screws. The back side of the camera is magnetic and curved so you can quickly and easily attach the camera to the mount AND move the camera around to get just about any viewpoint conceivable. I really liked the thought put into this design.
The camera itself is pretty small actually, probably about 1.5 times the size of a large egg. The bottom of the camera has a physical on/off switch which is what you use to enable/disable the camera. For me, this is actually important given where I placed the camera. Normally, you would want to put this in a public area or even outside (they do have outdoor, waterproof shells for wall mounting your camera outside). But we decided that we wanted to monitor our tiny rescue Chihuahua, Rufus, when we are out and the place that he stays is in the bathroom. Although I mounted the camera away from showers/toilets, it was a bit of a concern having a camera in a private environment like that. So, the fact that we could physically turn off the Rufus-cam and see that it was off and/or easily remove the camera from the mount to put it out of the bathroom is a huge plus.
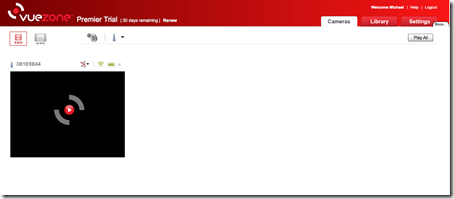
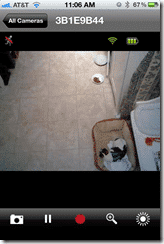
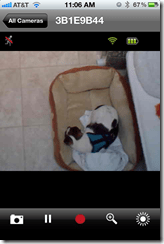
Using the camera is pretty easy as well. Depending on your service plan, you can use either a web browser or the iPhone app. If your camera is offline, you will see that indicated in the view. If it is online, you can see the action, or in the case of my dog, the napping. Again, depending on your plan, you can zoom in on particular areas of the video, record the video based on motion that is detected in the room and store footage from your camera.
Above is the view of all of your cameras, online or offline.
Here is my dog asleep in his bed (in non-destructive mode).
And you can zoom in on the video to get close-ups.
HighTechDad Ratings
For the most part, I found the setup to be quite easy. The online wizard walks you through all of the steps of setting up your account and connecting your camera(s). It was quite intuitive so I don’t believe that you need a technology degree to do it unlike some other wireless cameras that I have tested. For the features, I think the pricing plans are a bit steep, especially the higher end plan as I know of other services that are similar that are priced a bit lower. VueZone does seem to have sales so you might want to check to see if they have a promotion that might bring the yearly price to something like $30 or $50 for the two plans. However, the fact that you can pick up and move the camera so easily from room to room without having to use any type of cords is what makes the VueZone truly compelling. The entry level kit has an MSRP of $199.99 and you can pick up this kit on Amazon currently for about $119 which is definitely a great deal. I do wish that the VueZone cameras supported HD video streams and possibly night-vision but perhaps future versions will support that.
Overall, I liked the VueZone for its simplicity and ease of use.
Disclosure Text : I have a material connection because I received a gift or sample of a product for consideration in preparing to write this content. I was/am not expected to return this item or gift after my review period. All opinions within this article are my own. More information can be found in my About page as well as here.
HTD says: If you are looking for a easy to set up and portable wireless webcam that you can use to monitor your home, kids at play or the destruction your pets do while you are gone, definitely take a look at the VueZone solution.
[amazonproduct=B004YAW74O]





1 comment
hero
good job and thank’s for information