As I was testing out the Wacom Intuos Creative Pen Tablet, I realized that I’m NOT a digital artist. Sure, I can hack my way around various graphics and design programs, enough to be “dangerous,” and know what it takes to do great digital design. But without a lot of practice and training, I can’t even come close to being a digital artist. Just using the Wacom Intuos Tablet made me gain tremendous respect for those graphic designers and other creative professionals out there. But I played around with the Wacom Intuos Tablet and have some quite elementary observations and opinions. (*Disclosure below.)
If you’re a creative person looking for a digital pen tablet to use in your work, you might have heard of the Wacom Intuos Creative Pen Tablet. Honestly, the only tablet and pen devices I know about have always been from Wacom. The only other reference point is using my iPad with an Apple Pencil. While similar, they are not the same. An iPad may be perfect if you are just starting with digital illustration and design or even photo editing. However, the Wacom Intuos Tablet allows you to do much more when connected to your Mac or PC.
Wacom has a wide range of tablet and pen solutions, depending on your skill set and use cases. Some actually have digital displays built into them (that may be better for me, honestly), and others that are simply for NOT using a mouse when interacting with digital media or art. I have “grown up” using a mouse, so retaining my brain to use a pen or stylus is a bit of a challenge. I don’t write meeting notes anymore, for example. I simply type all of my notes.
So, as you read this review, please understand that I’m NOT an expert at tablets, at using a stylus, or at digital drawing. And, honestly, my own handwriting is NOT very good.
Table of Contents
Key features of the Intuos Creative Pen Tablet
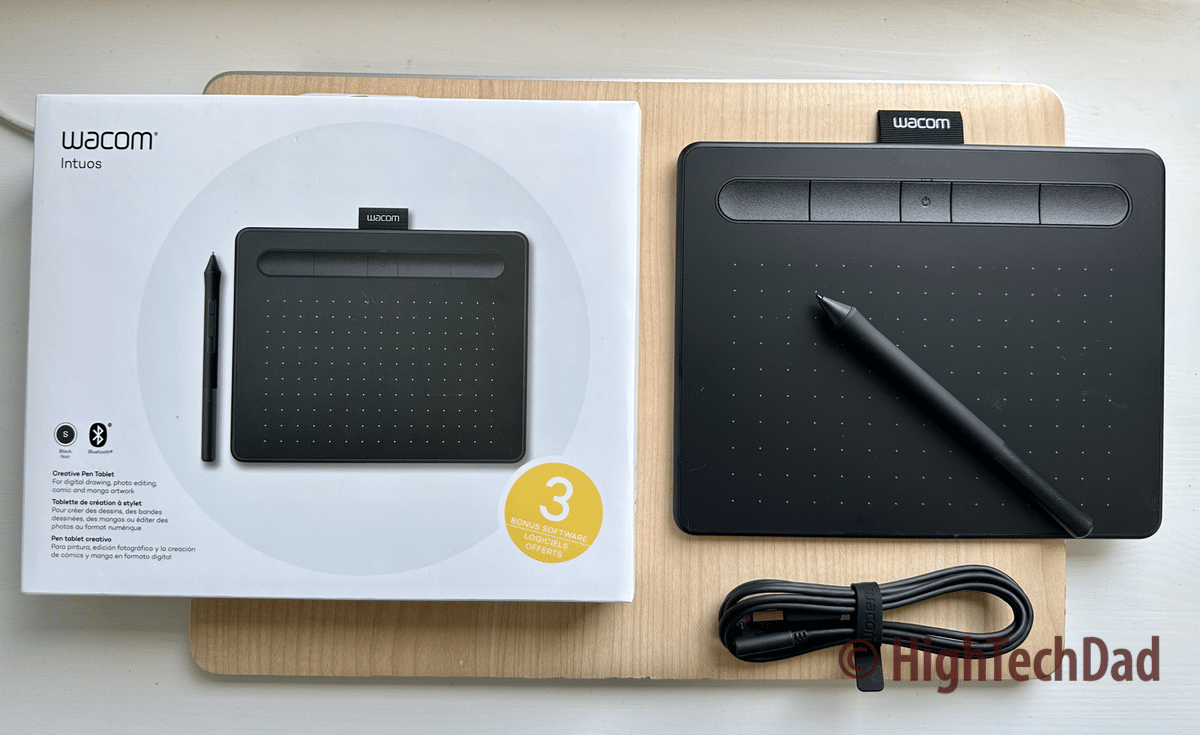
The model that I have been testing out and trying to wire my brain into using is what I consider to be more of an entry-level to a mid-level tablet. The model number is CTL4100WLK0, and it is otherwise known as the Wacom Intuos Wireless Graphics Drawing Tablet. This particular version has two ways of connecting to your computer (which I will go into later) via USB or Bluetooth.
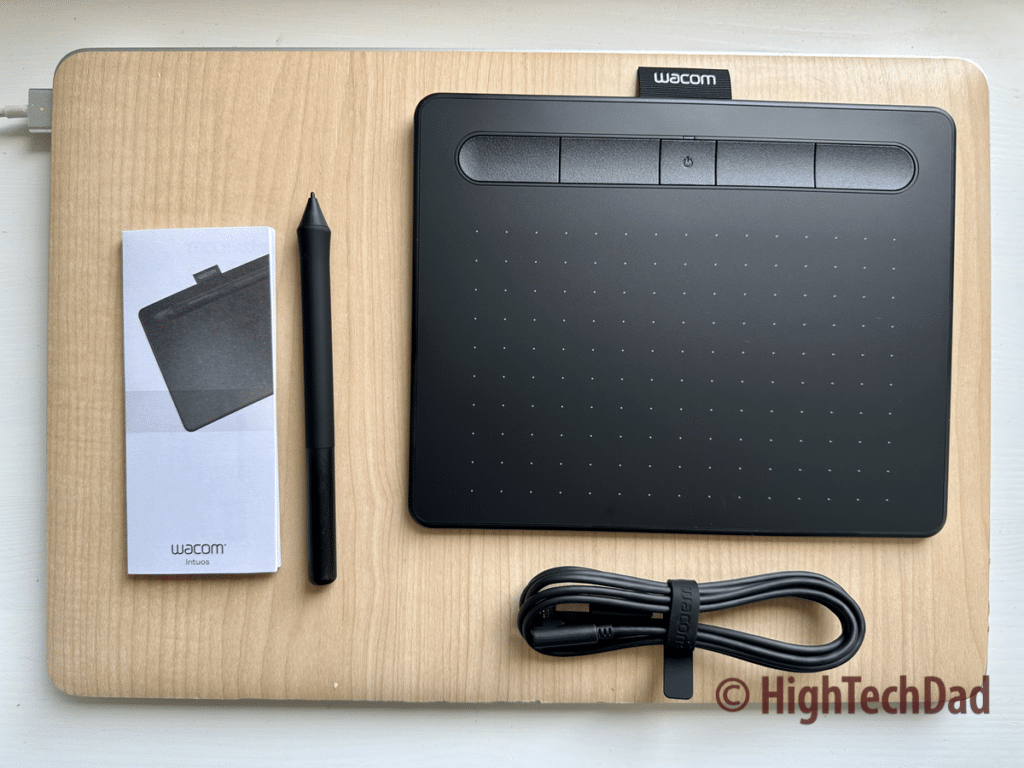
Here are some of the key features of the Wacom Intuos Tablet. I am testing the Small (S) size that has Bluetooth for additional connectivity.
- Portable and lightweight design – it weighs only 8.8 ounces!
- Comes in two sizes: Small (7.9″ x 6.3″ x 0.4″) and Medium (10.4″ x 7.8″ x 0.4″)
- Relatively large Active Area for pen interaction: Small (6.0″ x 3.7″) and Medium (8.5″x 5.3″)
- Responsive and accurate pen with pressure sensitivity – there are 4,096 pressure levels!
- Included software: Corel Painter Essentials, Corel AfterShot, and Clip Studio Paint Pro – note, these are TRIAL versions only, unfortunately
- Compatible with major operating systems: Windows and MacOS
- Supports a variety of software programs, including Adobe Creative Suite and Affinity by Serif
- Ideal for sketching, drawing, and painting
- Perfect for retouching photos and creating digital designs
The stylus, known as the Wacom Pen 4K, is, of course, cordless. I remember back in the day when these tablets actually had the stylus physically connected to the tablet. Ugh. But now, obviously, you are not tethered. Another key feature of the Pen is that it is battery-free, so there is no need to search for tiny little batteries (which add weight). This Pen is “always on,” assuming the tablet is on.
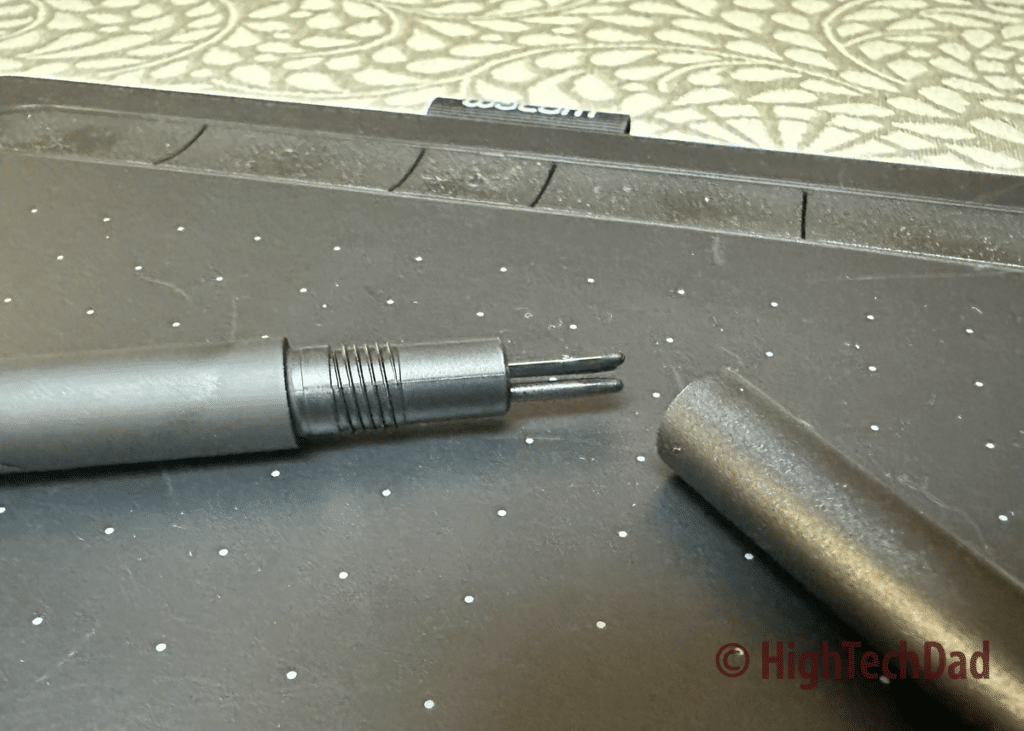
A thing to remember about the pen is that the nib (the point of the pen) does, in fact, wear down over time. Much of this depends on how you use the pen, the amount of pressure you use, and the tablet’s surface. You can get coverings for the tablet that will help mimic the feel of drawing on paper. That resistance to make things more paper-like causes friction which, in turn, will wear down the nib.
Luckily, the Pen 4K comes with replacement nibs built directly into the pen. The nibs will wear out with regular usage, but they are easily replaceable and can be stored in the pen “in case of emergency.”
Ways to connect the Intuos Creative Pen Tablet
One of the things that intrigued me about this particular model is that it has two ways to connect to your computer: via a USB cable or Bluetooth. With the initial setup, I recommend tethering it directly using the included USB cable, as you may have to download firmware or other updates. A thing to note: this particular tablet first came out in 2018, which does make it a bit “old,” and consequently, the included cable was not a USB Type C but rather a USB Type A. So I had to figure out how to connect it to my laptop (which I did via an extra USB-A port on an external hard drive. You can, of course, get a USB-C cable to make it work more easily with more modern computers.
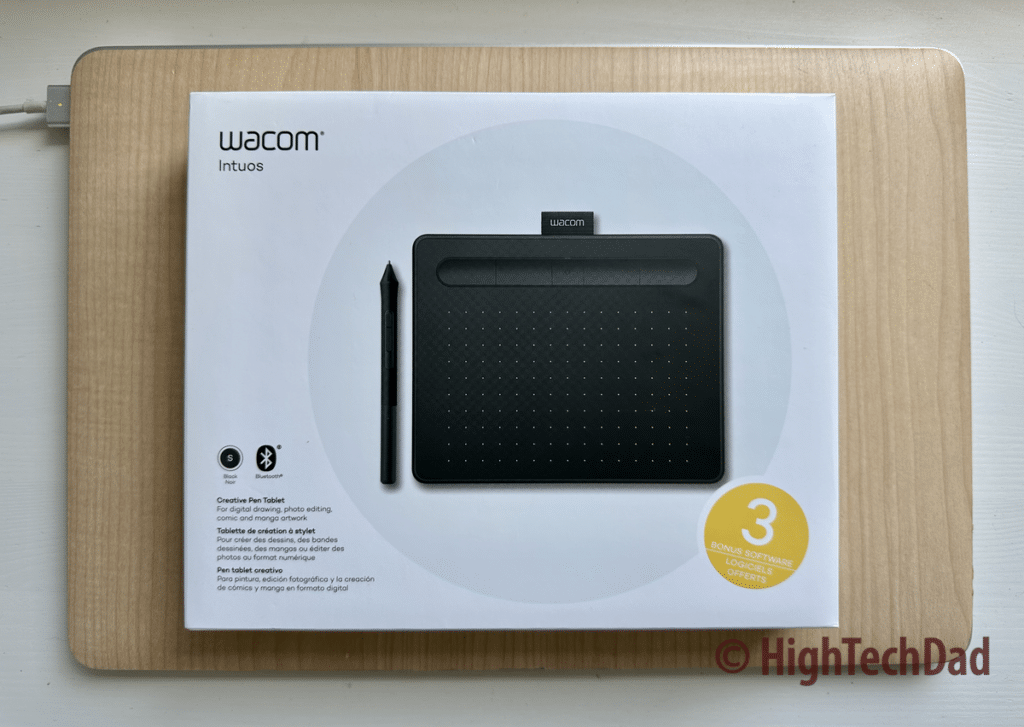
The other connection method, as I mentioned, is via Bluetooth. I’m a huge fan of trying to minimize the number of cables I need to carry and eliminate the spaghetti sprawl on my desktop of wires. Unfortunately, I found the Bluetooth to be a bit spotty and inaccurate, more so than my Bluetooth mouse, for example. Recognizing pen movements, pressure, and other motion would take a few seconds. It was enough of a battle that I opted up simply sticking to the USB cable connection, which was perfect. I tried connecting again, rebooting, disconnecting my mouse, and a few other things, but I still experienced lag which was unfortunate. It could have been due to other interference in my office environment; I’m not entirely sure.
The USB cable does charge the tablet, which is another advantage of using a physically tethered connection. That means that if you do want to go into Bluetooth mode, you have a fully-charged tablet at the ready.
But, my recommendation (and this coming from someone who is NOT a tablet expert) is to tether using USB most of the time, especially if you are working on creative, design, or editing photos, illustrations, or artwork.
Many configuration options
The included software has various options you can personalize to your liking. Once you install the Wacom options on the Mac, they will appear in your System Preferences. There are four main screens: Tablet, Pen, Mapping, and On-Screen Shortcuts. You should spend some time configuring these items to your personal preference.
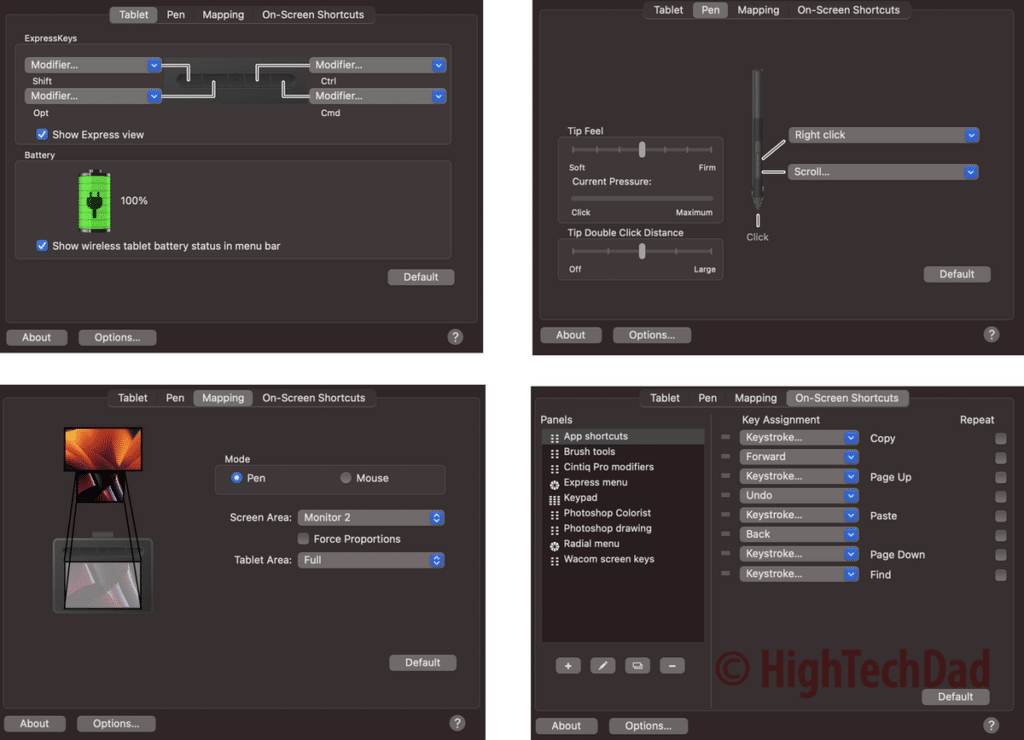
One of the main things you need to determine is how you want to map your tablet to your screens. I have my laptop screen and an external monitor in the environment I was testing with. At first, I had the Wacom mapped to both screens, but I found that my brain became a bit confused having to split the screens on the single table surface. So, I decided to map the Wacom tablet just to my laptop screen. After doing that, things became a lot easier for me, and there was more real estate for me to play with on the tablet itself.
The Tablet screen allows you to configure the four buttons located at the top of the physical tablet. These are modifier keys that can be used in conjunction with the activity of the stylus. By default, these are mapped to Shift, Opt, Ctrl, and Cmd. Like other aspects of the tablet, this needs to become part of your regular workflow. It does take some time to get accustomed to pressing a button and doing an activity with the stylus. This screen also shows the charge level of your tablet.
The Pen configuration screen lets you map the two buttons built into the stylus. I have mine at default as well during my testing and playing around – Right Click and Scroll. You can also tweak how the tip “feels” – soft to firm pressure – and you can test it and get visual feedback directly on the screen. You can also configure the double-click distance – the stylus is detected above the Wacom tablet surface. This particular screen takes a bit of time to dial into your preferences.
Lastly, you can map various On-Screen Shortcuts. This is a highly configurable section, as you can create and add your own shortcuts to the mix. Shown in the image are the defaults that come out-of-the-box. There are a variety of settings to test out – unfortunately, without more testing and learning, this is a bit beyond my level of expertise.
My under-educated recommendations on the Wacom Intuos Tablet
As I have already mentioned, I’m not a creative professional. So, I don’t have the muscle memory to be able to truly evaluate this Wacom tablet. However, with my limited testing and knowledge, I do feel that this Wacom Intuos Creative Tablet, despite being a bit dated, would be a good tablet for entry-level or beginner creatives. I think it has various powerful features that can be used from beginner to intermediate levels.
There are trial versions of various creative software that can be used to test out the tablet and stylus functionality. These are time-limited, so you need to decide after your testing if you want to purchase the full versions. I did test the Wacom tablet using some of the Affinity by Serif products. Once you enable the pressure-sensitive features of various pens and brushes within the software, the results are pretty amazing. I could see myself slowly growing my capability with practice.
The Wacom Intuos Creative Pen Tablet (with Bluetooth) that I tested retails for $99.95, which is reasonable for an entry-level yet professional tablet. It is a great way to test the waters to see if you can grow your digital creativity. It is also available on Amazon for $81.95 and is listed as an “Amazon’s Choice.”
Buy on HighTechDad
The product shown below (and related products that have been reviewed on HighTechDad) is available within the HighTechDad Shop. This review has all of the details about this particular product and you can order it directly by clicking on the Buy button or clicking on the image/title to view more. Be sure to review other products available in the HighTechDad Shop.
If you want a deeper dive into how this Wacom tablet works, I do recommend taking a look at Aaron Rutten’s video review from about five years ago that does a much better job than I ever could on this tablet (and the larger-sized one as well).
I plan on giving this Wacom tablet to one of my daughters since she is a much better artist than I could ever be. I believe that in the proper hands of a digital creative, the Wacom Intuos would be a fantastic tool to extend one’s creativity from traditional paper, pen, and pencil to online artistry. Regardless, if you are looking to give an artist a new tool to bring their creativity to a digital environment, definitely take a look at this Wacom tablet.
Disclosure: I have a material connection because I received a sample of a product for consideration in preparing to review the product and write this content. I was/am not expected to return this item after my review period. All opinions within this article are my own and are typically not subject to editorial review from any 3rd party. Also, some of the links in the post above may be “affiliate” or “advertising” links. These may be automatically created or placed by me manually. This means if you click on the link and purchase the item (sometimes but not necessarily the product or service being reviewed), I will receive a small affiliate or advertising commission. More information can be found on my About page.
HTD says: The Wacom Intuos Creative Pen Tablet is a perfect entry-level tablet and stylus to bring physical creativity into a digital environment. Once configured to your liking, it becomes a digital extension of your drawing experience, allowing you to bring your ideas to life on-screen.
HighTechDad Rating
-
Ease-of-Use
-
Family-Friendly
-
Price Point
-
Features
Summary
The Wacom Intuos Creative Pen Tablet is a perfect entry-level tablet and stylus to bring physical creativity into a digital environment. Once configured to your liking, it becomes a digital extension of your drawing experience, allowing you to bring your ideas to life on-screen. Set up is relatively easy. Plug it in via USB and install the software. Then, you do have to spend some time configuring the various settings. For each person, these are very personal, and they depend on the use cases as well as the software or digital media you will be working with. The good thing is, the price point is reasonable, making the Wacom Intuos tablet an ideal beginner or intermediate-level tablet for digital artists. I would recommend using USB instead of Bluetooth for more accurate stylus tracking.
Pros
- Great entry-level tablet
- Compact and lightweight
- 4000 levels of pressure sensitivity
Cons
- Tablet is several years old
- No USB-C cable included
- Bluetooth is spotty and not great for tracking
- Bundled software is time-limited


2 comments
JC
Worst device I had ever had. A waste of money.
Markmchale
Nice Review!
My second-hand XP-Pen Deco went kaput after 3 years, and now I’m in the market for a new drawing tablet.
I’m really wondering if I want to go with the Wacom One CTL-472, Intuos, or try to find a Intuos Pro.
I use it more for illustrations (think Clip Studio Art, MediBang kind of thing). Any recommendations or insight are welcomed!