As hacking into people’s accounts has become a “clear and present danger“, it’s important to note TWO quick and easy configuration settings that you can now enable within both Facebook and now Twitter that can make your Social Media account just a bit more secure. While it won’t protect you from other types of hack attacks, phishing or other social media scams, it will protect the traffic between your browser and two of the most popular social media sites on the Internet. I’m talking about SSL encryption.
SSL stands for Secure Socket Layer. You can read more about it on Wikipedia. But without getting into any geek talk, this is DEFINITELY a setting that you should enable within Twitter and Facebook. Here’s are the 1-minute steps to enable SSL.
Oh and you can click on the images to see them a bit bigger.
Yesterday, Twitter enabled an SSL setting (HTTPS) within their Settings page.
Here are the steps to enable it:
- Log into your Twitter account.
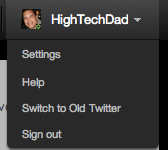
- Go to the Settings dropdown. It should look like this (obviously your Twitter name will show instead):

- Click on Settings. Down towards the bottom of the Settings screen, you will see “HTTPS Only“. Check that box so that is ALWAYS uses HTTPS.

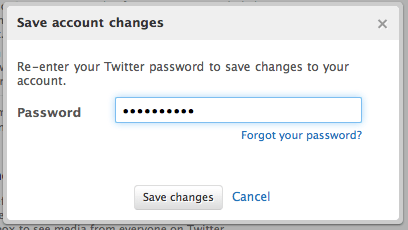
- Click Save. You will be prompted to enter your Twitter Password:

- That’s it!
Once you save your Settings, when you use the Web-version of Twitter, your traffic from your browser to the Twitter service will be encrypted. Note: I don’t believe this affects the API calls that 3rd party software or clients use. I’m sure that will be addressed in the future.
Facebook has had this setting for a while actually. And they are pretty darn good actually about letting you know about suspicious activity related to your Facebook account. For example, I was at a tradeshow last week and received an email notification from Facebook that my account had been accessed. Once I logged into Facebook (and remember, NEVER click through a link sent in an email, go directly to the site and enter in the URL manually), there was a “wizard” that walked me through resetting my password as well as details on the time, place, Operating System and browser that was used to access my account. It turns out that while the time and place were correct, the browser was one that I don’t usually use. This meant to me that someone had somehow gained access to my account so I promptly changed my password.
In order to prevent this from happening in the first place, I could have enabled SSL within Facebook. Here are the steps to do that.
- Log into your Facebook account.
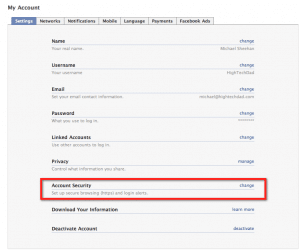
- Go to the Settings area and look at the Account Security. Click Change:

- Within the Account Security settings, click on Secure Browsing (https) and optionally the second item listed below:

- Click Save and you are set!
Voila! Your Facebook web-browsing session is now under SSL encryption
Generally you will want to enable SSL on as many sites as you can for added protection. I believe that Gmail now allows this. Again, it won’t protect you from other types of attacks but these quick fixes can make things just a bit more secure for you.
HTD says: Be sure to enable that SSL setting on any social media sites!


2 comments
Zinglewaga
For the Twitter https I think you mean check it ON! I know what you mean but others might be confused! Check if OFF your list? Check the setting ON. lol
hightechdad
Thanks for the input! I will tweak the wording a bit to make it more clear.