On my site, I typically tend to write about technology, hardware, software, consumer electronics, and other devices, and how they work within the family environment. From time to time, I also provide How-To and Fix-It articles, again related to technology. But there is a life beyond tech at home. And often, things need to be fixed as well. Case in point, the rear brake bulb of my 2013 Hyundai Elantra burnt out. Luckily, a kind man told me about it at a stoplight, so I was able to avoid a “fix it” ticket. Many people get these types of repairs done at the dealer or an auto shop. And, probably pay more than they really have to in order to do it. I’m a bit cheap (and I always like learning how to do new things), so I went to my local hardware store to pick up a replacement bulb (which happened to come in a 2-pack). I figured out how to do the replacement watching a few videos on YouTube and reading some posts, and I realized that while they were helpful, some of the videos were not of the best quality. So, after replacing the burnt out bulb, I figured I would replace the other bulb as well, AND film a How-To video about it. And while my auto repair skills are extremely limited (I don’t even change my own oil), this process was really easy so I thought I would share it. So here you go! How to replace the rear light bulb of a 2013 Hyundai Elantra.
First, I want to say that this process probably works with model years around the 2013 Elantra. In fact, it probably works for other models, not just the Elantra. Here are the tools I used:
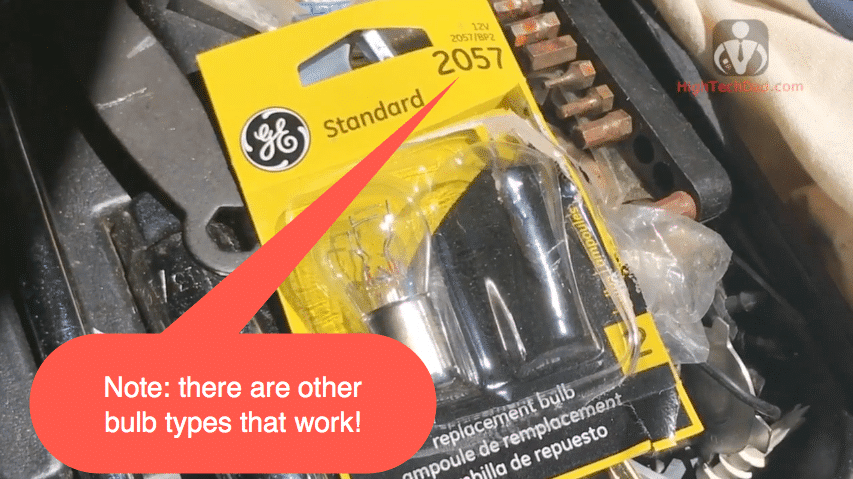
- Replacement bulbs (I used GE 2057’s)
- Socket wrench
- 10mm socket
- Gloves
- Knife (optional – see video)
Before you replace the real light bulb (brake light/tail light), I recommend watching some videos on how to do it. Obviously, I’m pushing my own How-To video but it seems to have already helped quite a few people. Here’s the video:
The process really shouldn’t take you that long to do, probably 30 minutes or much less depending on how skilled you are. Here are a few of the steps that are outlined in the video.
Steps to Replace Rear Light Bulb of 2013 Hyundai Elantra
First, be sure you have all of your tools handy (see the list above). For me, the 10mm socket and a socket wrench were key! Be sure you have that (although there may be some other tools you could use). The panel to access the rear lights is obviously in the trunk (and I’m talking specifically about the sedan model, the hatch may have a different layout but the process is probably the same).
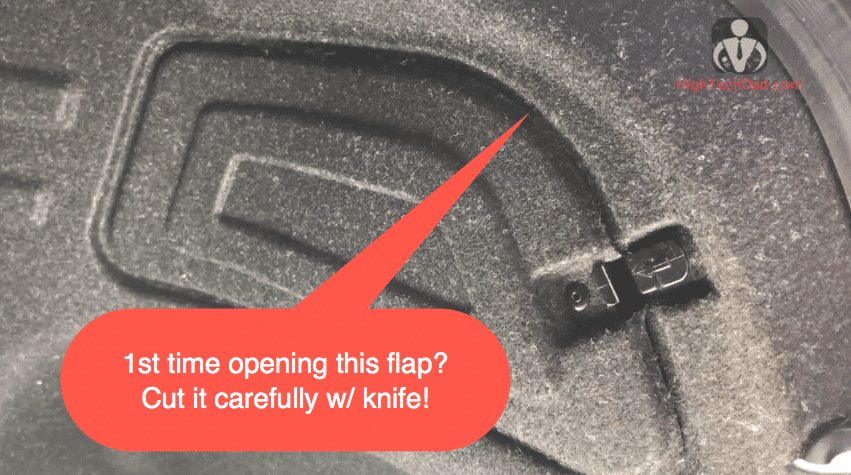
Near the tail lights, you will see a panel. You will need to open that up to get access. NOTE: the first time you open this panel, it might not open! This is what I ran into. In fact, I had to cut into the material to actually open this panel for the first time! Use a knife or box cutter for this.
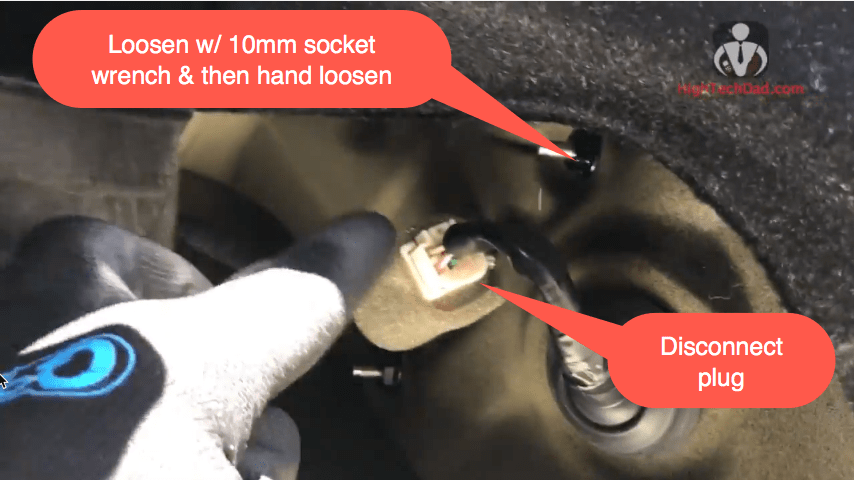
Once you have the panel open, you should disconnect the power. This is a simple plug that is just decoupled. From there, you will remove 3 nuts using the 10mm socket wrench. I would recommend using the wrench initially just to loosen them and then just hand loosen the rest of the way. NOTE: be careful not to drop the nut down into the panel!
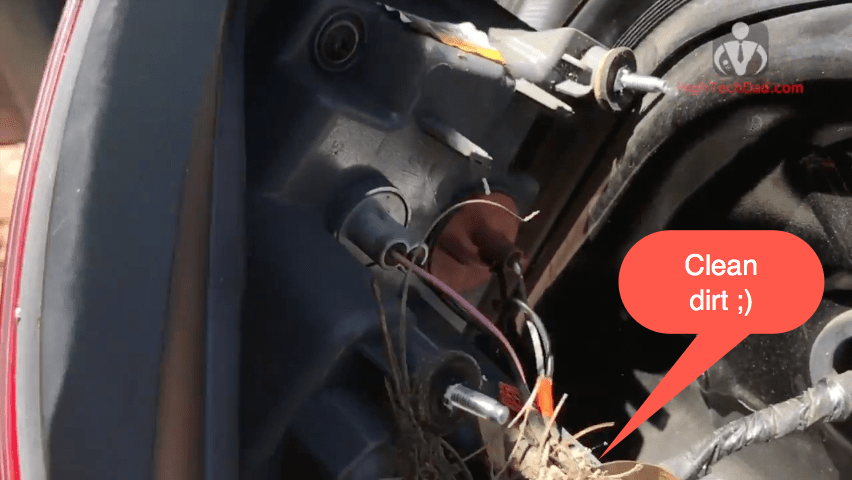
Once you have the 3 nuts off, you will remove the entire tail light assembly from behind the car. This will give you access to all of the bulbs (in case you need to change any other bulbs). It should come off fairly easily. You can push from the inside to help it. Once I got my tail light assembly off, I was also able to clear a lot of dirt and debris that had accumulated over the years.
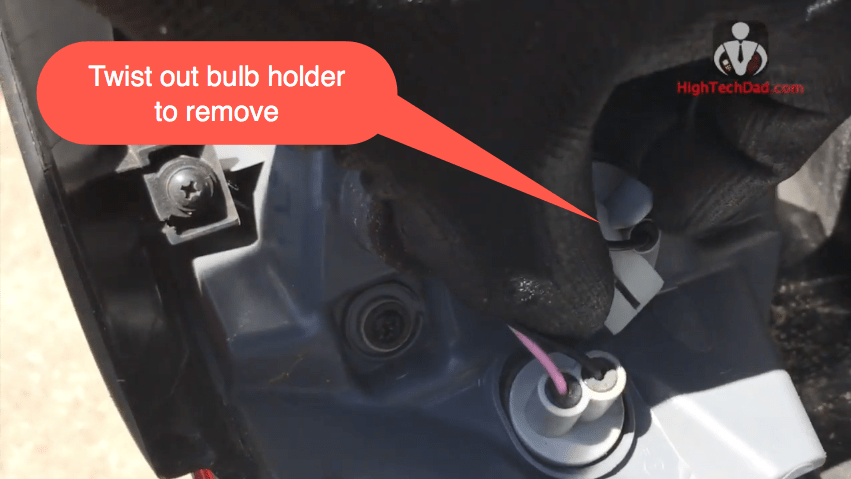
Identify the rear brake bulb you want to replace and twist the holder to release it from the tail light assembly. I believe it was a quarter turn to get that out.
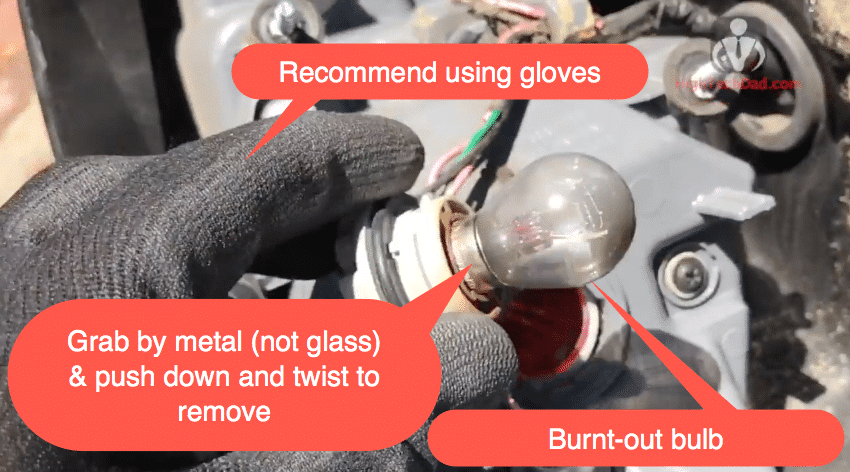
I highly recommend using gloves when touching the bulb itself. There are some bulbs that will have a degraded lifespan if you get the oil from your fingers on the glass. And gloves are a bit more grippy. To remove the bulb from the holder, grab the bulb by the metal part (NOT the glass), press it down (it should depress slightly), and twist to remove it. If you grab the glass, you may twist it away from the metal base and the process gets a bit more complicated if you break the bulb.
Next, you will need the replacement bulb. Again, there are many products out there, each with different levels of brightness and lifespan. As I mentioned, I bought the bulbs in a pair and I wanted to match brightness/lifespan so I replaced both bulbs. Be sure to do a little research on what type of bulb, and be sure you get the proper one (or it won’t fit).
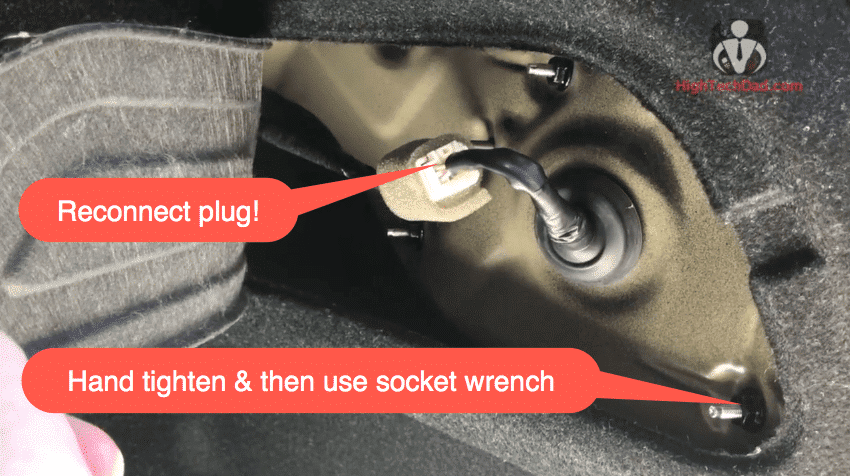
Once you have the dead bulb out, just screw the new one back in by pressing down and twisting (in the other direction). Then, just insert and twist the bulb holder to get it back into the tail light assembly. From there, you will re-attach the tail light assembly. Be sure to get the lip on the assembly attached to the plug on the body of the car (see the video). Once the three bolts are through the holes, you go back into the trunk and then hand-tighten the nuts back on. Then further tighten using the socket wrench. (Don’t over tighten!)
Lastly, don’t forget to reconnect the plug! After that, just snap the flap closed and you are done! Have someone help you test out your work (be sure to test the brake with the headlights on and off).
It’s actually quite easy to replace the rear light bulb on a 2013 Hyundai Elantra. The process, as I said, is the same or similar with other model years, perhaps other Hyundai models, and other rear bulbs. I hope this how-to article and video helped you on your path to both save some money and get down the path of being a “car expert!” By the way, I also posted an article and video on replacing the side mirrors of my Hyundai Elantra!
If you have questions or comments, please do leave a note on this article and/or on the video. If it worked for you, please share the tweet below:
HTD says: Learning some basic auto repair and maintenance can not only save you some money, it empowers you! Some people don’t have the courage to try to fix things themselves, I hope that can be changed!
