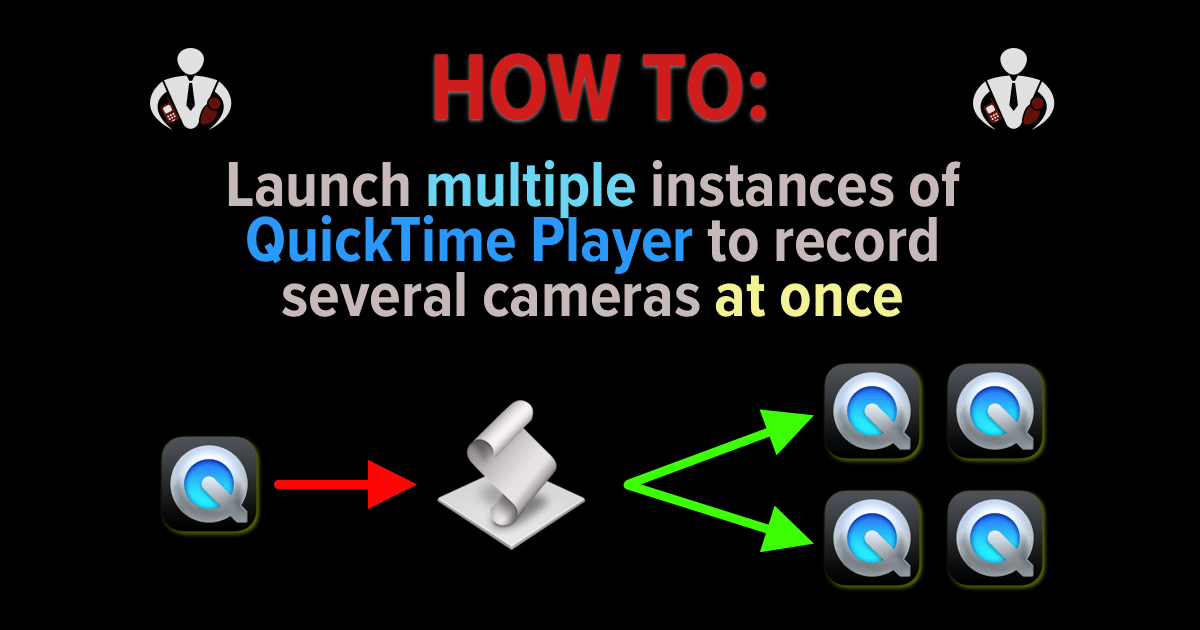
It’s been a while since I wrote a How-To article, but as it turns out, in a review that I’m working on, I needed to solve an issue before being able to do a video review. My problem was this: I needed to be able to record multiple webcam videos simultaneously in order to compare the recordings. Sure, there are apps that can do this, but I wanted to stay simple and use stock apps on my Mac. Enter QuickTime Player, which is a great tool for making simple recordings. Unfortunately, “out of the box,” you can only record one stream at a time. That is until I did some research!
You can actually launch multiple instances of QuickTime Player and have them record both audio and video simultaneously using different input sources. But to do this, you need to have multiple QuickTime Player applications available and running. Simple to correct, right? Not so much.
Table of Contents
How to duplicate QuickTime Player in older versions of macOS
In previous macOS versions, you could simply duplicate the QuickTime Player application (or any application or file pretty much) and launch the copies independently. If you are on an older version of macOS, you can right-click or control-click the QuickTime Player and select “Duplicate.” Magically, you have a new QuickTime Player application duplicated.
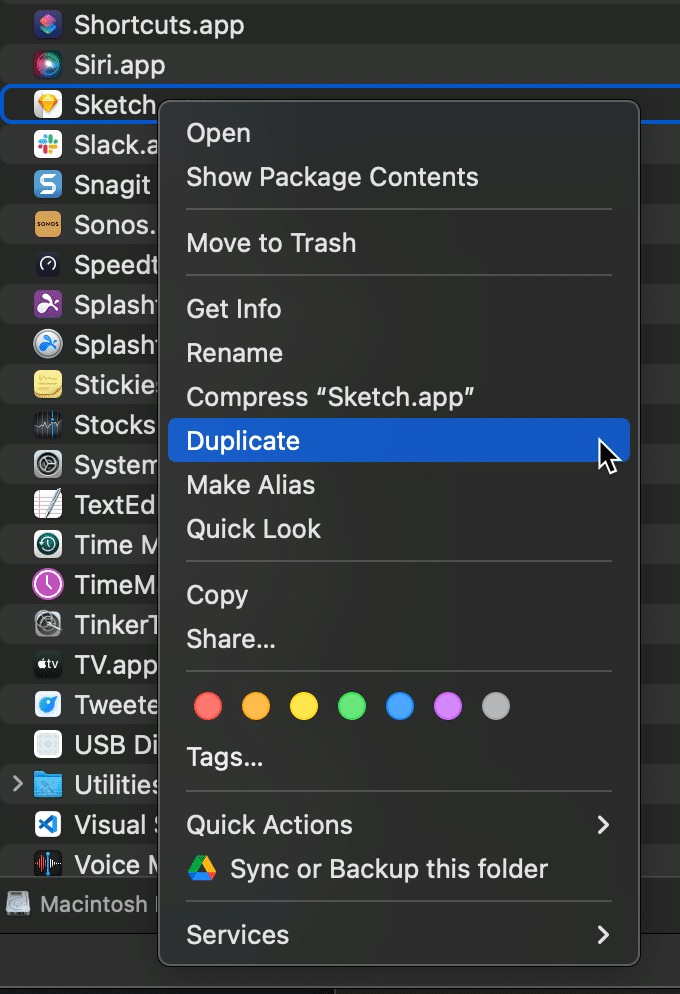
Here’s how to do it:
- Find QuickTime Player and select it
- Control-click or right-click the QuickTime Player
- Select “duplicate”
- A copy of the QuickTime Player application is created
I was excited to learn how to do this, but when I tried it on macOS Sonoma (10.4), the “duplicate” function was missing for QuickTime Player!
As it turns out, Apple removed the “duplicate” functionality from their stock applications, so if you try to do this with any Apple stock application like Safari, Notes, Reminders, and all of the other Apple apps, “duplicate” is missing. Other third-party applications still have this function available.
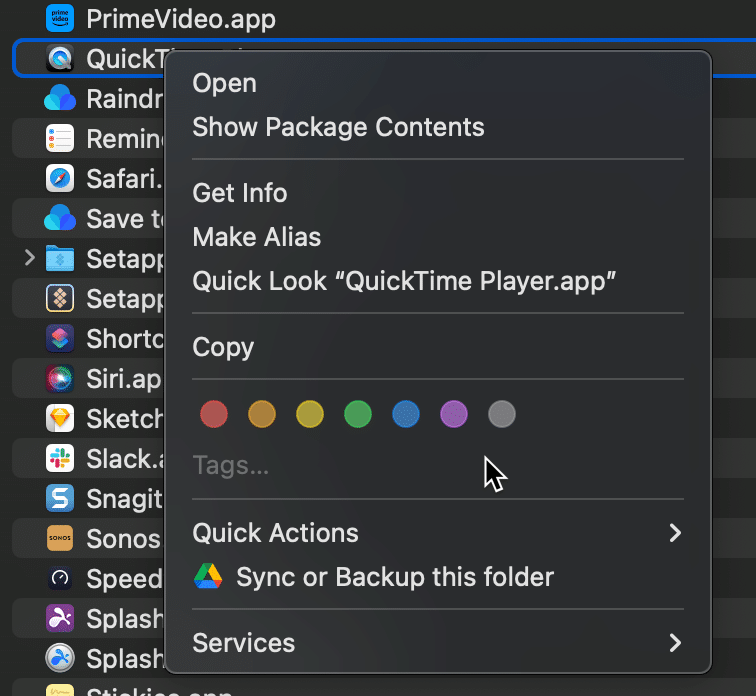
I’m unsure when Apple decided to make the change, but I believe it was in Ventura (13.x). But don’t worry; below are a couple of ways you can still launch and run multiple instances of QuickTime Player to record multiple video and audio input sources simultaneously.
Use a Terminal command to open multiple instances of QuickTime Player
In doing my research, I did uncover a simple Terminal command that will launch QuickTime Player, AND if you run the command multiple times, you will have multiple, simultaneous instances of QuickTime Player running.
Oh, and I’m no CLI (command line interface) master, so please don’t ask me any complicated questions about what the commands mean.
But this command accomplished precisely what I wanted – it launched multiple instances of QuickTime Player so that I could record multiple simultaneous input sources.

Here is the command:
open -n -a /System/Applications/QuickTime\ Player.app/Here is what the command does (according to ChatGPT):
This Terminal command for macOS accomplishes the following:
- open: This is a command-line utility on macOS used to open files, directories, or applications.
- -n: This flag indicates that a new instance of the application should be opened, even if there is already an instance running. It ensures that a separate instance of QuickTime Player is launched.
- -a: This flag specifies the application to open. In this case, it points to QuickTime Player.
- /System/Applications/QuickTime\ Player.app/: This is the path to the QuickTime Player application. The backslash (\) is used to escape the space in the application name. The space is escaped because the command-line interpreter treats spaces as separators between arguments. By escaping the space, the interpreter recognizes the entire string /System/Applications/QuickTime\ Player.app/ as a single argument.
So, altogether, this command opens a new instance of QuickTime Player on macOS, regardless of whether there are already instances running.
I couldn’t have described it better – haha! The key to the command line here is the “-n” switch, which issues the command to open a new application instance.
How to use the command:
- Open the Terminal app (usually located in the Applications/Utilities folder)
- Assuming you haven’t moved QuickTime Player from the /System/Applications/ directory, copy and paste the command listed above
- Hit Return or Enter to run the command
- QuickTime Player should launch (if there is an error, it may be because there was a typo in your command or QuickTime Player is missing or in a different location)
- Close the Open dialogue box and choose “New Movie Recording” (or “New Audio Recording” or “New Screen Recording”)
A quick note: you can use this command on other Apple applications. And remember, if there is a space in the name of the Application (or the name of the directory), use the “\” (backslash) to “escape the space,” meaning to ensure that it uses the space when executing the command.
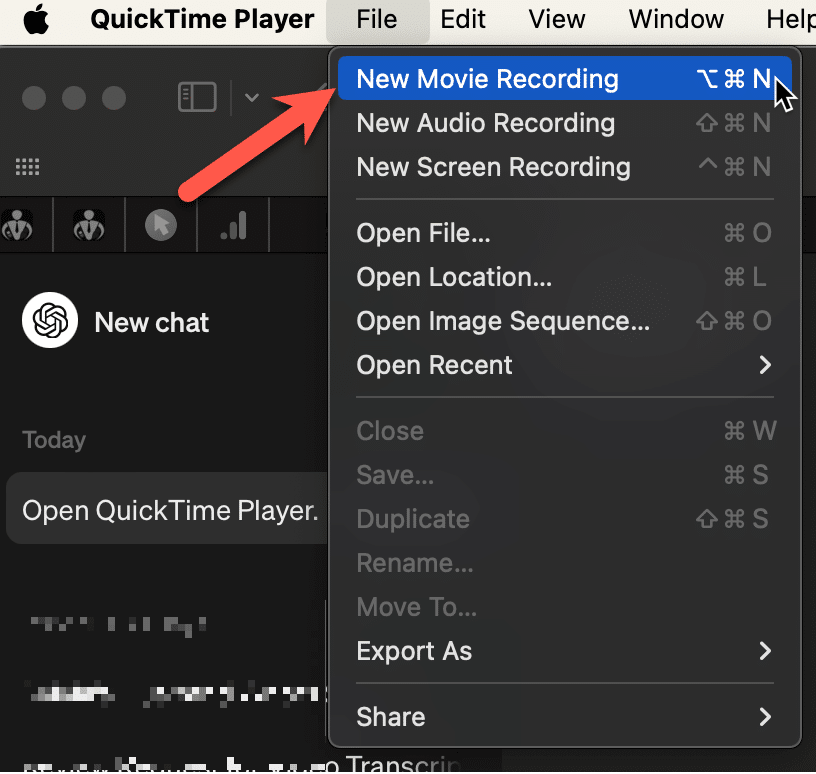
Want more instances of QuickTime Player running? All you have to do is rerun the command (and again) to launch new QuickTime Player instances.
Super easy, right? Well, as a BONUS, in the section below, I walk through how to create an “application” using AppleScript to do the same thing. And all you have to do is launch the AppleScript application!
BONUS: Use AppleScript to create an Application that launches multiple QuickTime Player Instances
If you will be doing this process over and over (launching multiple versions of QuickTime Player), consider quickly creating an AppleScript application to make your life easier. And it just takes a couple of minutes to set it up.
You will be using the same Terminal command listed above BUT with some slight modifications. What I will list out below will create an application that launches two QuickTime Player instances (you could have it do as many or as few versions of QuickTime Player as you want).
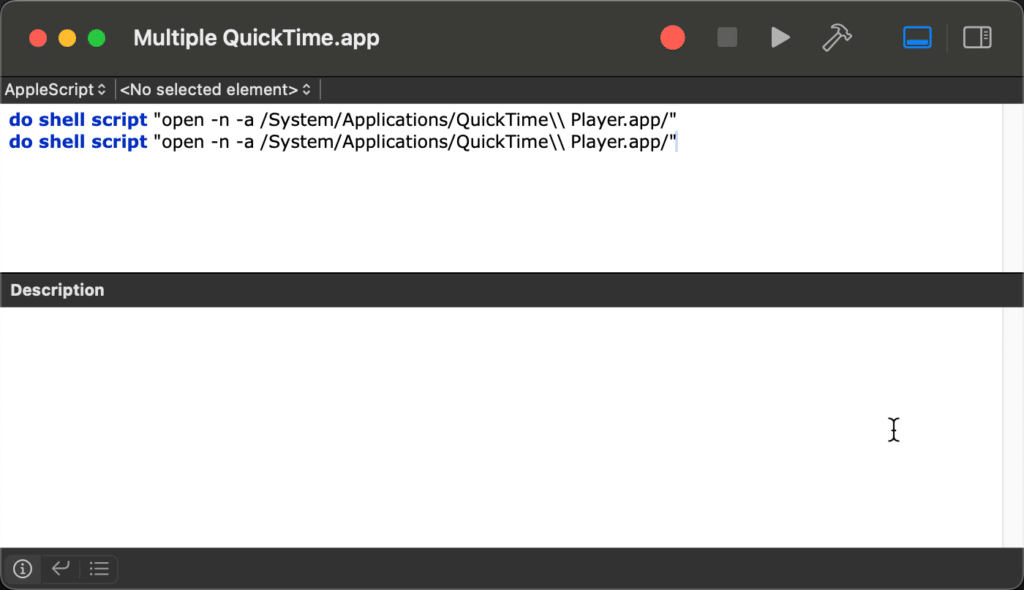
Here is the code you will use in AppleScript:
do shell script "open -n -a /System/Applications/QuickTime\\ Player.app/"Here are the steps:
- Open Apple’s Script Editor application (usually located in /Applications/Utilities)
- Select “New” from the File menu
- You will have an empty and untitled AppleScript script
- Copy and paste the code from above into the AppleScript section
- Add another line with the same command into the script if you want two instances of QuickTime Player to launch (the number of lines of that command will be equal to the number of QuickTime Player instances)
- When you have added all the lines you need, select “Save,” name your script, and choose “Application” as the File Format. Note that once you save, you will get some color context in your AppleScript
- That’s it!
Now, whenever you want to launch multiple instances (and that depends on how many lines you entered in your script), you just launch your new AppleScript application!
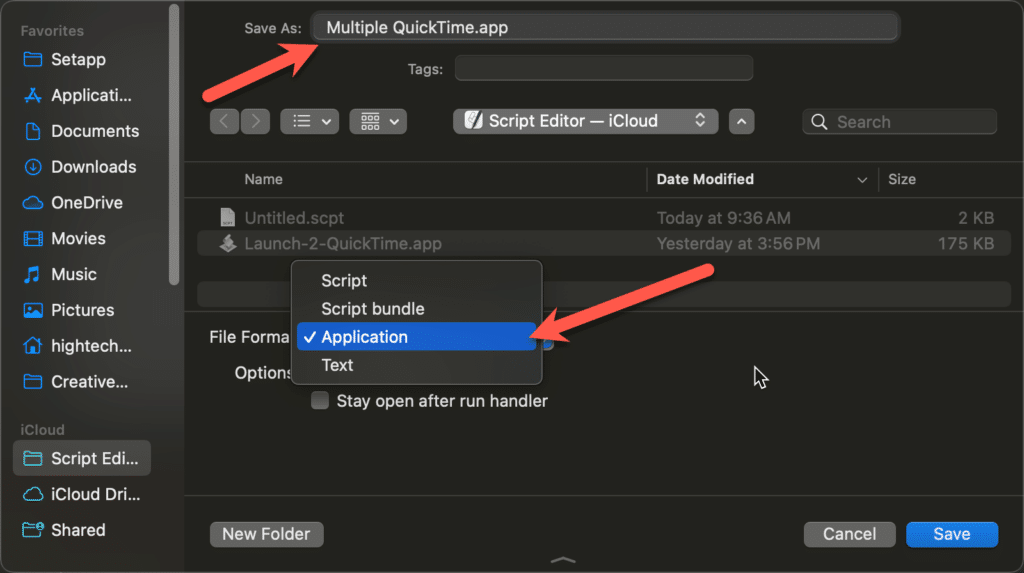
Here is a bit more insight from ChatGPT on the commands, AND it is important to note that you should use two backslashes for escaping the space (“\\”).
This AppleScript command opens QuickTime Player. Let’s break down the components:
- open: This is a command-line utility on macOS that is used to open files and directories or launch applications.
- -n: This flag opens a new instance of the application even if one is already running. It ensures that a separate instance of QuickTime Player is launched.
- -a /System/Applications/QuickTime\\ Player.app/: This specifies the application to open. Here, it points to the QuickTime Player application located in the /System/Applications/ directory. The double backslashes (\\) are used to escape the space in the application name, ensuring that the command is properly interpreted.
So, altogether, this command opens a new instance of QuickTime Player on the macOS system.
Additionally, I asked about the “do shell script” line, which you need in your AppleScript. In AppleScript, the “do shell script” command is used to execute shell commands from within an AppleScript script. This allows AppleScript to interact with the command line and perform tasks that are not directly supported by AppleScript itself, such as running shell commands, executing scripts, or interacting with command-line tools and utilities.
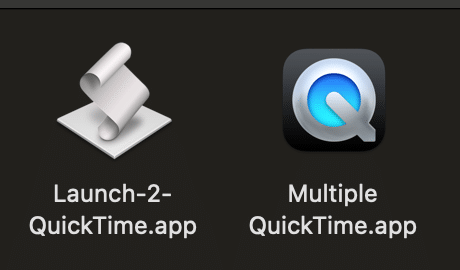
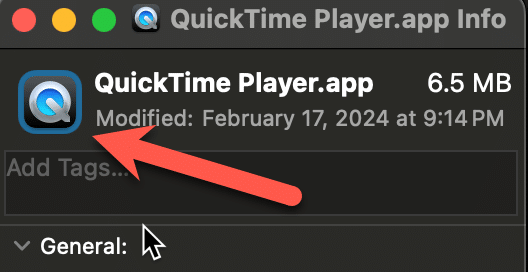
Lastly, if you want to be really fancy, you can change the application icon from the AppleScript icon to the QuickTime Player icon by following these steps:
- Do a “Get Info” on QuickTime Player by right-clicking the application and choosing “Get Info”
- Do a “Get Info” on your new QuickTime script.
- In the QuickTime Player Get Info box, click once on the small icon (NOT the Preview icon) until it looks like it is selected
- Copy the icon by clicking control-c on your keyboard
- Go to the AppleScript Get Info box and select the small icon so that it is highlighted
- Click control-v (paste), and the QuickTime Player icon should replace the AppleScript icon (note: if it doesn’t work, try the process again)
- Close both of the Get Info boxes
You should now have the QuickTime Player icon on your AppleScript. You can then just move that AppleScript application wherever you need it, and when you want to, just double-click it to launch multiple instances of QuickTime Player.
Hopefully, this all made sense and was easy to do. The end result is that you have either a Terminal command you can run to launch multiple QuickTime Players, or you can use your new AppleScript application to do the same thing!
Did this work for you? If so, how will you be using it? Will you be recording multiple simultaneous input streams from cameras or audio or your desktop? I will be testing it out soon on a webcam review. Leave a comment to let me know if it worked, how you will use it, or if you have any questions.
HTD says: this tutorial is an extremely easy way to allow you to record multiple video or audio input streams using AppleScript or Terminal commands using multiple instances of Apple’s QuickTime Player.
