As you probably have heard, this week, at the Apple WWDC 2017, there were announcements surrounding the latest and greatest bright and shiny things coming from Apple. From hardware to software to new services, Apple once again got everybody excited about what is to come in the next few months. And, if you have an Apple Developer account (or not), you now have access to the latest developer beta releases of MacOS (10.13 – “High Sierra”), iOS (iOS 11), WatchOS (WatchOS 4), and AppleTV OS (tvOS 11). I, much like many others, was excited to hear about some of the new and updated features of these various OS’s, so much so, that we quickly signed into our Apple Developer accounts to download and install these latest betas. And, while I cannot discuss these features that I experience in the betas (unlike other publications which seem to ignore the terms of the Apple Developer agreements), I do believe I can report on what I have seen others experience and my general impressions and recommendations when working with ANY type of beta software. So, I decided to write this article on tips, warnings, and advice when working with beta software. Note, this is specific to the recent Apple betas (iOS 11 and High Sierra).
Let me first start out by emphasizing that in order to install any of these Betas, you must have an Apple Developer account. These are not expensive. For Individuals, it is $99 per year and for Enterprises, it’s $299. Remember, these are account primarily for App developers. (I signed up so that I could get a headstart on articles prior to these OS’s being released – it’s helpful for me to understand potential confusion or concerns prior to others, I believe.) Regardless, I hold off on writing about features and functions until there is at least a Public Beta.
As a recommendation, if you are NOT an App developer but still want an early preview of these OS’s, you can sign up to get the Public Betas. These Public Betas are free and are usually a bit more stable than the Developer Betas. They don’t come out as frequently also. You can currently sign up for iOS 11, macOS High Sierra, and tvOS 11 through this program. Honestly, I highly recommend you take that path rather than the Developer route, especially if you are merely wanting to test any of these OS’s out.
But I wanted to compile some recommendations from my own experiences as well as from what I have read. This is a bit of a laundry list of items that I have thought about. Some are general thoughts while others are specific to some of the OS’s.
Tips, Warnings & Advice When Working with Beta Software
Let me preface this list by saying this is NOT exhaustive. If you have other tips or recommendations, I encourage you to leave a comment! But I figured I would start.
General Apple Beta Tips
First, some general tips.
- Use a test device – Don’t install a beta on an Apple device that you rely on day-to-day. If something goes wrong or doesn’t work, you may be left with what is known as a “brick,” meaning it just becomes a paperweight.
- Back up your device – If you have an iOS device (iPhone/iPad), be sure you have a full backup of everything! If you are installing on a macOS device (MacBook, MacBook Pro, Mac Pro, iMac), be sure you have a complete backup of that as well (using TimeMachine or a full copy of your Mac on an external drive).
- Note all of the device information prior to installing – Be sure you know everything about your device (model, ID’s, Serial Numbers, etc.). A while ago, I wrote an article about finding the UUID of your iOS device when you can’t actually access the device itself.
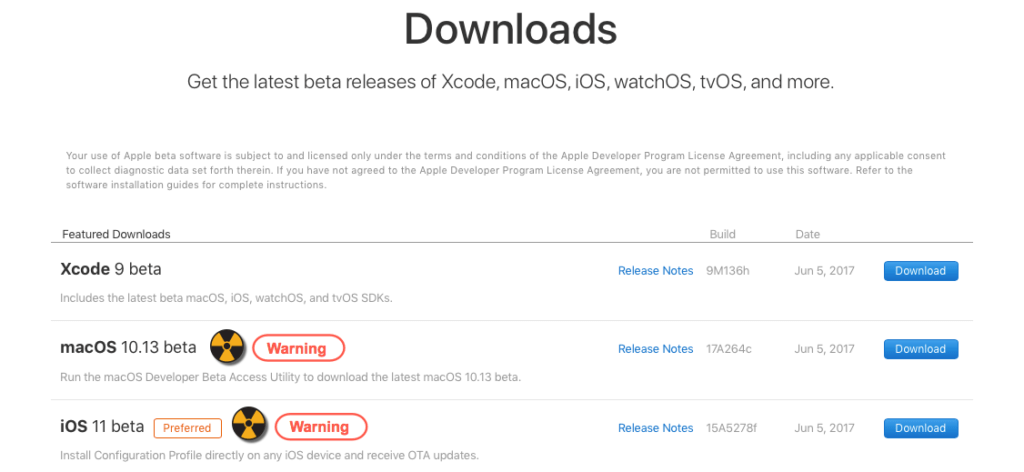
- Be sure you can get the beta – With iOS devices, you need a beta profile for your device. You need to set this up in your Apple Developer account. Similarly, for macOS, you need to be sure you trigger the appropriate beta download via your Apple Developer account. For iOS, once you install a valid beta profile, you can do OTA (Over The Air) updates.
- Do some end-user research prior to installing – Don’t just dive into things blind. Before installing a beta, do some searches to ensure compatibility, for example. Take a look at the user forums on Apple’s site or on 3rd party sites. Search for recent articles specific to the device you want to upgrade to the beta. In fact, a great place to look is in the Apple Developer Forums. While you can’t reply to messages there, you can see what people are talking about. Here are the Apple Developer Forum links for betas of iOS 11, macOS 10.13, tvOS 11, and watchOS 4. Note: these links may not be active in the future as Apple moves to the next version(s) of the OS’s.
- Later versions of the beta are generally better – I would recommend actually staying away from the first couple of releases of any beta. Let some of the major bugs be worked out first. Then take the plunge.
- Connect with a Developer or someone “in the know” – While this may be a bit more difficult, it might be helpful to “partner” with someone who has gone through the install process or who has deeper knowledge of the intricacies of Apple software and devices.
- Don’t “borrow” other people’s Developer accounts – If someone is “selling” or giving you access to their Developer account in order to install a beta, the owner of the account may be in violation of the Terms in the Developer agreement. If an account is shut down, who knows what may happen to other users “associated” with those accounts.
Ok, now that you are ready to install (or perhaps have already installed a beta), here are some things to expect and know.
macOS 10.13 “High Sierra” Tips & Observations
First let’s start with some observations and thoughts I have based on reviewing the Beta forums (and from my own experience), starting with macOS 10.13.
Here are some things about macOS 10.13 to watch for as well as some tips.
- Use as “generic” of a Mac as possible – If you have modified your Mac from how you purchased it, there is a good chance that initial macOS installs might not work. This happened to me, I believe because I have a TarDisk Pear installed (so my hard drive is sort of like a “Fusion Drive”).
- Make a backup prior to installing – I know that I already mentioned this in the previous list, but I cannot emphasize it more. Have a backup! And make another one!
- Do a clean install – If possible, don’t just “upgrade” your existing installation. Do a completely clean install. You can even do this on a Virtual Machine (VM) or a new partition of your hard drive or even onto an external drive.
- Know the recovery & other keyboard commands – Honestly, I couldn’t install beta 1 of macOS 10.13 (because of the Fusion Drive setup, I believe – but I did log a bug with Apple about it). My install got stuck in a loop where it would fail and retry and fail, repeatedly. So I had to think about ways to revert (like installing from fresh and restoring my info from a backup, or doing an in-place downgrade to Sierra). I highly recommend bookmarking this Apple Support page that has Startup Key Combinations for Mac. I used the Option-Command-R to do a re-installation from the Internet which worked perfectly (in fact, my system seems faster!).
- Your System will be slower – At least with earlier betas, there is a good probability that your system will seem sluggish. This could be due to a variety of causes like re-indexing or the beta not focusing on performance improvement or additional logging. Expect this.
- Not all features will work – Features will be missing or may not completely work as expected. So if you are dependent on something, don’t be surprised if it suddenly stops working. That is the nature of updating and fixing software. You tear it down first and then build it back up.
- 3rd Party Software/Hardware issues – Yes, there will be issues. Software and/or hardware could prevent installation from even taking place. Look at the forums. Sometimes very random things (e.g., a Sonos software install creates a FileVault user ) prevents install.
Again, these are some initial thoughts. I never was able to install the first version of the beta, but I’m waiting for the next ones to try again.
Apple iOS 11 Beta Tips & Observations
Now, on to iOS 11.
Many of the same tips and observations listed for macOS 10.13 can be applied for iOS 11. Again, it’s a first beta that I’m talking about here (but also, these observations and tips apply to subsequent betas as well).
- Use a newer device – While iOS updates do go back to previous iOS models, in order to really take advantage of some of the new features, it is helpful to have a newer iOS device.
- You will lose your jailbreak – I used to jailbreak many, many years ago. But I stopped simply because I wanted to use stock Apple releases. Jailbreaking introduces too many unknowns. If you do update, you will lose your jailbreak (but that should be obvious enough).
- Back up your iOS device – Said it before and I will say it again. Back everything up so if you have to roll-back and restore, you can. And I highly recommend doing a physical backup and not using an iCloud one.
- Free up space – Be sure to have a good amount of free space when you try the install. In fact, if you are doing an OTA update, you MUST have enough free space.
- Do a new install – While I elected to just do an upgrade, it is often better to do a completely fresh and new install. You can then restore from a backup. However, there may be some compatibility issues with the filesystem or other things that may prevent a restore. I have only run into the issue where my backup had a later version of the iOS than my iOS device and I had to update my iOS device prior to restoring the backup. Probably not the case here though.
- Things will be slow (initially) – Just like in the macOS section, initial versions of iOS betas may be quite slow. This, again, could be due to indexing (e.g., of photos or other items) or that the code itself is not focused on performance. Newer iOS devices will perform a bit faster.
- Your battery may drain quickly – The first version of iOS 11 REALLY drains your battery quickly. I noticed this and it is all over the Apple Developer forums as well. So, be sure you have a power supply handy (portable or plug). This will be optimized obviously in future beta releases.
- 3rd party apps might not work – As Apple transitions to new file systems or protocols, things might not work. I noticed this with Amazon Prime Videos that were downloaded. Playback just didn’t work. As App developers update their apps for the new OS, these will be corrected.
- Learning curves – I guess this applies to any of the betas. New functions may require old habits to be relearned. Be prepared for things not working as expected.
Well, obviously this is not a complete list. Again, I encourage you to leave feedback or comments, or even any observations IF you have taken the plunge to install one of these Apple betas. As I previously said, betas only get better as more people test and report issues and bugs, as well as when apps are updated to support new features. Also, I did not touch upon tvOS 11 nor watchOS 4 as I don’t have as much experience (yet) with those, but many of the tips above still may apply.
I do hope these tips help those users who are considering installing Apple betas, as well as those who have already installed them. Yes, all of this is bright and shiny, and the experience using an Apple beta can be a positive one, provided you do some work ahead of time thinking things through. (And a note, the warning graphics on the images above were added by me merely for emphasis!)
HTD says: Embracing new technology, software, and hardware doesn’t have to be scary or disastrous, provided you take adequate preparation steps, know what to expect, and understand that betas are betas – they are NOT production releases.


