Just the other day, my wife asked me a tech question that I really didn’t know. And I should have. It was: “how can I get my iTunes playlist onto my iPhone?” It seemed relatively straight forward. She had created several iTunes playlists on her PC but she just couldn’t sync it over to her iPhone. I quickly tried a few things that had worked in the past, like trying to check off playlists to sync via a manual sync, but I too, couldn’t seem to get it to work. So I got to thinking, maybe there were others struggling to get their iTunes Playlists to sync as well. I decided to dive into it a bit deeper and figured I would document the process that worked for me.
What I discovered is that it is actually quite easy to do, once you know how to do it. And with the magic of the iCloud Music Library, you can update and sync all of your iTunes playlists across all Apple devices. But getting this is the challenge. But have no fear, here’s how I did it. Hopefully this will work for you but it does have some prerequisites and requirements.
My current setup includes an Apple Music’s Family plan (for $14.99/month for up to 6 “family” members). It’s a great deal if you want to have access to Apple’s library of music from any of your devices. For the iTunes playlist syncing via the iCloud Music Library to work, you must subscribe to Apple Music or use Apple iTunes Match (there is an individual plan for $9.99/mo). NOTE: I’m fairly confident that this is required – and correct me if I’m wrong – for the iTunes playlist syncing to work. If you don’t subscribe to Apple Music or Apple iTunes Match, you probably need to follow the traditional way of syncing iTunes playlists.
I’m not trying to upsell Apple Music or iTunes Match in any way. But it does have a lot of cool features like allowing you to download music that you “own” to other Apple devices you have. Alternatively, you could use Apple’s iTunes Match which lets you upload all of your music to Apple’s cloud and then you can download your “owned” music to other devices of yours. This service costs $24.99/year. You CAN use both services and there is an Apple Knowledge Base article that describes the two services.
You DO need to have an iCloud account in order for the iTunes playlist sync to work, obviously, as it is required for Apple Music among other things.
So those are the only requirements: an iCloud account & an Apple Music subscription/iTunes Match to enable automatic iTunes playlist syncing.
How to Set Up iCloud Music Library Syncing
Before you can set up an iTunes playlist that syncs automatically, you need to be sure your iCloud Music library is set up on your various devices.
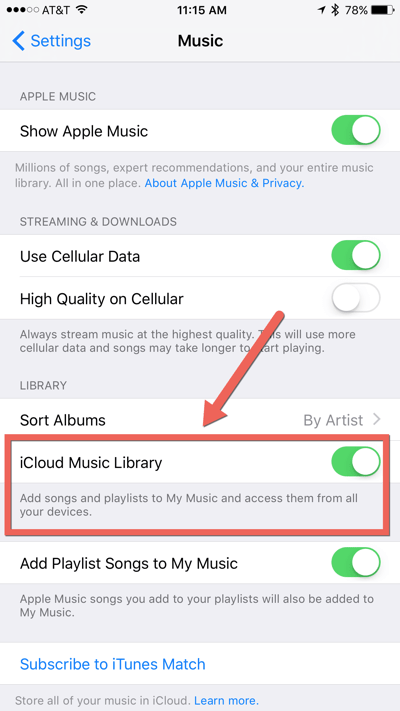
On your iPhone or iPad, go to: Settings > Music and then turn on “iCloud Music Library”.
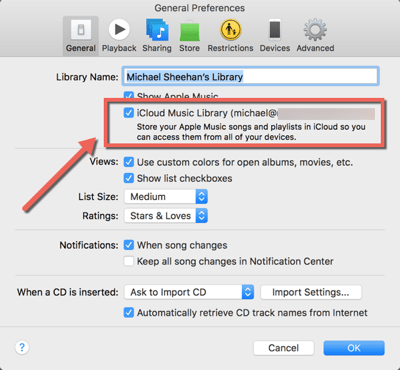
On your Mac, within iTunes, go to “Preferences” under the iTunes menu and check the “iCloud Music Library” setting under the General tab. On your PC, go to the “Edit” menu and choose “Preferences” and on the General section, check the “iCloud Music Library” setting.
It is critical that on your computers AND ALSO on your iOS devices that you are using the SAME iCloud account! Otherwise, you won’t be able to sync iTunes playlists across devices.
You may be prompted to synchronize and/or merge your iCloud Music Libraries. I would recommend doing this but if you do, you may get some duplicate playlists or songs or other items once you do merge them. It’s easy enough to clean up later.
Creating an iTunes Playlist on your Computer
Once you have enabled the iCloud Music Library, now you can create iTunes playlists which synchronize across your various devices. First, I will walk through the creation of a playlist on a Computer, my Mac, specifically.
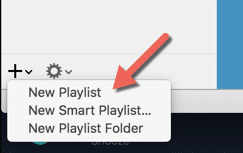
Within iTunes and the “Music” section, go down to the bottom left corner and click the plus icon. This will show you options for iTunes playlists: New Playlist, New Smart Playlist and New Playlist Folder. Choose “New Playlist.”
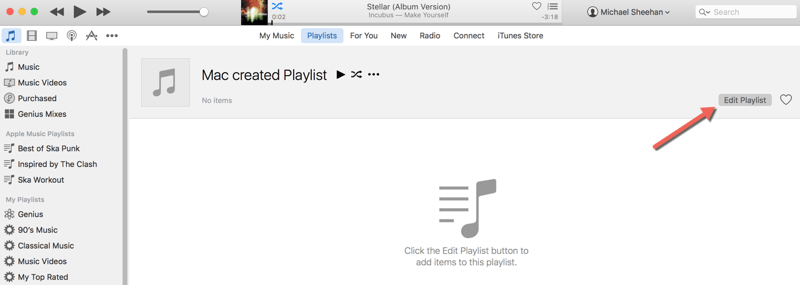
Then, type in a name for your iTunes playlist. In this example, I named mine “Mac created playlist.” Then click the button “Edit Playlist.”
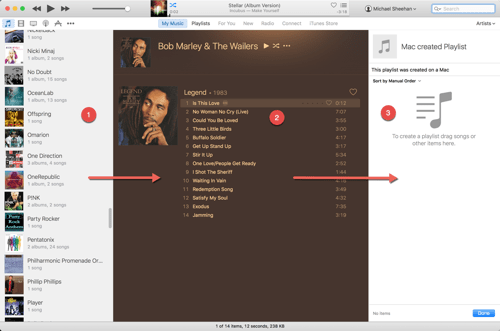
From there, it is a 3-step process to add various songs or albums to you new iTunes playlist. I had my music sorted by Artist. So, starting on the left (#1 below) and I clicked on the Album. Then I selected the song(s) I wanted in the playlist (#2) and dragged the song(s) over to the right into my playlist (#3). That’s it!
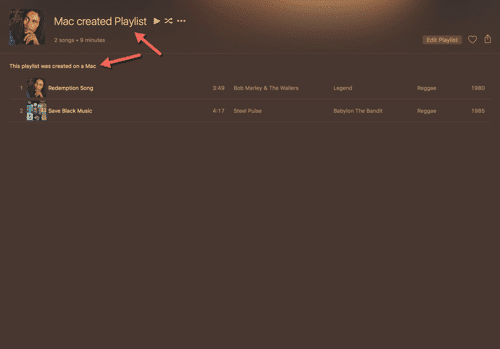
Once you are finished creating your iTunes playlist, just click “Done” at the bottom and your iTunes playlist will not only be created, it will sync with the iCloud Music Library and start populating your other connected Apple devices.
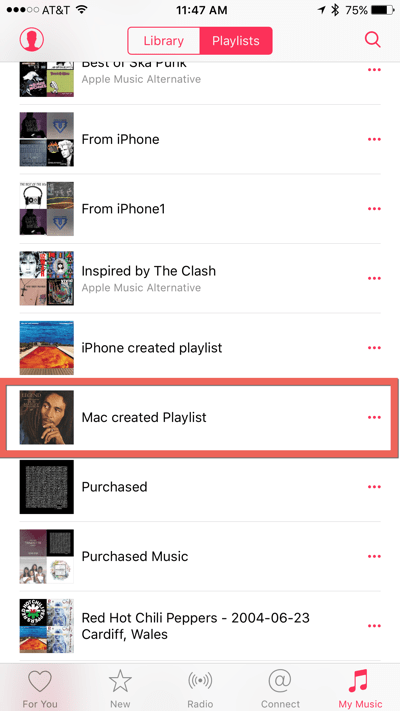
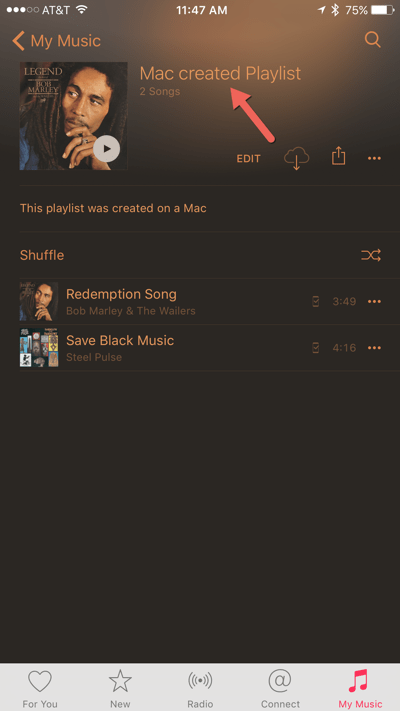
I then checked my iPhone and the new “Mac created playlist” appeared within the “My Music” – Playlists section.
Clicking on that iTunes playlist on my iPhone shows the same songs (obviously) as the one I created on my Mac.
You do have the ability to edit the iTunes playlist on your iOS device as well if you want to.
Creating an iTunes Playlist on your iOS Device
The process for creating an automatically syncing iTunes playlist on your iOS device is practically identical as on your computer. First, open the Music app. Then go over to the “My Music” section by clicking on it at the bottom of your screen. Once you are there, click on the “Playlists” tab. At the top of your playlists, you will see a “+ New Playlist.” Press this to create a new iTunes playlist.
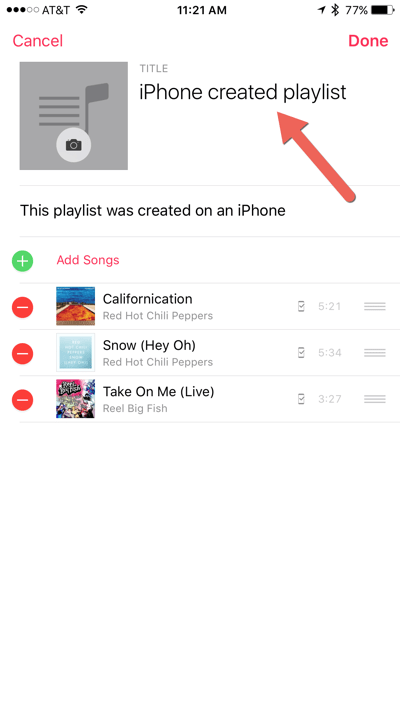
Once you are in the playlist editing mode, you can type in the name of your iTunes playlist (I used “iPhone created playlist” in my example) and you can add an optional description.
Then you click the green plus icon to add music to the playlist from the ones available on your iOS device. You can easily add entire albums or artists or individual songs. Once you have finished, just click “Done.”
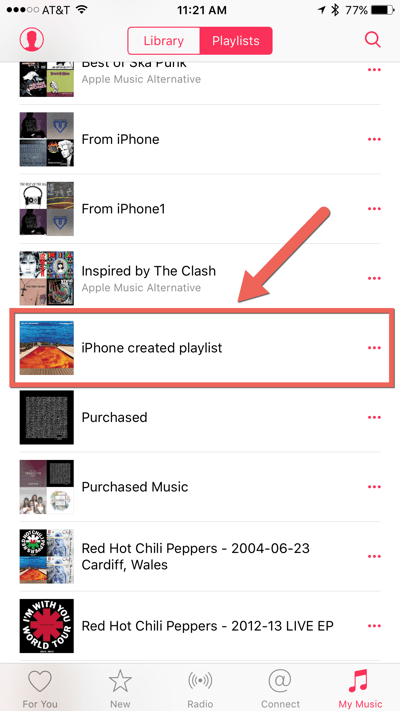
Your new iTunes playlist will appear.
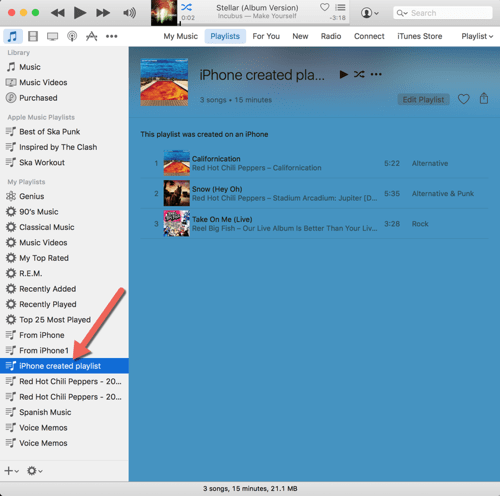
And, like magic, the new iOS-created playlist will show up on your other devices like your computer.
That’s it! Pretty easy, right? It wasn’t for me, initially but now my iTunes playlists are seamlessly integrated and automatically up-to-date!
BONUS: Understanding iOS Music Icons
One of the great things about having a subscription to Apple Music is the fact that if I don’t physically have a song or album on my iOS device, I can stream it from the Apple Music cloud. (WARNING: streaming music will incur cellular charges if you are NOT connected to WiFi!).
Also, with the Apple Music subscription, I can actually download music I haven’t actually purchased and use it for offline playback. Think of it as renting or borrowing a book from the library. You MUST have an active Apple Music subscription in order to do this though. If your subscription expires, your “rented” music will go away.
So why is this important? Well, if you set up an iTunes playlist on your computer where you probably have a LOT of music stored on your hard drive, some (or all) of that music might not be physically stored on your iOS device.
Have no fear. The Apple Music subscription lets you stream even the music on your playlists. You can optionally download the music to your iOS device if you so desire as well.
This is great, right? But how do you know what is or isn’t stored on your device? Apple tries to help you out here, but if you don’t know what you are looking for, you might miss it (and also think you are playing music locally but actually streaming it incurring cellular charges potentially).
Here’s a quick primer on the icons.
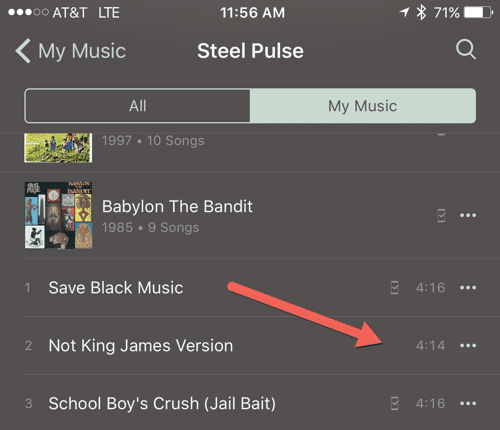
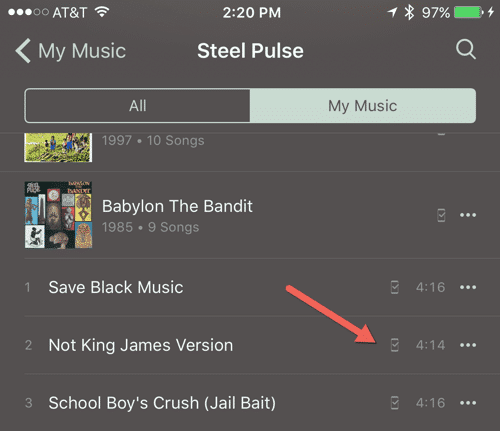
The image below shows one song (“Save Black Music”) as being physically on my iPhone. (Note the tiny iPhone icon with a check mark.). The song directly after it (“Not King James Version”) does NOT have that icon, meaning it isn’t on my iPhone.
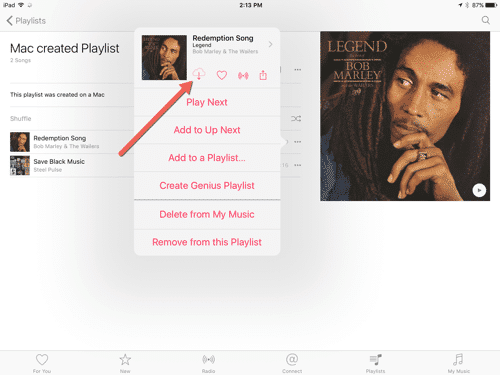
To download that song, click on the three dots on the right and click on the cloud with a downward pointing arrow. Below is how it looks on my iPad.
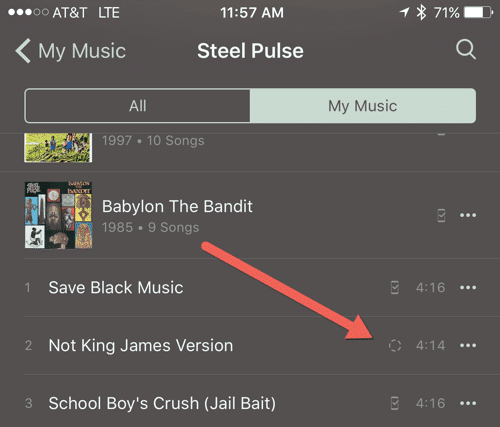
Once you click the download from cloud icon, you will see that the song is preparing to download.
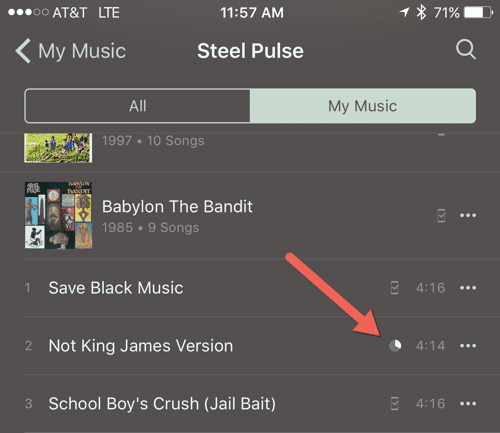
And then it will show as downloading as a pie chart with the progress.
Once it has downloaded, you will see the tiny iPhone icon with a check mark for that particular song or album.
There! Now you are an expert!
If you have any questions or comments about this process, please feel to leave a comment. I’m sure that I missed something or there might be some little thing that may be different in your setup. Regardless, as I have always said, there is a solution to just about everything. You just need to be patient and look for resources to help you.
HTD says: While some tech items claim to be “easy” and “simple,” sometimes they just aren’t. That is, until you figure them out!



1 comment
Scott St. Onge
Excellent article. Thanks, hightechdad.