For the past few months, I have been using the Apple Watch Series 3. But I have been a bit lazy. I have kept it tethered to my iPhone so I haven’t really been using it to its full capabilities. I have the cellular version which has its own number which is magically hidden and mirrored to the actual number of my iPhone. So, if I get a call on my iPhone, it magically rings on my Apple Watch, even if the Watch is not directly connected to my iPhone. I just don’t seem to go anywhere without my iPhone. (But, I may try turning off Bluetooth on my iPhone and have the Watch still be physically next to me.) Regardless, as I spent more time testing out the Apple Watch Series 3, I started to uncover a bunch of features I didn’t even know about. And some of these features work on the earlier models of Apple Watches (while some are specific to the Series 3). Those who use their Watch all of the time will probably simply say – yep, knew about that feature – but for the rest of you who may have received one as a gift over the holidays, or just picked one up, some of these Apple Watch Series 3 tips might be completely new to you.
I do have to say, having used the Series 1 for a couple of years, the Series 3 is quite a jump. There are two huge things that truly stood out to me. For starters, the battery is so much better. With my Series 1 (and granted, it is a bit old now), by the end of the day, my Series 1 was gasping for a charge and so every night, I took it off to get it charged back up. With the Series 3, with the same amount of usage, I still had enough battery to keep wearing it through the night and into the next day. The battery is that much better!
The second thing that I really like about the Series 3 is the fact that it is truly much more water resistant. You can swim with it or wear it in the shower. There is even a way to lock the touch screen when doing water activity and then push out any water from the speakers or mics using audio tones when you are finished.
Those two main observations aside, the more I play around with the Apple Watch S3, the more things I am discovering and actually starting to use. So, for those who are new to the Apple Watch, or for those who have been just using the most basic functions, I would like to offer up some Tips & Tricks that you may not (or may) know about. And, if you have any other Tips/Tricks that you have discovered, be sure to leave a comment to share with others.
Here’s the high-level list:
- Unlock your Apple Watch by Unlocking your iPhone
- Use your Apple Watch to automatically unlock your Mac
- Play music from your Watch to Apple AirPods
- Pair multiple Apple Watches with a single iPhone
- Take Apple Watch screenshots (or not)
- Take photos with the Apple Watch (err…your iPhone)
- Dismiss notifications from Watch without removing them from your iPhone
- Use your palm to dismiss notifications or calls
- “Peak” at your Watch screen
- Siri now talks on the Series 3
- Sometimes you need to Force-Restart your Watch
- Make Mickey or Minnie say the time
- Use Theater Mode
- Stream Music via cellular
And now, on to the details!
14 Apple Watch Tips & Tricks
First of all, these aren’t in any type of order other than as I thought of them. Some are very minor. Some are merely recommendations based on my personal preference. And others are things that I personally didn’t even know about. Take your pick! And I do hope they help you get more out of your Apple smartwatch investment. You really should use your tech to its fullest capability.
#1 – Unlock Your Apple Watch by Unlocking Your iPhone
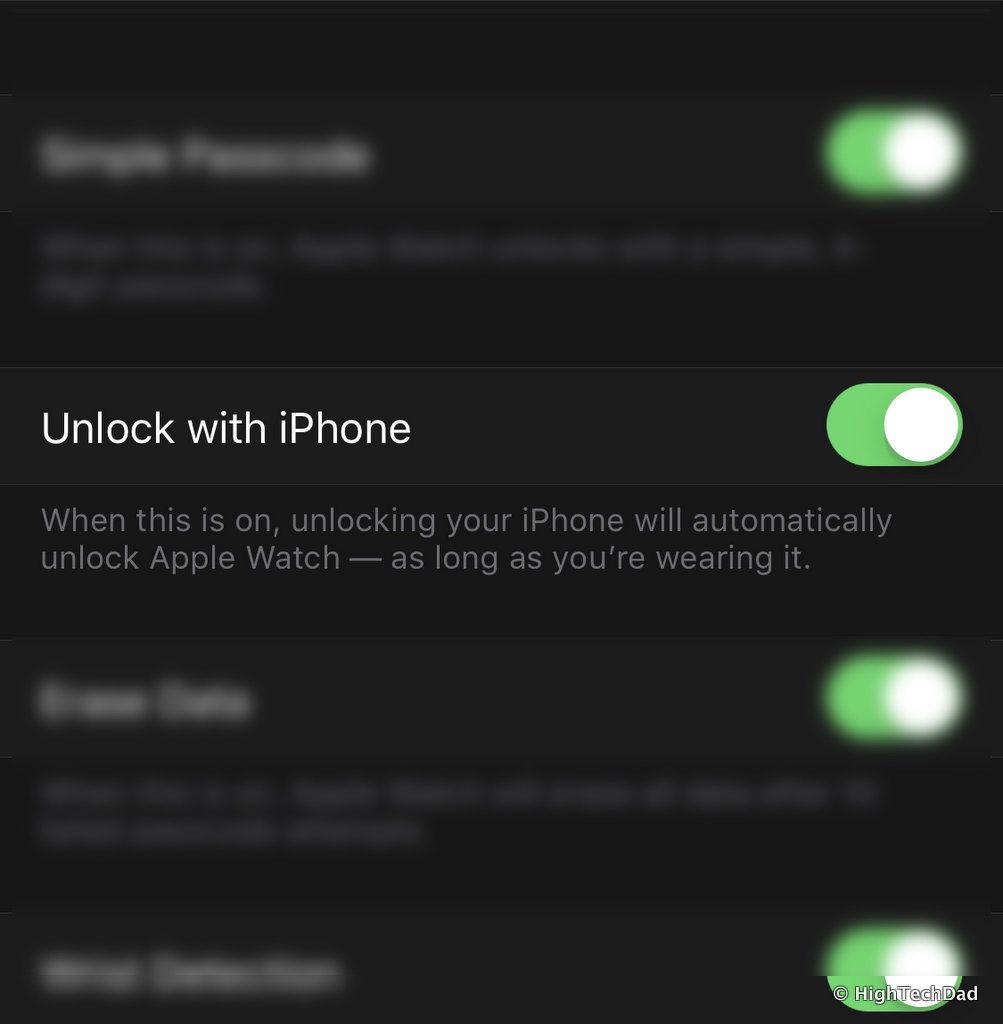
Buried down in the settings of your Apple Watch is a toggle that, when active, will allow you to automatically unlock your Apple Watch when you unlock your iPhone. Best security practices are that you have passcodes on everything. Your data, financial, and personal information should be protected. (I would recommend you enable 2-factor authentication on your Apple account as well but that’s another story.) So, assuming you have a passcode on your Apple Watch, you probably are a bit sick and tired of having to always tap in that passcode when you put your Apple Watch on.
Well, if you enable this setting on your Apple Watch (which you can do within the Apple Watch app on your iPhone), if you put on your Apple Watch and you see it isn’t authenticated, just unlocking your iPhone (via a passcode, TouchID, or FaceID) will automagically unlock your Apple Watch. This also assumes your Apple Watch is paired and connected to your iPhone. It’s a subtle thing, but it’s also one less set of passcodes you need to type in. And yes, you can also go into your Apple Watch settings on the Watch itself to enable this.
#2 – Use Your Apple Watch to Automatically Unlock your Mac
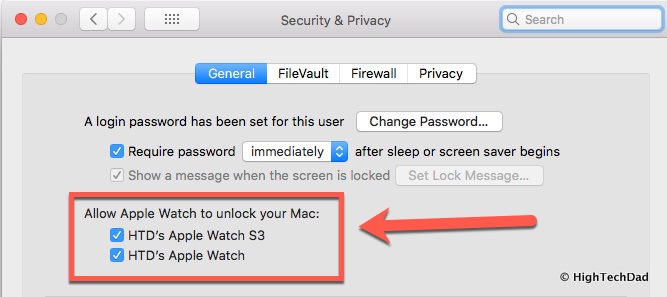
I have to say, I absolutely love this feature. You don’t have to have a Series 3 to do this. It works with older Apple Watches as well. But again, this works to the authentication circle that Apple has set up. The big caveat here is that you must be logged in and authenticated with your Apple iCloud account on your devices. In this case, your Apple Watch and your Mac must all be authenticated and logged in with the same iCloud account. And, most importantly, you MUST have 2-Factor Authentication set up on your iCloud account, otherwise, this won’t work.
To set this up, be sure you are logged in to iCloud on these devices. Then, on your Mac, go to System Preferences > Security & Privacy, and then in the first tab (General), look in the section “Allow Apple Watch to unlock your Mac”.
The nice thing is, if you have multiple Watches, you can have each of those used for authentication. And, you can do this on multiple Macs. A thing to note, the authentication doesn’t always work. I would say though, 9 times out of 10, it does. So that is a set of keystrokes you can avoid typing on your Mac when you have that enabled.
#3 – Play Music from your Watch to Apple AirPods
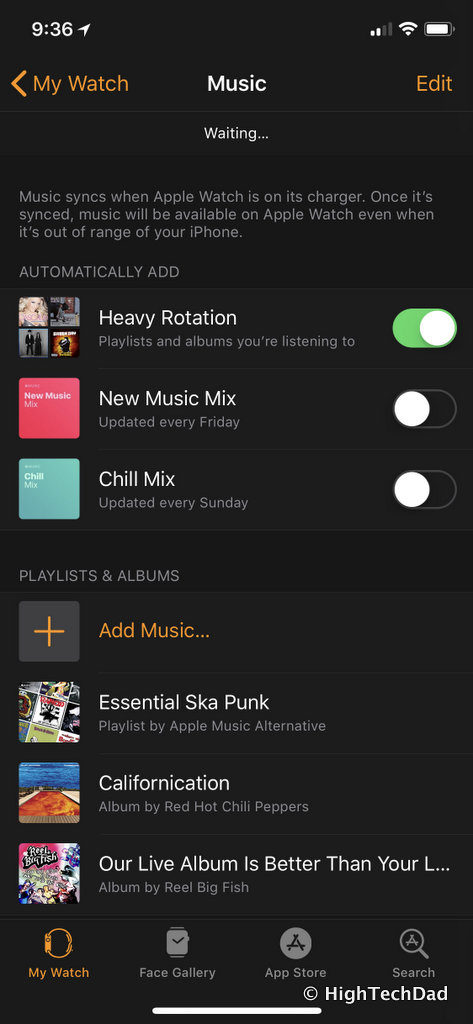
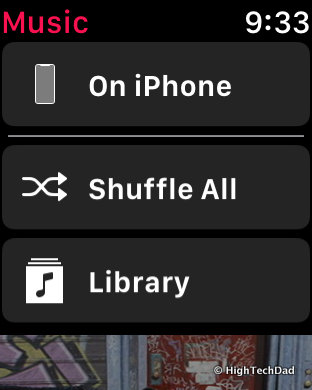
One of the nice things about the Apple Watch is that you can store some of your music on it. And, with the Watch Series 3, you have increased capacity to store music. The Series 1 has 8 GB of storage available. And the Series 3 has 16 GB of storage (for the Cellular/GPS version) and 8 GB (GPS-only version). So, while it is not a huge amount of storage, it is enough for a few hours of music, even enabling you to leave your iPhone at home. (As an added bonus, if you have the Cellular version, you definitely can leave your iPhone at home since you don’t have the need to tether.)
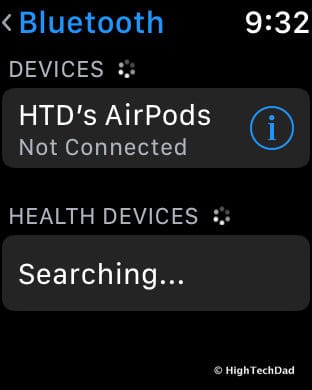
So great! You have music on your Apple Watch. But how can you listen to it? Simple enough, you can connect compatible Bluetooth headsets to your Apple Watch and listen directly from it. What’s even nicer is if you have Apple AirPods since they will automatically appear in your Bluetooth devices on your Apple gadgets that are sharing the same iCloud account. It’s almost magical. If you have some AirPods, just connect them to one Apple device, and they will show up on all your other Apple devices, including the Apple Watch.
#4 – Pair Multiple Apple Watches with a Single iPhone
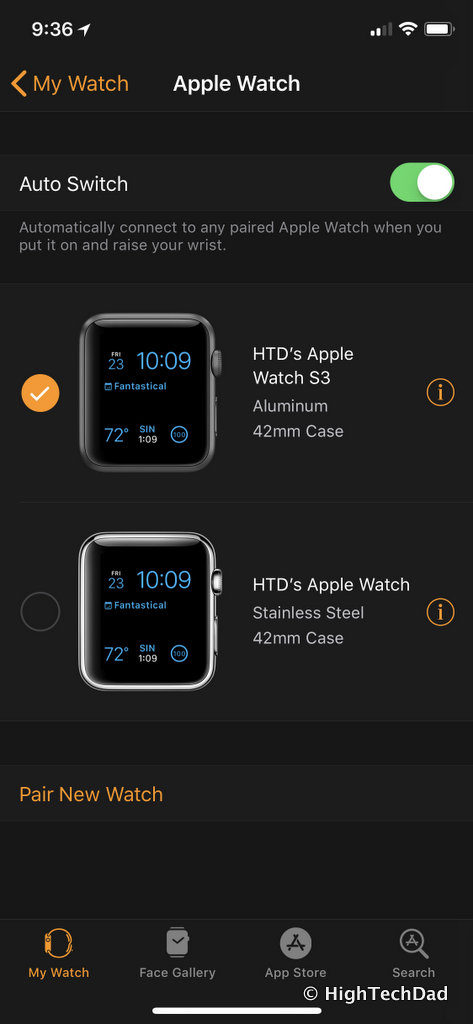
Have two Apple Watches? With previous versions of iOS and watchOS, you couldn’t pair two of them simultaneously. Let’s say perhaps you have a fancy Apple Watch for during the day and evening and an Apple Watch Nike+ for when you do all of your workouts. Now, you have the ability to have both of them paired with your iPhone. This is nice because you can easily manage the settings and interfaces directly from your iPhone. And, if you have health data being tracked on your Watches, that data is combined in the Health app!
To make things even nicer, if you turn on the “Auto Switch” function, your iPhone will automatically detect which Watch you are actively using. It’s just one last thing to worry about. You can also manually switch to the Watch of your choosing within the Apple Watch app on your iPhone.
#5 – Take Apple Watch Screenshots (or Not)
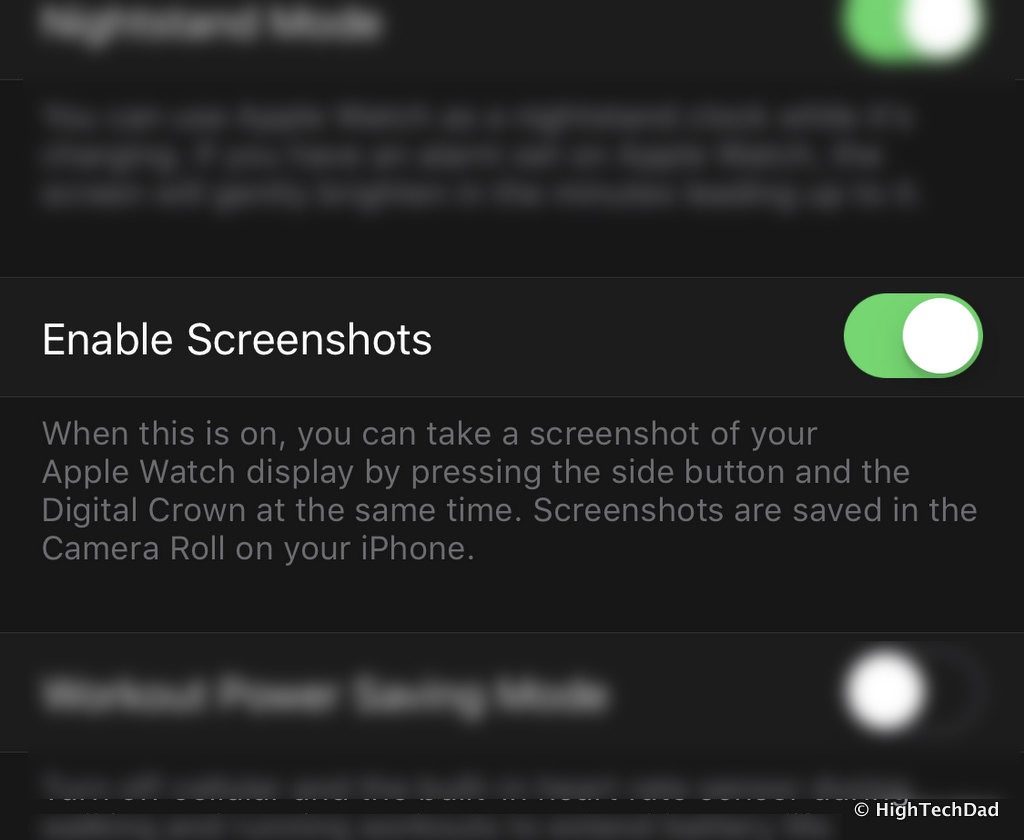
Ever since early on, you can take screenshots on your Watch by clicking the Digital Crown and the button directly below it simultaneously. This is a great feature to have, especially for people who do reviews or articles like this. Once you do a screenshot, it magically appears in your Camera Roll on your paired iPhone.
I left this setting enabled for the longest time. But I started noticing a lot of random screenshots filling up my Camera Roll feed. As it turned out, I was accidentally triggering screenshots when I was putting on my backpack. The two buttons kept getting pressed. So to save my camera roll, I actually have turned off this setting and only enable it when I need to do articles or reviews. My recommendation is to turn it off and only turn on when you really have a need.
#6 – Take Photos with the Apple Watch (err…your iPhone)
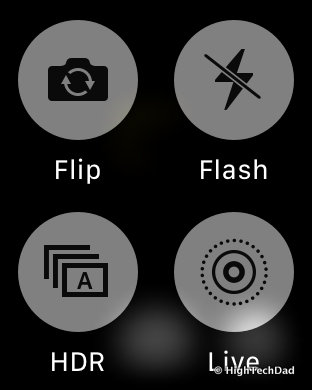
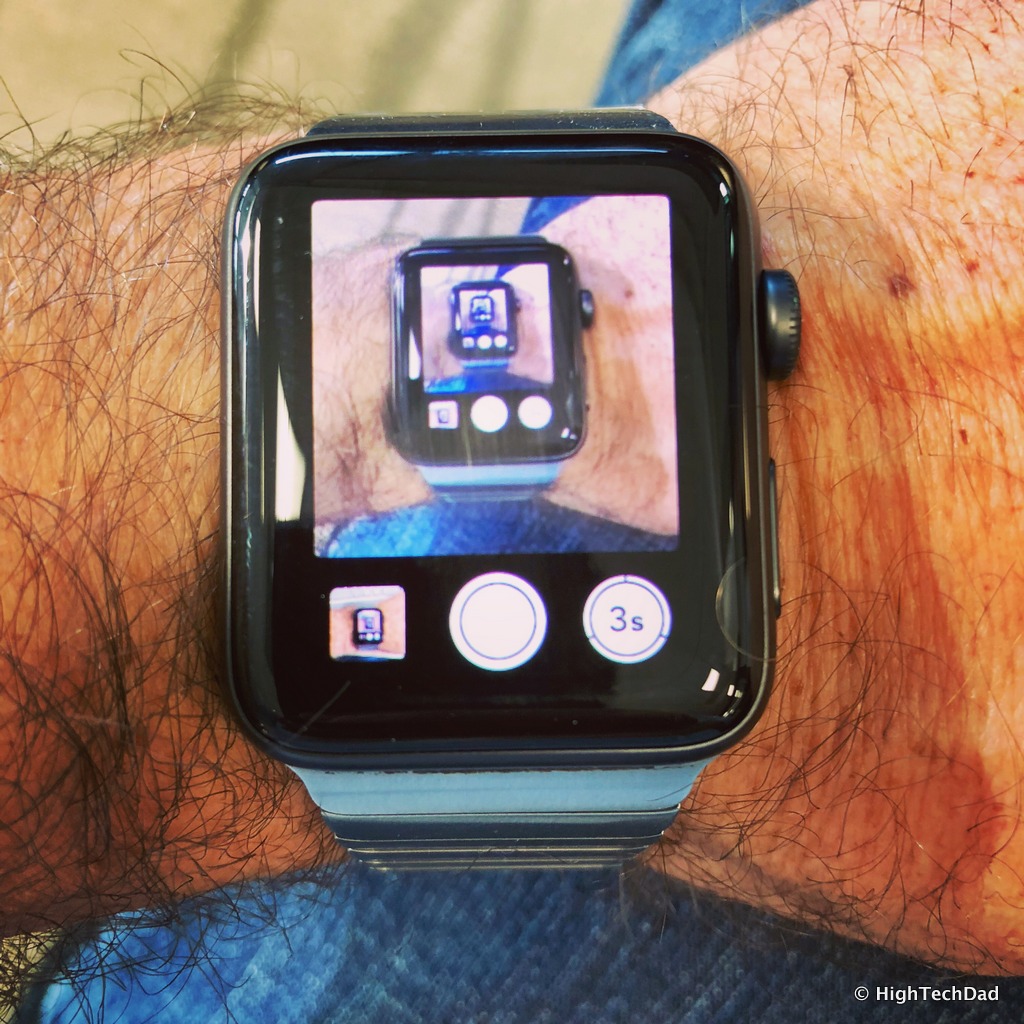
The Watch has a Camera app. But, there is no actual camera built into the Watch. But through some connectivity magic, you can not only control your paired iPhone’s camera and actually use the Watch to trigger a photo, you can also see what your camera is displaying. For example, I had my iPhone in its charger and launched the Camera app on my watch and took this selfie.
The initial view when I launched the Camera app was the wrong camera, but if you Force Touch the app, there are some additional options you can use, so I flipped the camera.
The Camera app acts pretty much like a remote shutter and viewfinder. Very nice feature to have.
#7 – Dismiss Notifications from Watch without Removing them from your iPhone
This is a very subtle little tip. Based on how you configure your notifications (I have many of my iPhone notifications mirrored on my Watch), when you dismiss a notification on your Watch, the notification is dismissed on your iPhone as well.
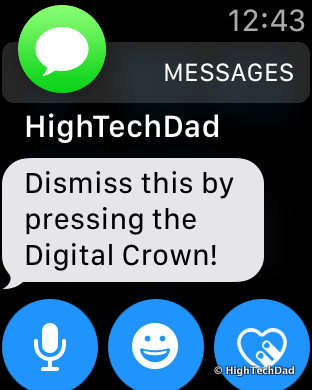
This is great if you simply don’t want to see repeated notifications across your devices. However, what if you want to just dismiss the notification on your Watch, and still have it appear on your iPhone, all that you need to do is press the Digital Crown instead of pressing the Dismiss or Dismiss All action.
#8 Use Your Palm to Dismiss Notifications or Calls
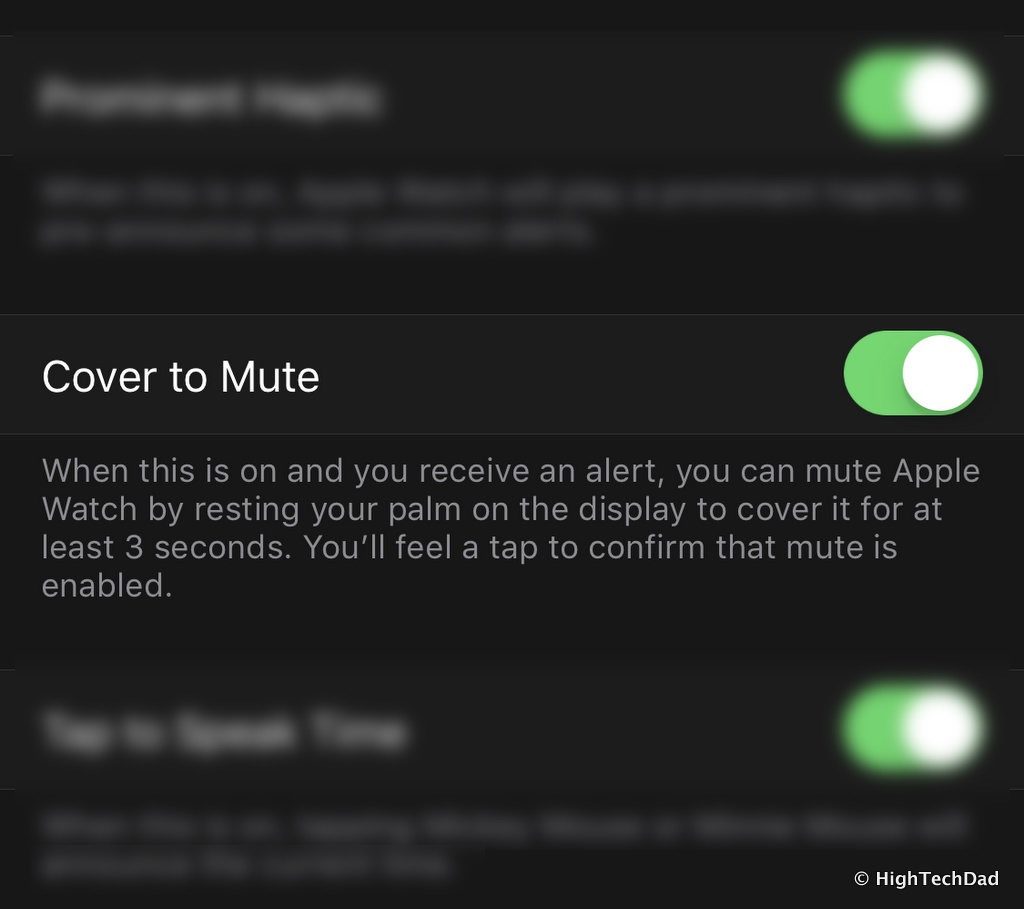
One of the worst things is getting disturbed by a phone call or a notification when you are in an environment where that would be bad. A prime example is if you are in a theater where it is dark. If you get a call or a notification, one of the most intuitive actions you might do is cover your Watch. In fact, if you have this exact setting enabled on your Watch, it will mute notifications that are coming through. Turn this setting on, and then when you get a notification, just hold your palm over or on top of your watch and it will become silent. (Also be sure to read tip #13 below!)
But another nice thing about this feature is, it turns off the display almost immediately. So, if you do glance at something on your Watch, and you don’t want to wait for your screen to time out and turn off, just rest your palm on the display for a second or two and the display will turn off.
#9 – “Peak” at your Watch Screen
Since we are talking about trying not to disturb people when in a dark environment (theater, night time, etc.), this little tip makes a lot of sense. And, unfortunately, I don’t have a pretty photo or screenshot to show this. Basically, instead of tapping on raising your wrist to turn on the Watch screen, or pressing on one of the buttons, all you need to do is slowly turn the digital crown. As you turn the crown, the screen will slowly un-dim. Basically, it’s a way to turn on your screen gradually which is ideal in a dark environment.
#10 – Siri Now Talks on the Series 3
I must say, I didn’t use Siri that much on my Series 1 Watch. And this is probably because it was pretty much a one-way conversation. You could press and hold the Digital Crown to activate Siri and then issue some commands. And you would see the feedback on the screen. But for me at least, I didn’t really feel that engaged with Siri.
This all changes now with the Watch Series 3. Siri has actually gained a voice and as a result, this new interaction is much more of a conversation and therefore, much more useful and helpful. And, coupled with the intuitive gesture of raising the Watch to be closer to your mouth (for speaking), saying “Hey Siri” seems to activate much better than with the Series 1. Also, because of this better processing power, I actually don’t wait for Siri to respond after initiating my following commands. I simply chain it all together as one sentence – “Hey Siri, send a text to my wife saying I will pick up the girls.” And Siri does all of this quickly and confirms it vocally.
#11 – Sometimes You Need to Force-Restart your Watch
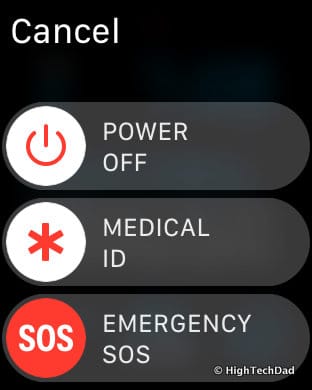
We all know how to power off (or on) the Apple Watch. Simply press and hold the button below the Digital Crown until the Shut Down screen displays. From there you can shut down your Watch. If your Watch is off, pressing that same button will turn your Watch back on.
But what about when your Watch simply locks up and doesn’t respond to shutting down button presses or anything? Or perhaps it is stuck with the Apple logo and doesn’t seem to want to complete a start-up process? Well, if you press and hold both of the buttons (Digital Crown and the button below it) for several seconds, that will force your watch to restart.
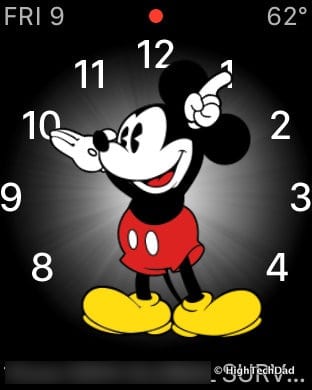
#12 – Make Mickey or Minnie Say the Time
Many people might consider this to be an Easter Egg, but it actually isn’t hidden away. You can enable this fun little feature within the settings. And, this is a great feature if your kids are starting to learn how to tell the time (on an analog clock). You need to turn on the setting AND you need to have the Mickey or Minnie Mouse watch face active.
Then you just tap on the watch face and Mickey or Minnie will speak out the time…in their voice!
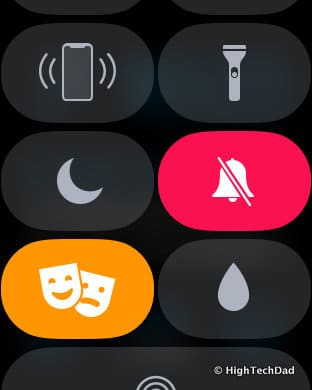
#13 – Use Theater Mode
While previously I gave some tips on how to be a good citizen when you are in a dark environment like a theater, Apple has actually enabled a new mode which is different than the Mute, Do Not Disturb, or Airplane modes. It’s called Theater Mode. When you enable this, you still get your notifications as vibrations so as not to disturb those around you, you do NOT get the bright light that comes from a notification coming up on your screen.
This toggle is in the Control Center of the Apple Watch. When Theater Mode is active, the screen remains dark until you tap on it (or on a button). Don’t forget tip number #8 above to quickly turn off the screen!
#14 – Stream Music via Cellular
With the Cellular/GPS version of the Apple Watch Series 3, you have the ability to stream music from your Watch using your cellular connection as your data source. This feature is designed for athletes in mind or people who don’t always want to lug around their iPhone for connectivity. With the Series 3 Apple Watch (the one with cellular), just take your Bluetooth earbuds or your Apple AirPods with you, have them paired with your Apple Watch S3, and head off. You can play your locally-stored music, or stream music from Apple Music (like My New Music, My Favorites, My Chill Mix, or Heavy Rotation).
And, if you have streaming ability on your watch, you also have the ability to send and receive texts as well as phone calls. You can set it all up in the Apple Watch app and then you can easily play on the Watch.
One last little tip on a setting you may want to review. Under the General > Settings of the Apple Watch app, there is a setting for Emergency SOS. While this is a very useful feature if there is an emergency, some police departments have complained about an increase in accidental 911 calls. You may want to consider turning off the “Hold to Auto Call” toggle. Or have your emergency contact be a family member instead of law enforcement. (You may want to review your iPhone setting as well.)
I do hope that these tips and tricks helped and that by knowing them now, you will start using them as I now am. And, as I said, if you have any other really cool tips or tricks, be sure to leave a comment to share with others!
HTD says: The Apple Watch Series 3 offers some tremendous hardware improvements over previous versions of the Apple Watch and is driving some great functionality. But sometimes, just knowing some tips and tricks can make you excited about older versions of the Apple Watch.
