I love security cameras! As does my wife. My kids, however, are a bit on the fence about things. While they like being protected and knowing who’s coming or going, one of my daughters complained, half-jokingly, that she can’t sneak out at night. “Dad, you guys had it easy before all of this tech. How am I supposed to sneak out when you are always watching?!” Ah, the miracles of technology – preventing the life passage of being a teen! Now, she has one more security camera that she will have to sneak around, and good luck with that! I just installed the Ring Floodlight security camera. (*Disclosure below.)
The reality is, she’s a good kid. And, as far as my tech will tell me, isn’t sneaking off anywhere. I’m much more concerned about the “strangers” that happen to be in or around my property. And while some people may think it is an invasion of privacy, I have had numerous occasions where I have caught someone late at night testing the car doors on my driveway, or even crouched by a window hiding and making a phone call. I have captured many nocturnal creatures making their journey around my home (raccoons, skunks, rats, cats, etc.). I feel that when it comes to home security, you can’t have enough technology to protect your family.
I’m no stranger to Ring. A few years ago, I got my hands on a Ring doorbell and wrote a review about it. I still highly recommend it. I was impressed with how easy it was to install and set up. It is now tightly integrated into our family – even my dog knows the Ring chime and waits by the door when he hears it. The Ring Floodlight Cam is no different in terms of ease of install, equally easy setup, and super-easy usage
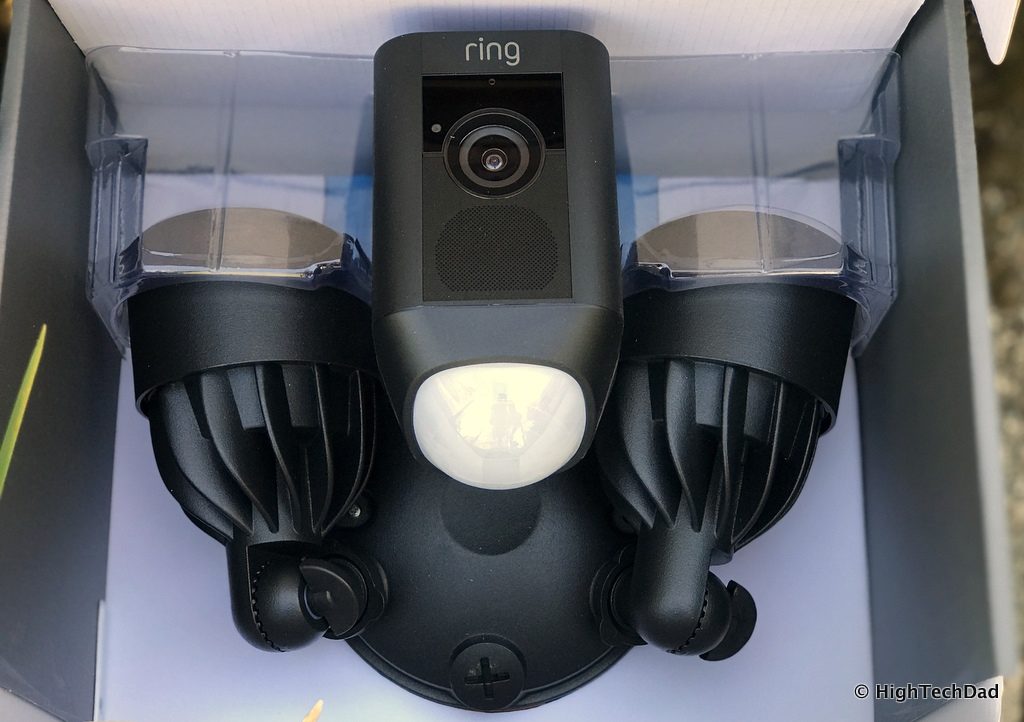
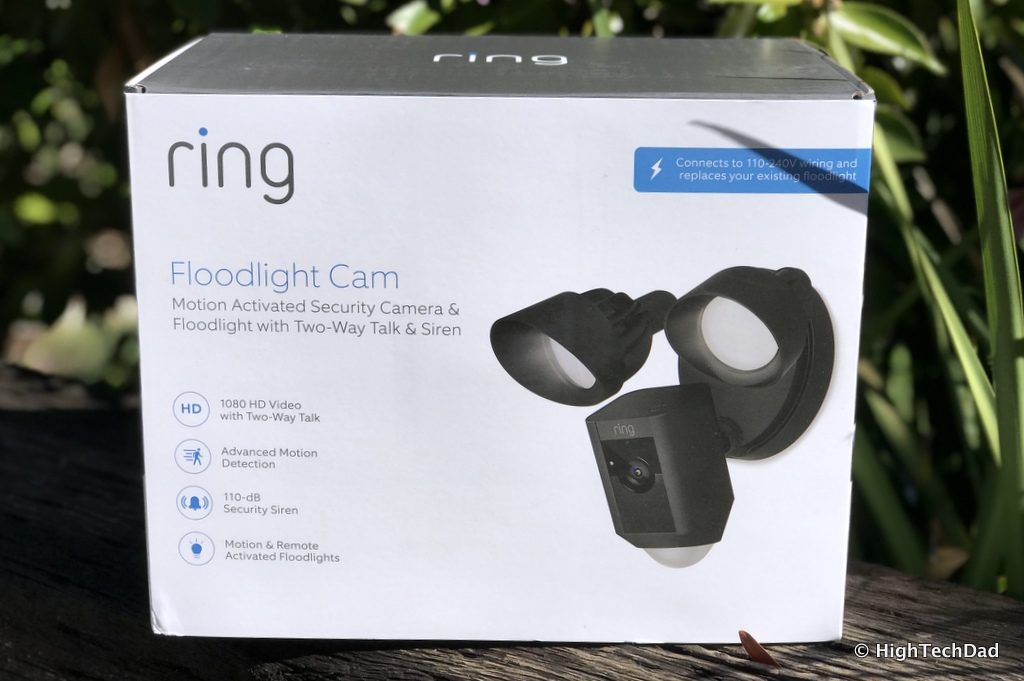
The Ring Floodlight Cam specs
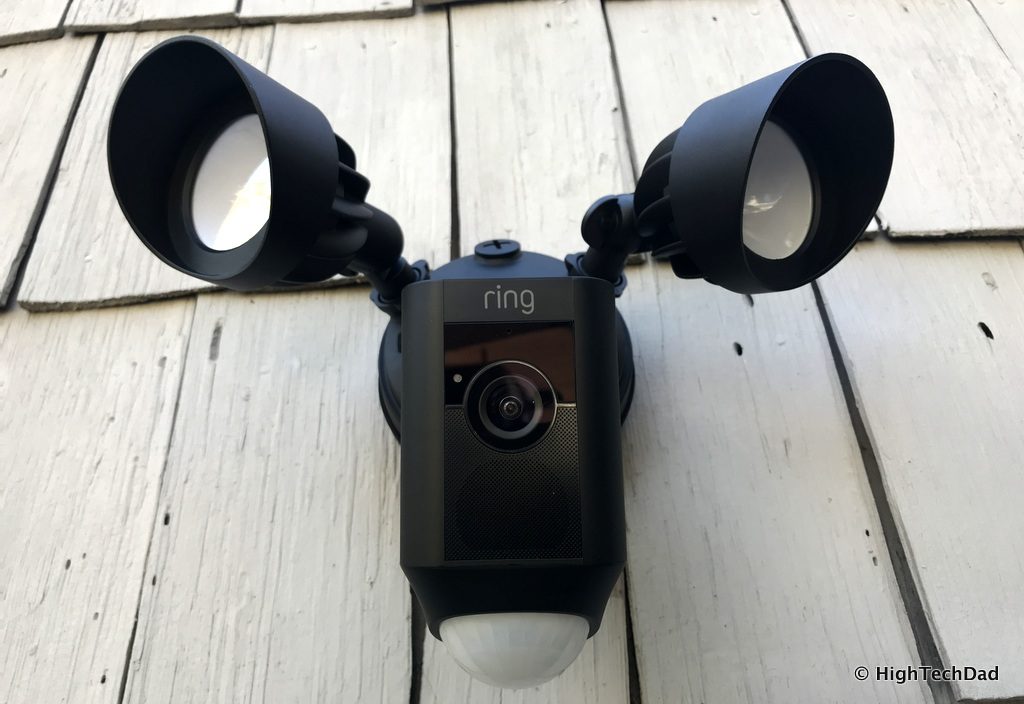
If you are thinking that you need a new floodlight and/or security camera somewhere around your property, then you should definitely consider the Ring Floodlight Cam. With this one device, you get the best of both worlds: a motion-activated, day and nighttime, HD security camera coupled with high-intensity floodlights. Just those two features alone should be compelling enough. But with the Ring Floodlight Cam, you also have 2-way audio, a siren alarm, and the ability to watch and talk directly from the floodlight using just your smartphone or tablet.
Before I jump into the installation, let’s talk about the specs. This is a hard-wired device, so you need to either be replacing an existing floodlight (with a ground wire) or know enough about wiring electrical to put up a junction box. If it’s a new installation, I would highly recommend talking to or working with an electrician, just to be sure that you wire things correctly and do the install safely. Also, if you are doing an existing floodlight replacement and you have a light switch that controls it, you will want to disable the light switch (so that it is “on” permanently) or label it so that people know not to turn it off. The Ring Floodlight Cam must have power going to it at all times for it to work and stay connected to your WiFi.
The Ring Floodlight Cam uses 802.11 b/g/n WiFi at the 2.4 GHz frequency (only) to connect to its service. So one of the prerequisites prior to installing is to ensure you: 1) have a good, strong WiFi signal at the installation location, and 2) ensure that your WiFi router has 2.4 GHz capabilities enabled. Also, because you will be streaming HD video every time motion is detected, you should have a minimum of a 1 Mbps upload speed. More is better, obviously (mine is about 10 Mbps).
As I mentioned, the Ring Floodlight Cam has two-way audio with built-in noise cancellation. From my tests, the audio is fairly loud (not booming) and you can hear audio back on your smartphone fairly easily. (Since it is almost Halloween, I have been thinking about ways of scaring people using the speaker…hmmm.) It also has 1080p HD video and the capability to stream live video feeds when the camera is activated. It also has a night-vision mode so you can see in the dark even if the floodlights are not on. I actually set up mine to have the LED lights on from dusk till dawn, but still, the night-time images do come back as being black and white simply due to the fact that in darker environments, there isn’t enough color data to fully render in 1080p color. This is to be expected.
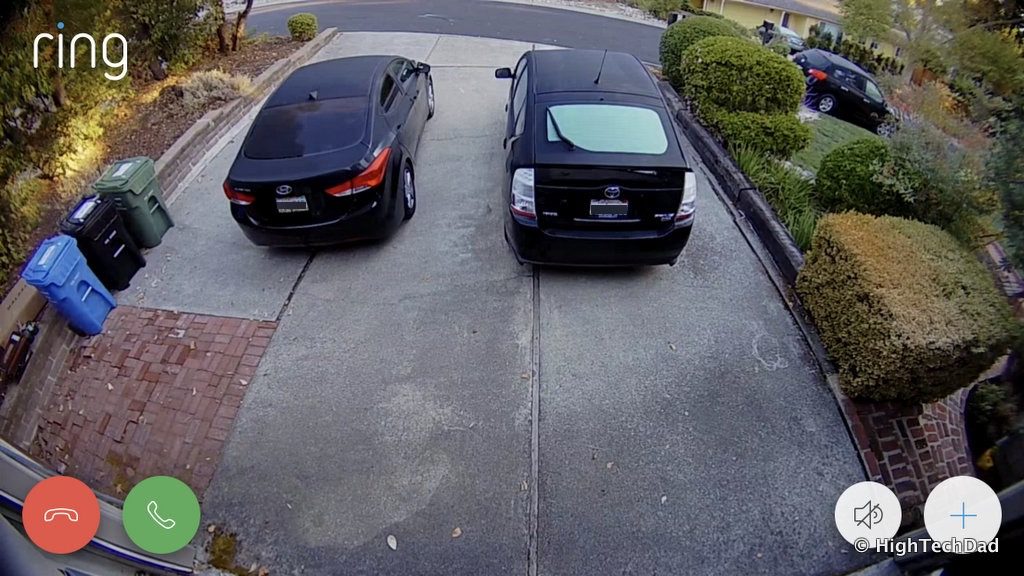
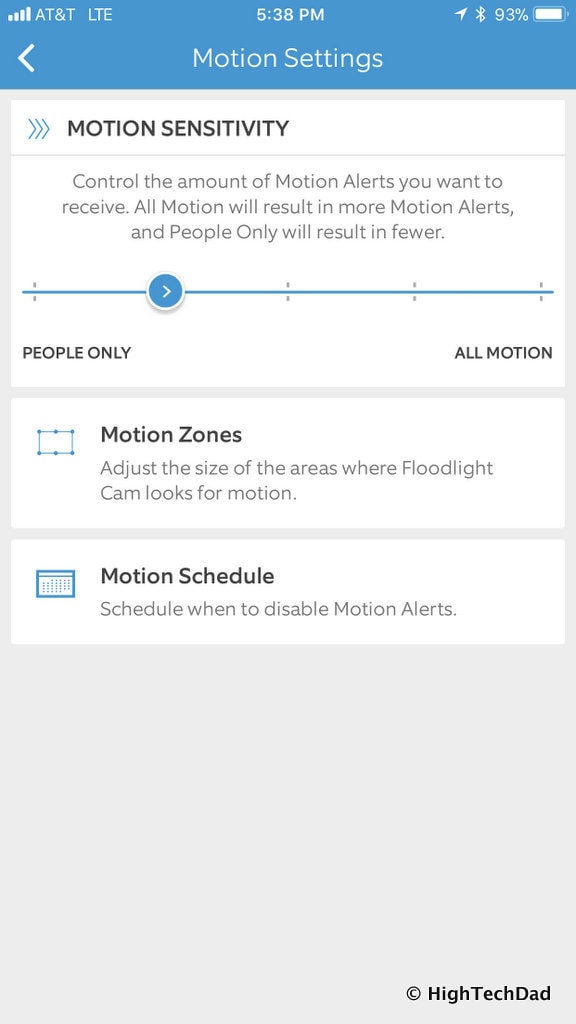
The camera has a 270-degree field of view (slightly fish-eyed) which actually captures a wide area of view. It’s recommended installing the Ring Floodlight Cam at least 9 feet off the ground. The higher the install, the more you can see. Within the settings, which I will go into later, you can set the threshold of object detection. You can have it very sensitive to capture all movement or make it truly look for people and faces by reducing the sensitivity.
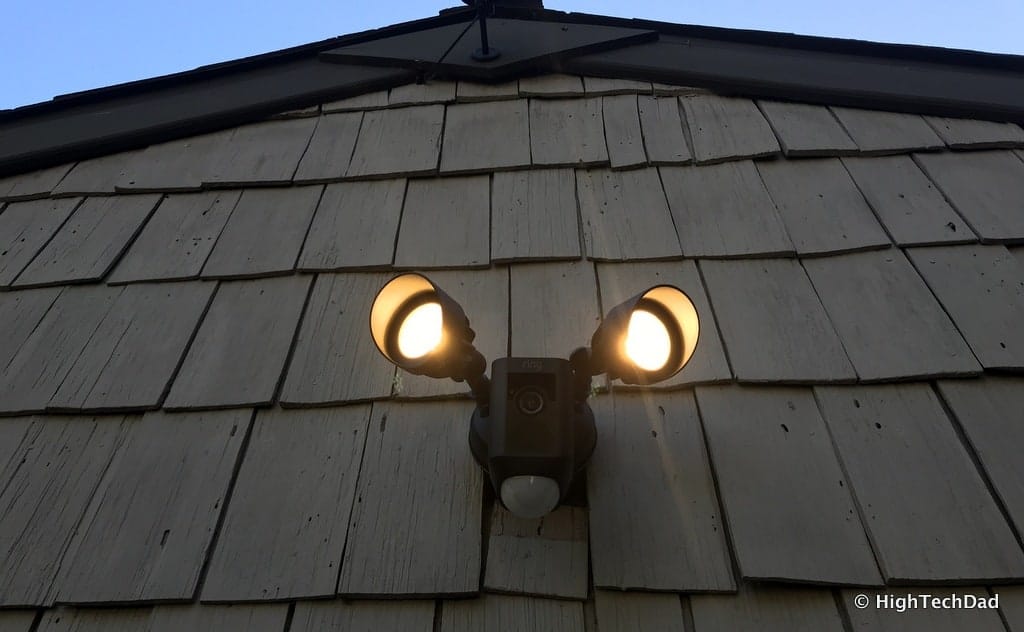
The two LED floodlights are 3000-degree Kelvin floodlights which means it is not a yellow color like a candle (1900K) nor is it bright blue like the sky at 10,000K. It’s fairly warm in color though. The alarm is 110-decibels which is loud enough to get attention if someone is close by, but not enough to wake up the neighbors down the street.
And, assuming you have the Ring Floodlight Cam installed correctly, the entire setup is weather-resistant and can operate between -20°F to 120°F.
Let’s take a look at how my install went.
Installing the Ring Floodlight Cam
When it comes to a new install or replacing something existing, you can pretty much guarantee that there WILL be some sort of wrinkle or workaround. New installations, professionally done usually are a safer bet. In my case, I was retrofitting an older junction box and replacing some existing floodlights. So, I knew that I had power because my old floodlights worked fine. I wouldn’t know, however, until I took off the old floodlights.
First and most importantly, before you do anything, turn off the power to the junction box you are going to be working on at the circuit breaker!
Got that? Turn off the power!
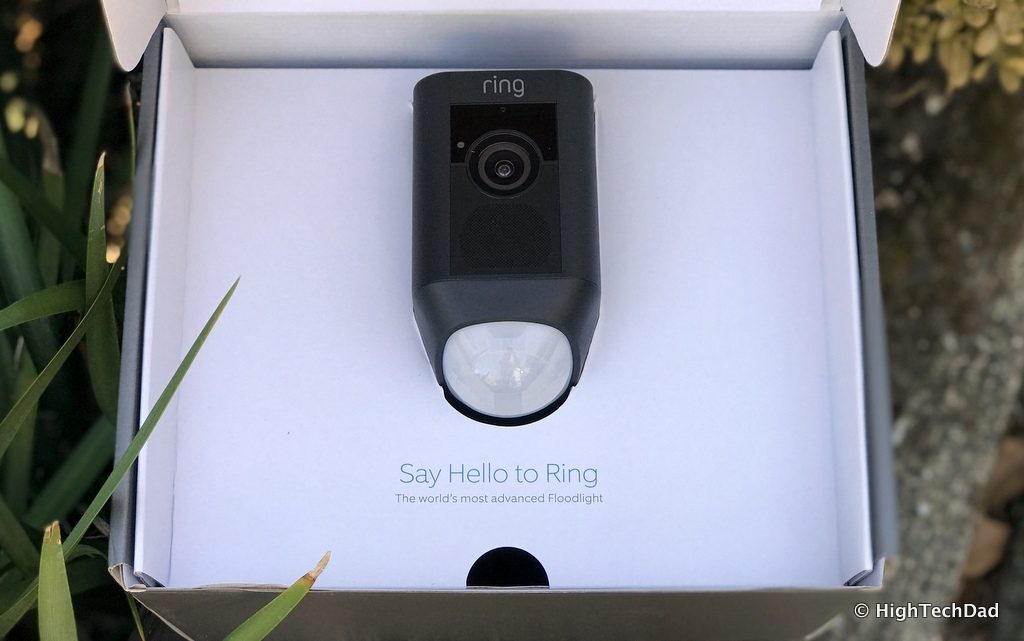
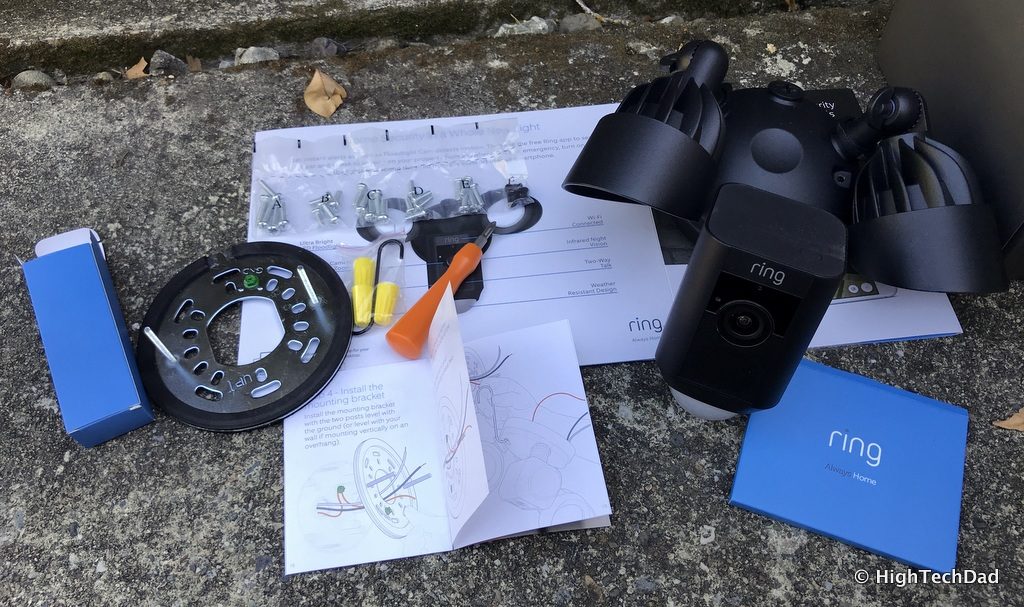
Once you are sure that the power is off, you should take some time to look at the Ring Floodlight Cam installation instructions as well as the parts included in the box. In the box, you should have:
- Ring Floodlight Cam
- A bag of various-sized screws (some of which won’t be used)
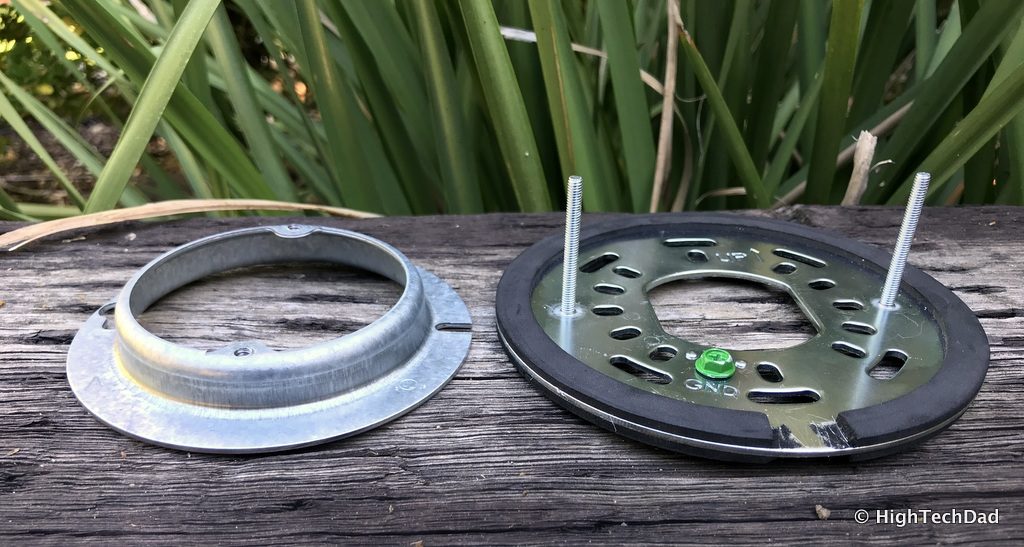
- A foam gasket and mounting bracket with two longer screws coming from it
- Wire nuts to connect the wires
- Nut caps to connect the Cam to the mounting bracket screws
- A hook to temporarily hang the Cam from the junction box
- Screwdriver (interchangeable Phillips bit)
- Various installation instructions
While the included installation documentation is quite good, there is even better documentation within the Ring help section. I just followed the included instructions…until I hit a little hiccup.
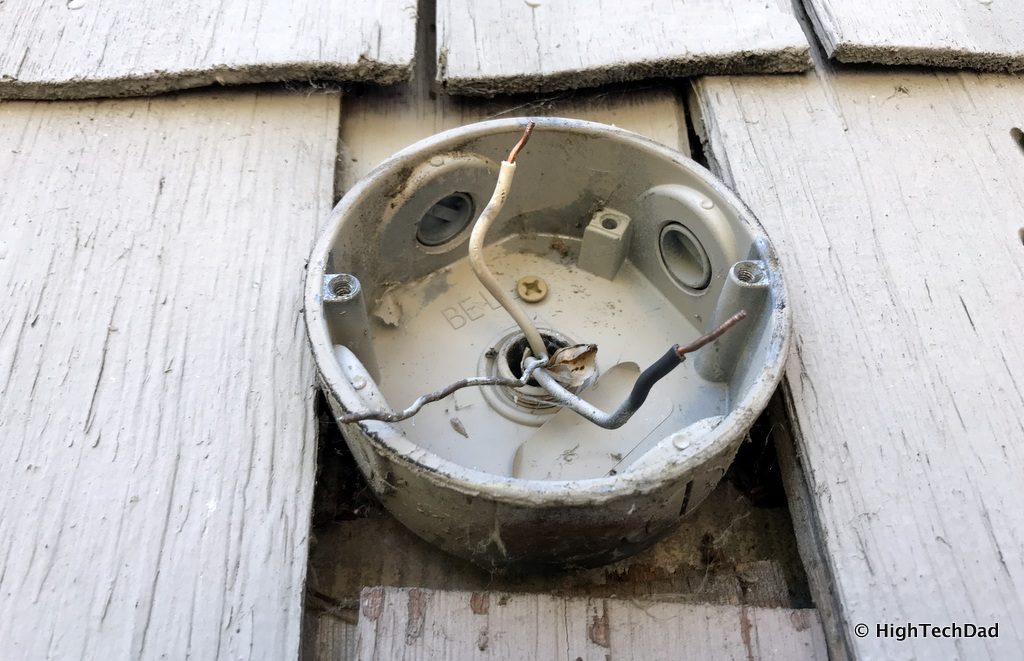
I was able to easily remove my old floodlights. That wasn’t a problem. And, luckily, I had the right size junction box (circular) for the Ring. But what wasn’t right, that required a quick trip to the hardware store, was the alignment of the junction box.
The way my old junction box was mounted, it had only two screws to attach the Ring mounting bracket to. BUT, those holes were directly behind where the long screws jutted out. Essentially, I had no way of attaching the mounting bracket to the junction box AND have the attached screws parallel to the ground.
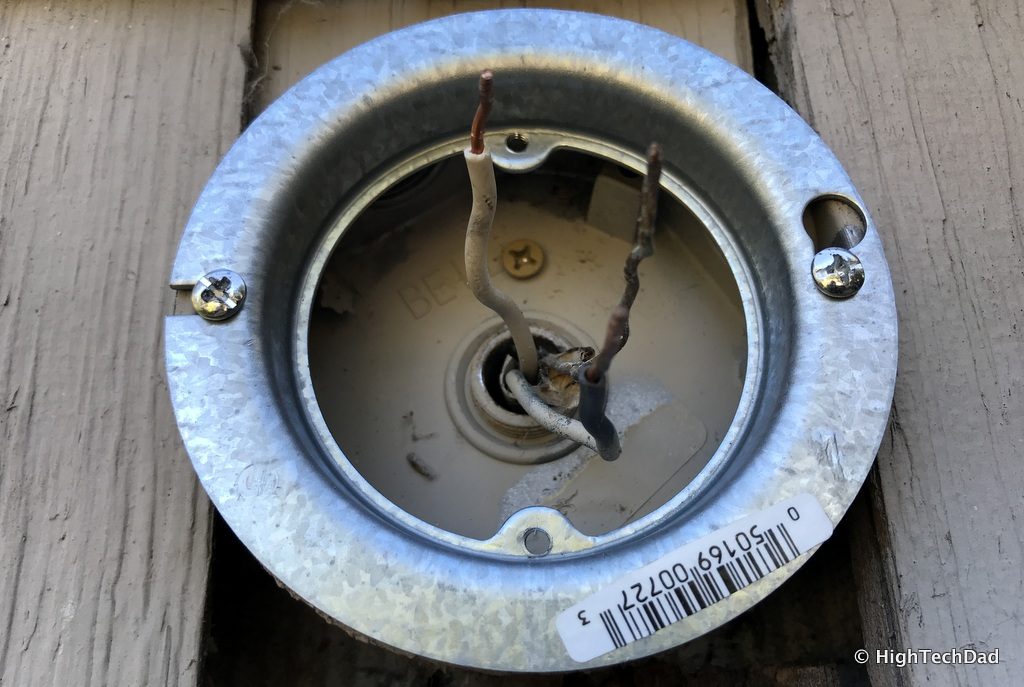
I had something in mind to fix it but wasn’t sure what it exactly looked like nor what it was called. But after a few minutes in my local hardware store, I had exactly what I needed.
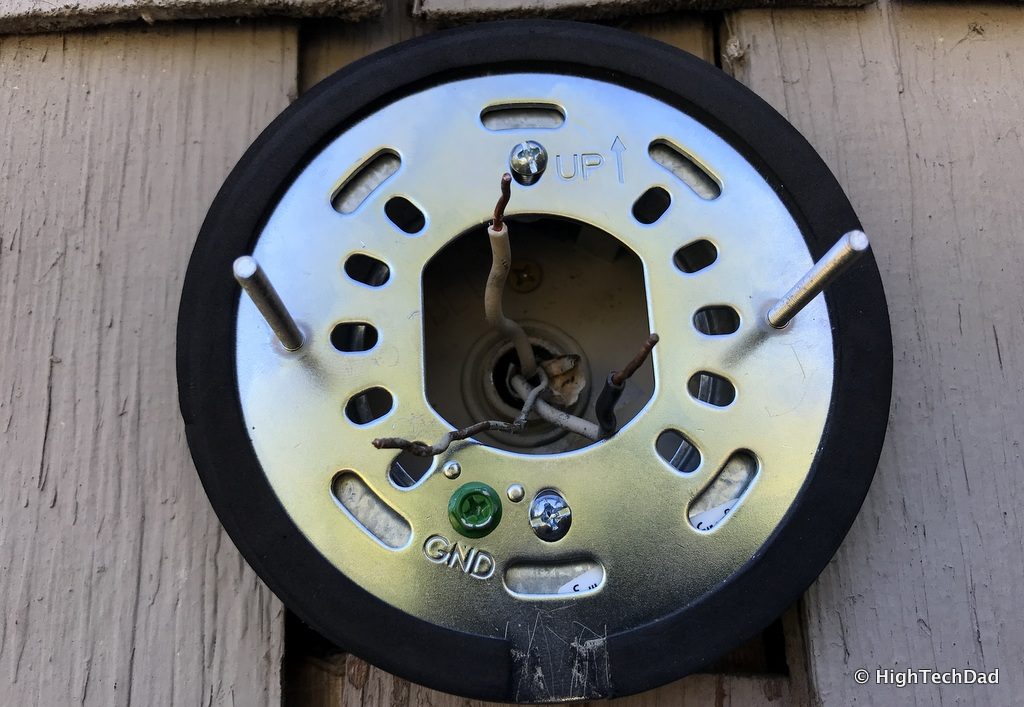
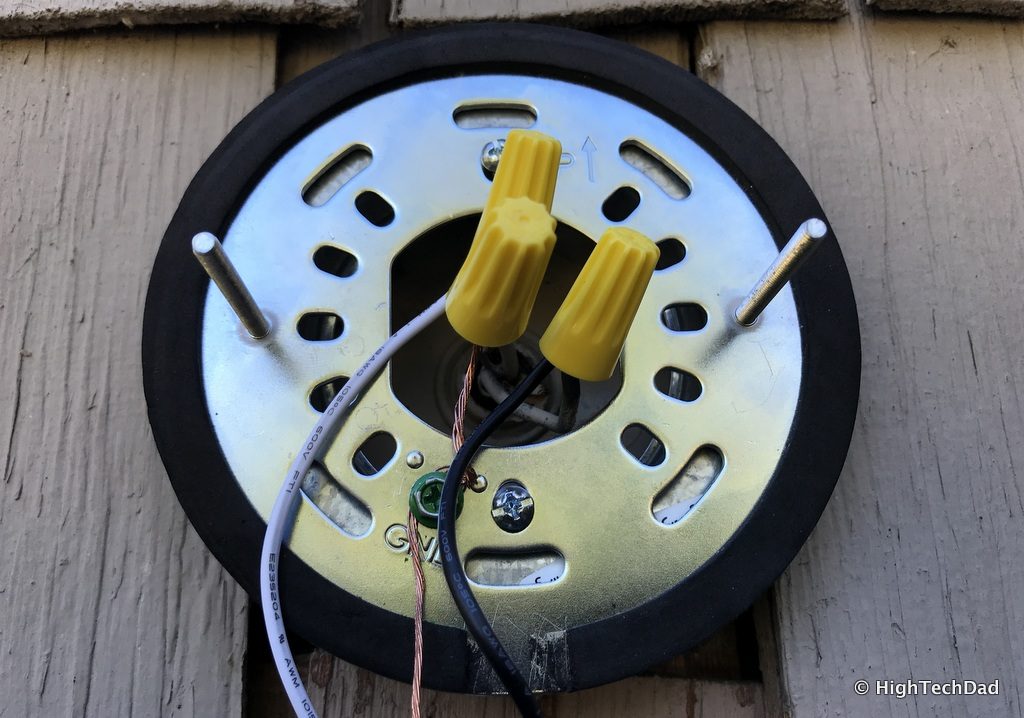
And once I was back on my ladder, I had the piece installed and the bracket securely attached to it.
Here’s the bracket attached.
Make sure you follow all of the recommendations, especially connecting the ground. Connecting the wires is incredibly easy; there are only three of them. Once you are sure the wiring nuts securely connect and hold the wires, you simply need to shove the wires into the junction box and secure it using the nut caps and the included Ring tool. Also, I didn’t use the supplied hook but it’s nice to have that option.
Once I had the Ring Floodlight Cam fully mounted, I went back to my circuit breaker and turned the power back on.
The next step involves using the Ring app. You use the app to first directly connect to the floodlight so that you can configure your WiFi network, and then to set up the rest of the Cam’s settings. You will be asked to either set up a new account with Ring or connect to your existing account. Since I already had my Ring Doorbell, I just added a new device.
Here is what you can expect as you go through the configuration steps. These are from my iPhone.
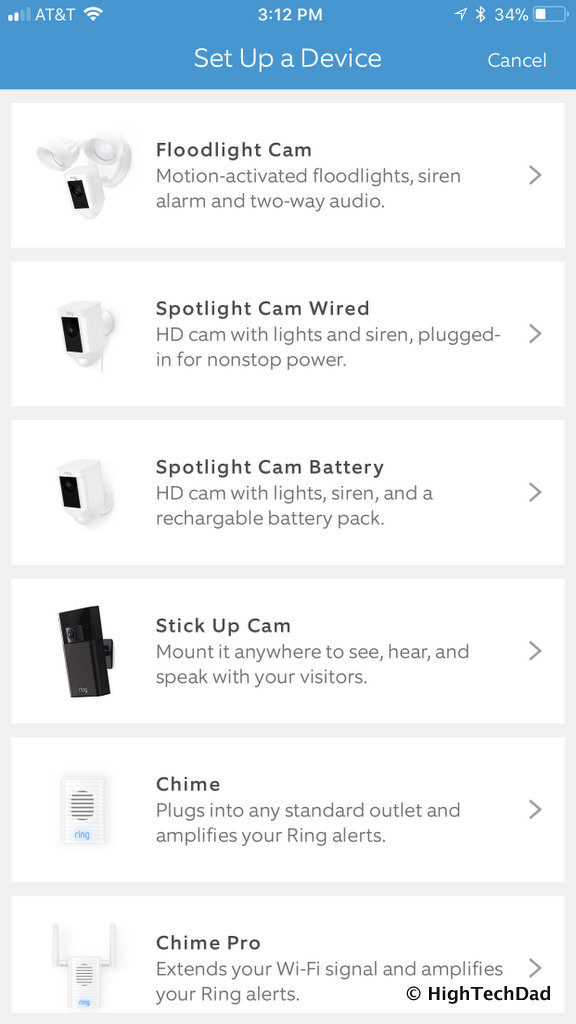
First, you select the device you are adding.
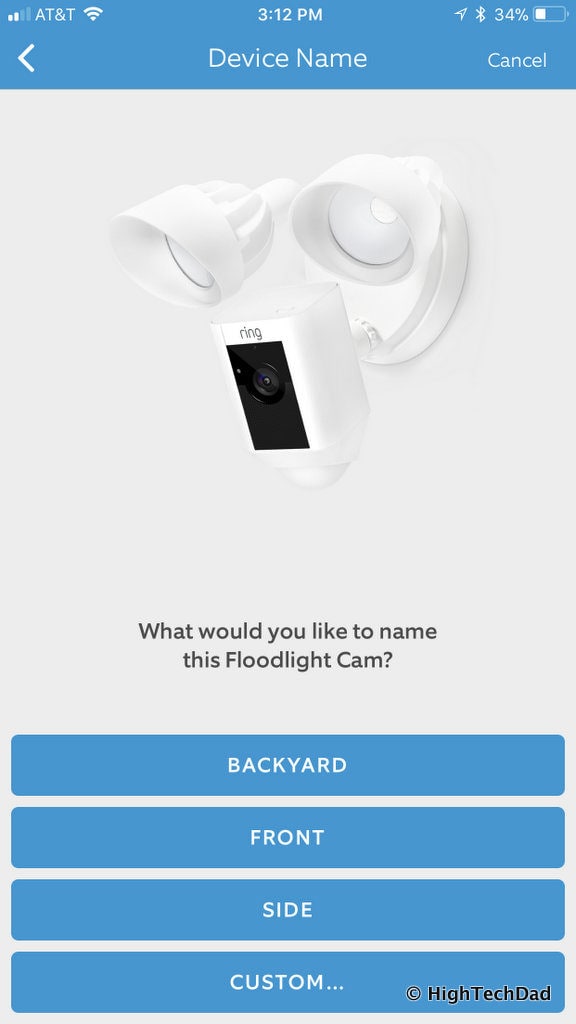
Once you choose the Floodlight Cam, you will want to name it. I called it “Driveway.”
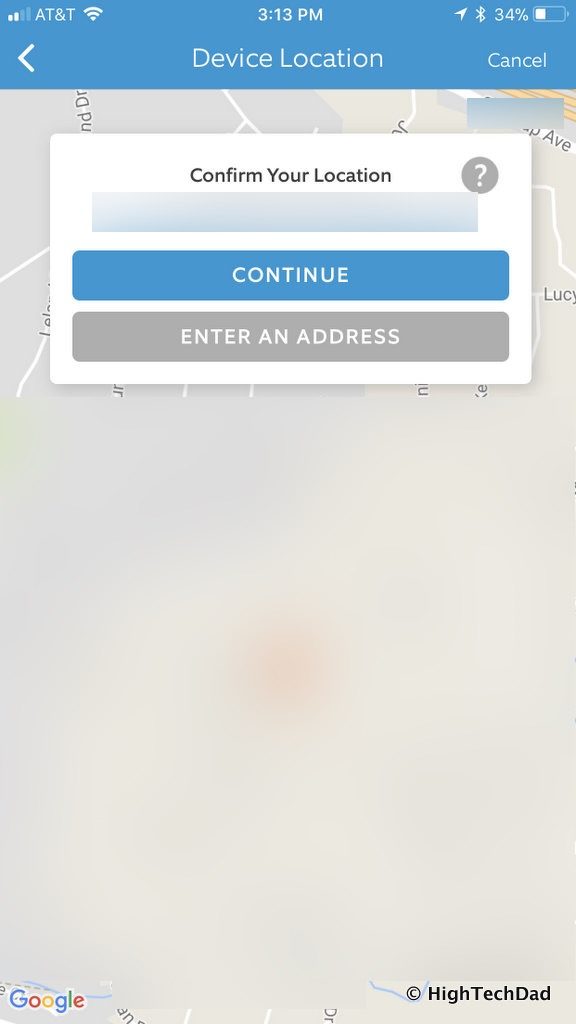
Next, you will confirm the location of the Ring Floodlight Cam. Remember, you can have multiple Ring devices at different locations, all managed within the same Ring account.
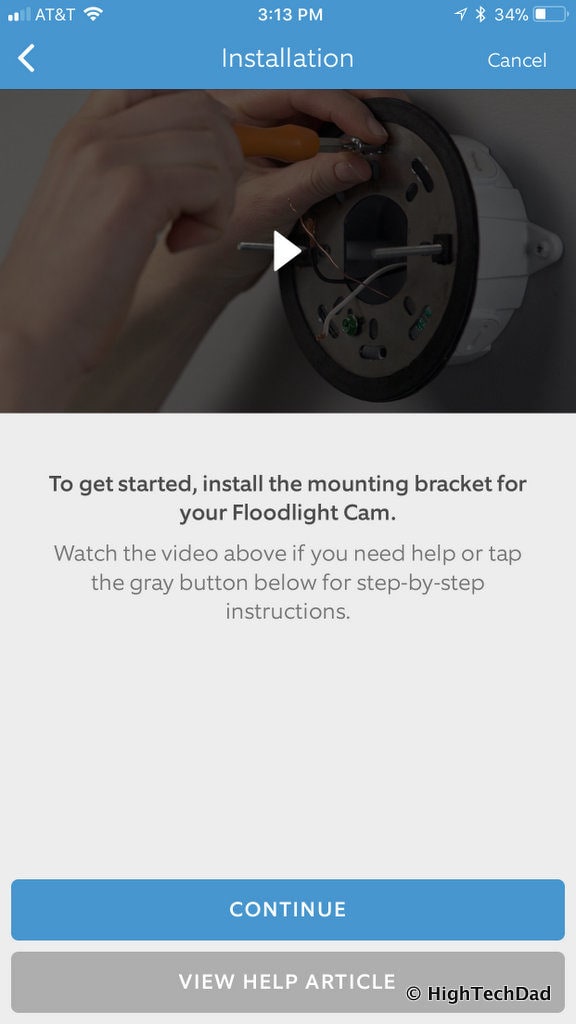
The next few screens give you steps with video instructions on installing your Floodlight Cam (which I have already covered so I’m going to skip through those screens).
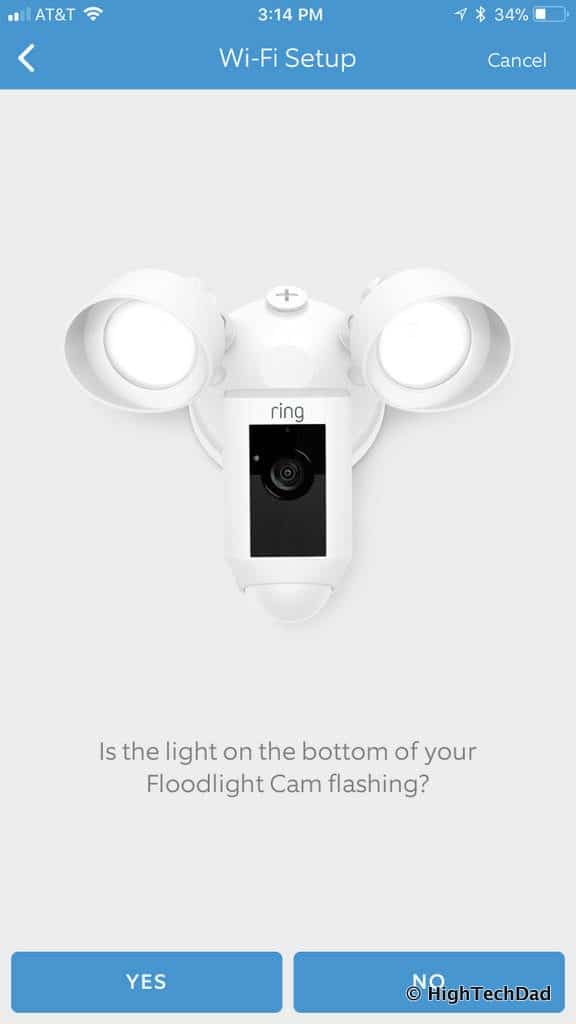
Once you have finished with the install steps within the app, you go to the configuration. You are asked if the bottom of the Cam is flashing. In my case, it was not. I believe that once power is sent to the Cam, it will start flashing but perhaps it timed-out for me. I clicked the “No” option.
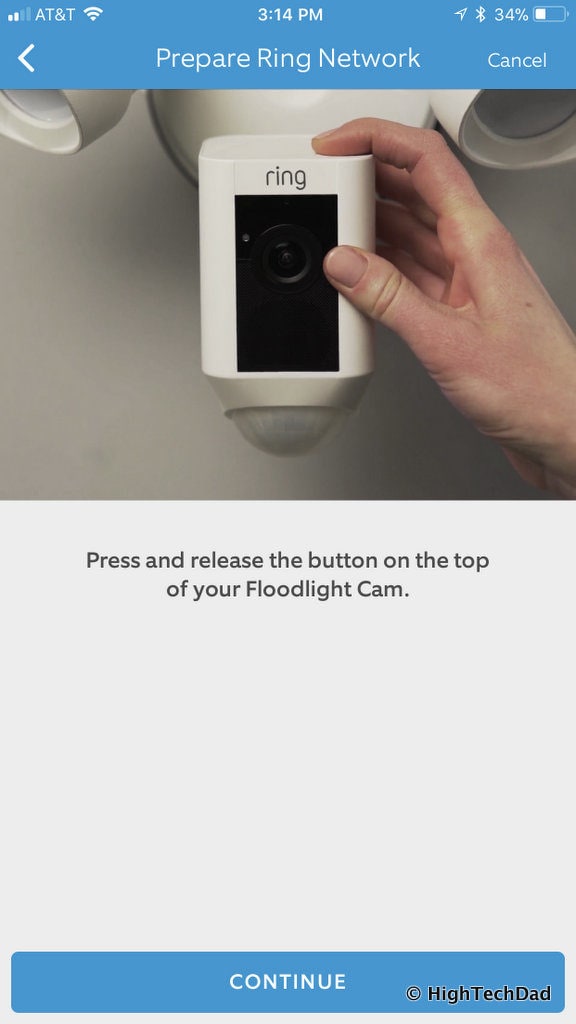
Since I had pressed “No”, I was given the instruction to press and release the button on the top of the camera portion. It was at this point where I was pleasantly surprised! Suddenly, the Floodlight Cam started talking to me! I absolutely loved this helpful feature as I was going through the connectivity process. It spoke status updates as the connection was made. It’s a really nice touch as it gets a bit lonely up on a ladder!
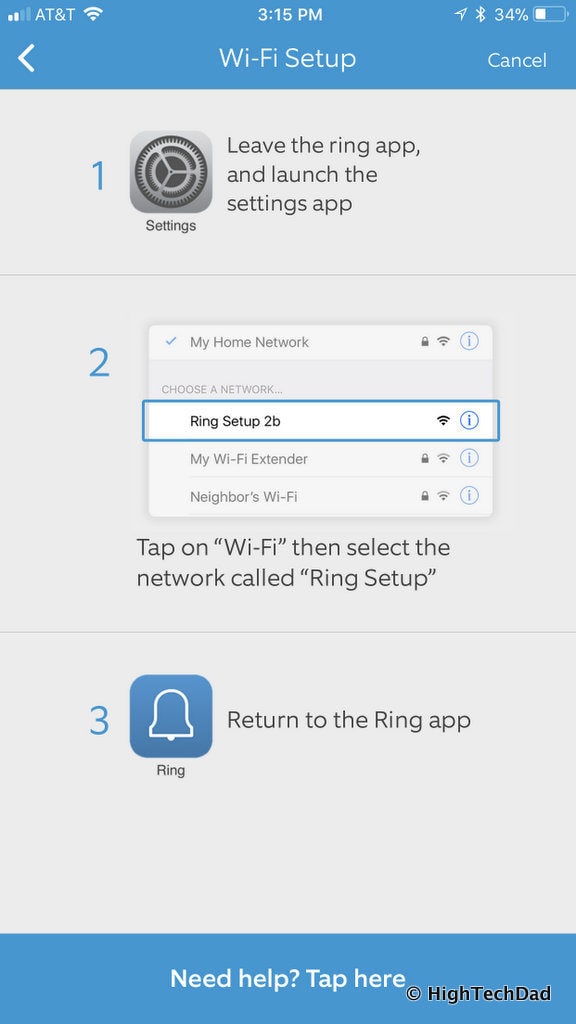
At this point, you need to directly connect to the Cam via an Ad Hoc WiFi connection (as I mentioned).
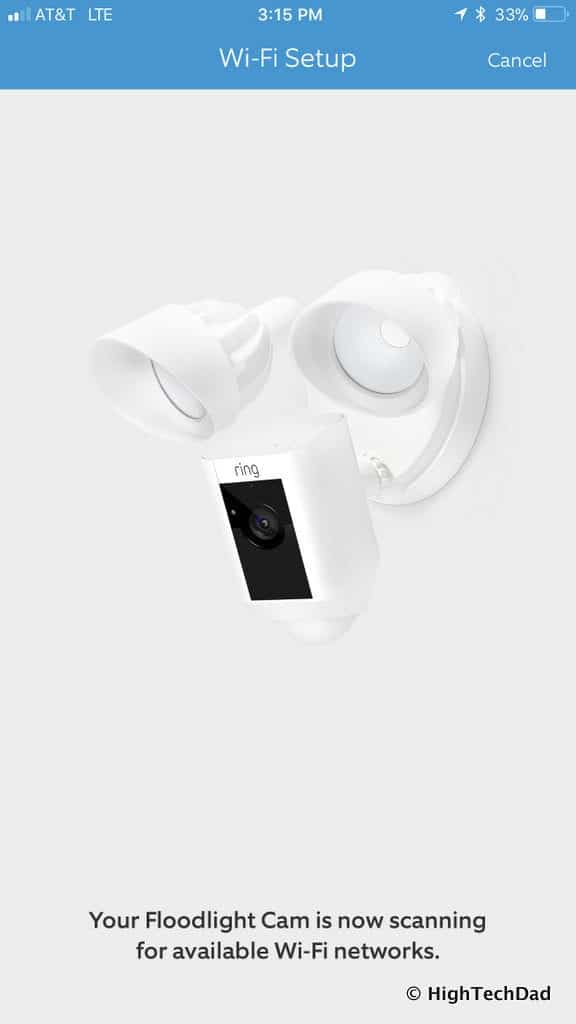
After connecting directly, your Floodlight Cam will start scanning for available WiFi networks.
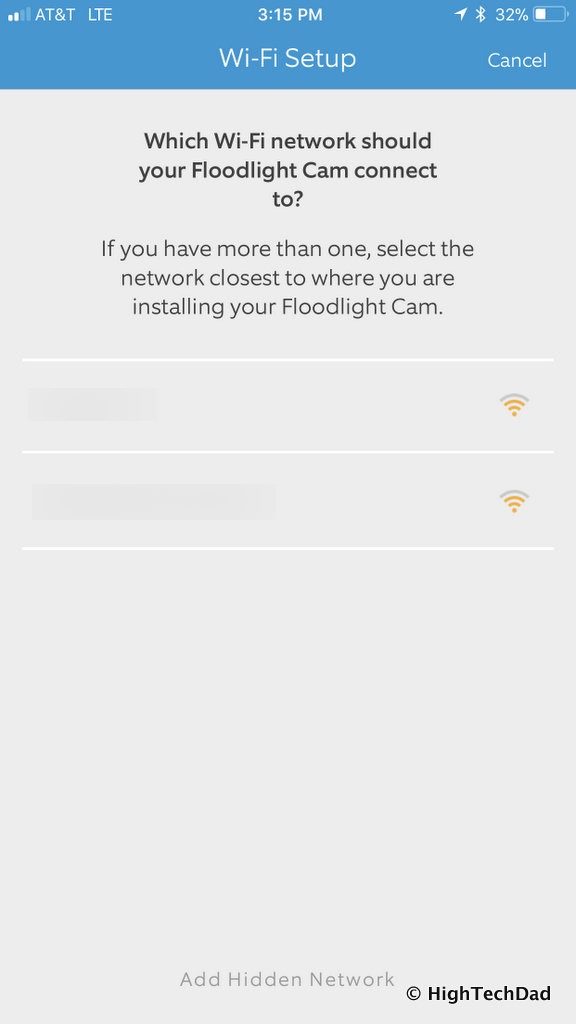
When the Cam finds some available networks, it will display them.
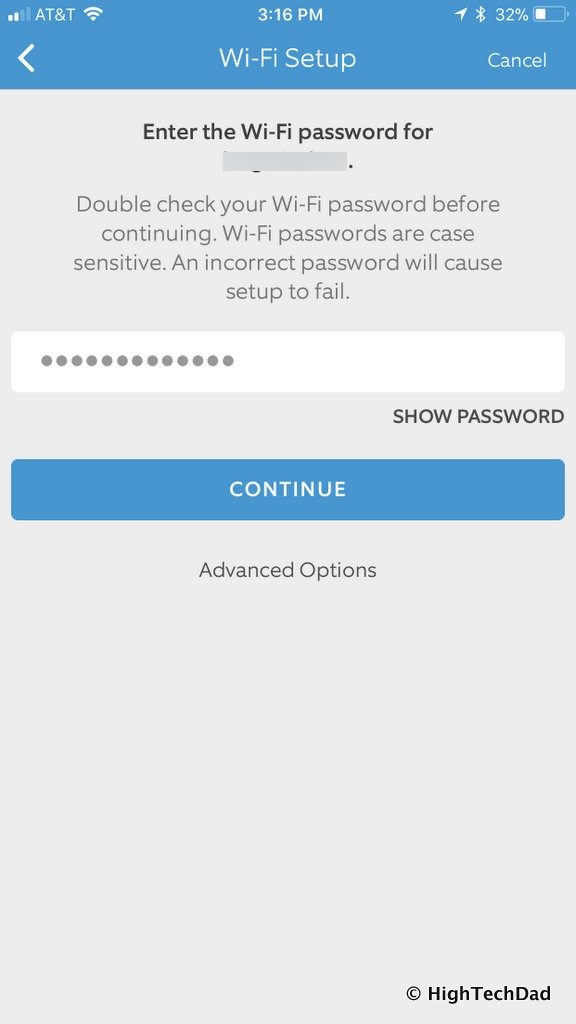
Select your preferred WiFi network and enter the password for that network.
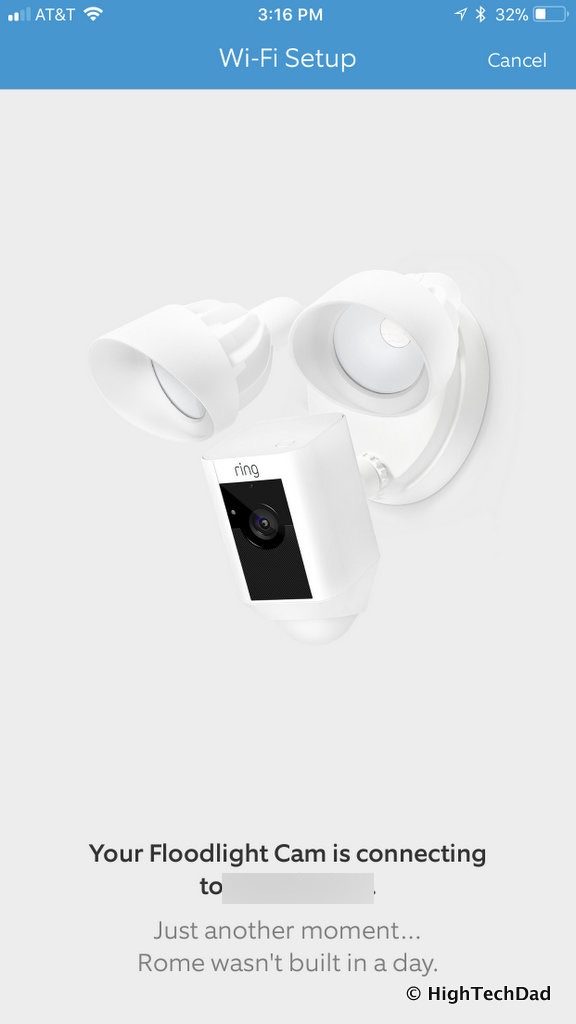
Once you enter in the password, the Cam will attempt to connect. You may get some voice help directly from the Cam during this stage (love it!).
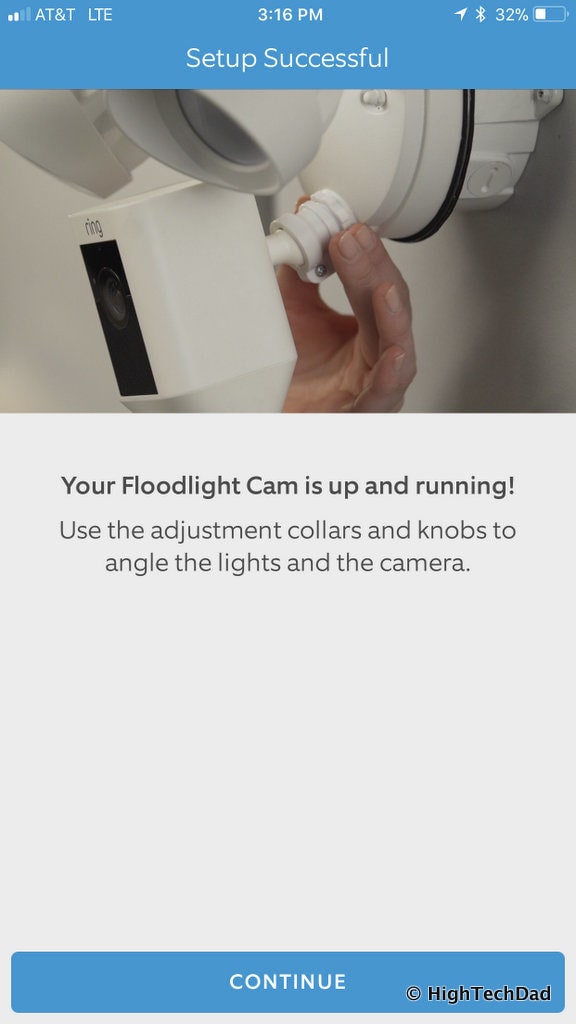
After you successfully connect to your WiFi network, you are done! You now can position the floodlights and camera to your liking.
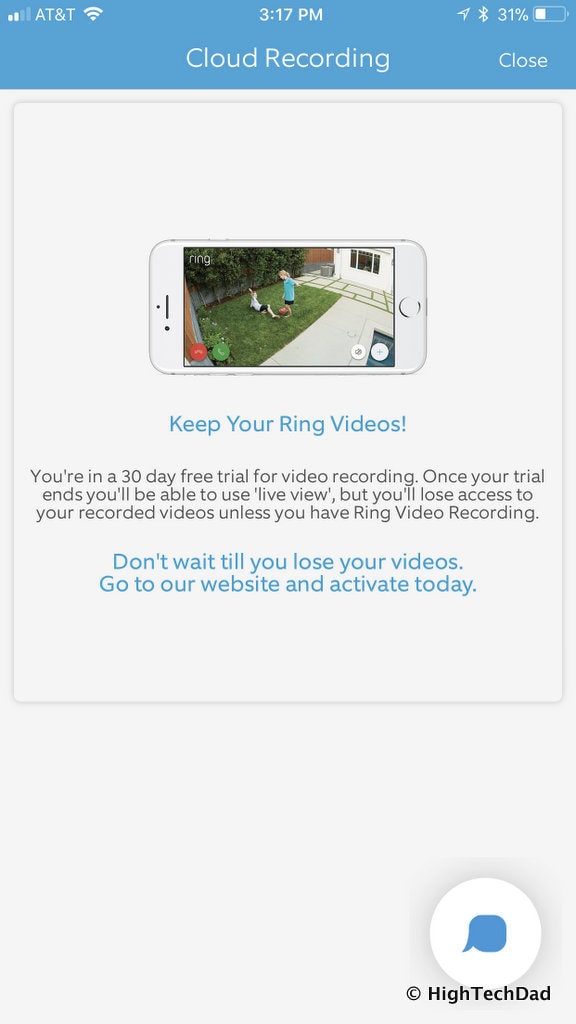
You are prompted after successfully connecting to sign up for a Ring Video Recording plan. You do get 30 days to try it out before making a decision. But, the nice thing is, the pricing I feel is quite reasonable. You have a few options:
- No Plan – free, you get alerts if someone presses the doorbell or if a motion alert is triggered, and you get live streaming and two-way audio, but nothing is stored after that.
- Protect Basic – for $3/month/camera (or $30/year/camera), you get 60 days of cloud storage for your videos, video review, and video sharing.
- Protect Plus – for $10/month (or $100/year), you get everything that Protect Basic has, but it is good for unlimited cameras. So if you have 3+ cameras, you may want to choose this option. You also get discounts and a lifetime warranty on your Ring devices (if damaged or stolen).
Now on to the configuration!
Configuring the Ring Floodlight Cam
Once you have connectivity, you can go to configuring a variety of options like setting up zones or when you want your lights to come on our how to notify based on detected activity.
One of the first things that I did was to test the field of view. During this stage, you may have to adjust where the camera is pointed. Luckily, since the camera is quite a wide angle, initial pointing for me was pretty easy. If you want to adjust the direction of the lights, that may take a bit more work and require you to do it when it’s a bit darker outside.
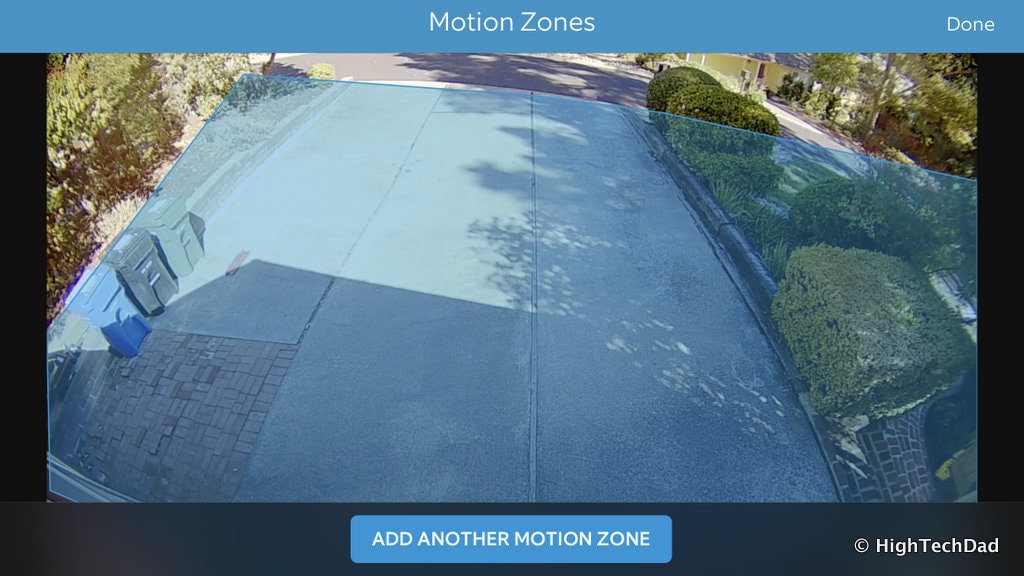
An important thing to set up are the motion zones. By setting these up, you can dictate what areas within the field of view of the camera would trigger an alert. It can be a very small area like a doorway, or a much larger zone like a driveway. Since mine is mounted over my driveway, the zone I drew goes all the way to the street but stops right before the street itself so as to not be triggered every time a car drives by.
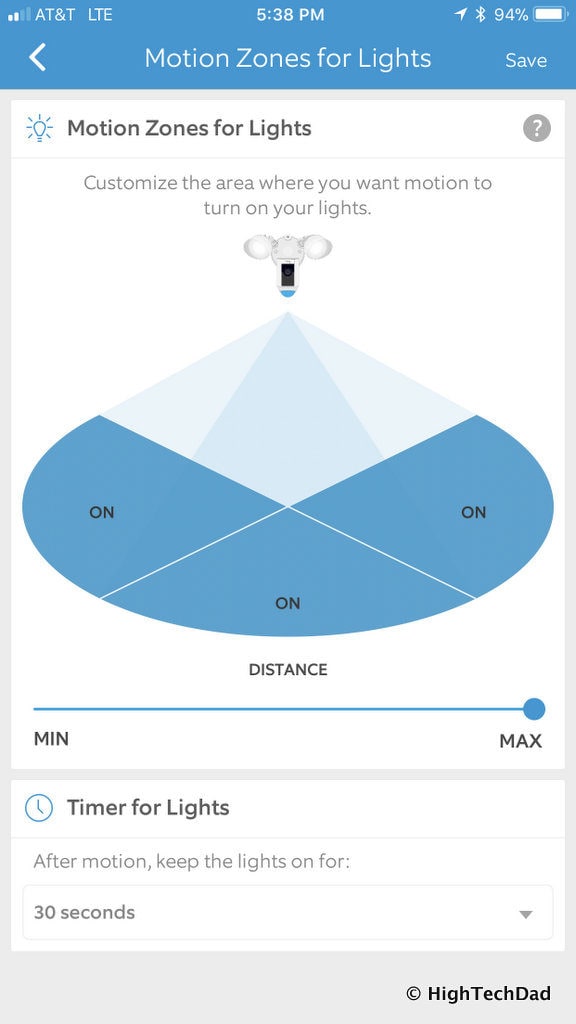
You can also configure motion zones for the floodlights. While in my case, I have the lights on pretty much all night, there are times when the lights may be off but it’s still dark out. I have the light motion detection set to maximum and to all angles, but you have the ability to decide the distance as well as the address that triggers the lights.
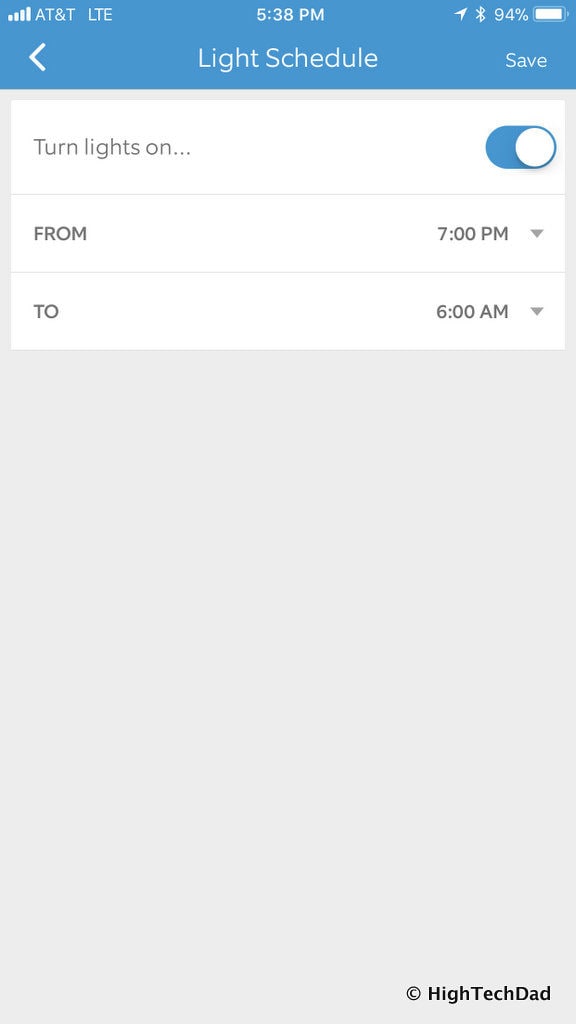
As I mentioned, I manually set up the On and Off times for my lights. Easy to do but I really wish the Ring Floodlight Cam had a bit more smarts built into it.
For example, a “dusk to dawn” setting that changes based on date, time zone, and Daylight Savings Time would be “smart.” You could also solve this using a service liked IFTTT.com or using a smart hub like Wink. Unfortunately, after reaching out to Ring, I found out that this isn’t available currently but is something under development. So if this is something that you are looking for, it will be coming.
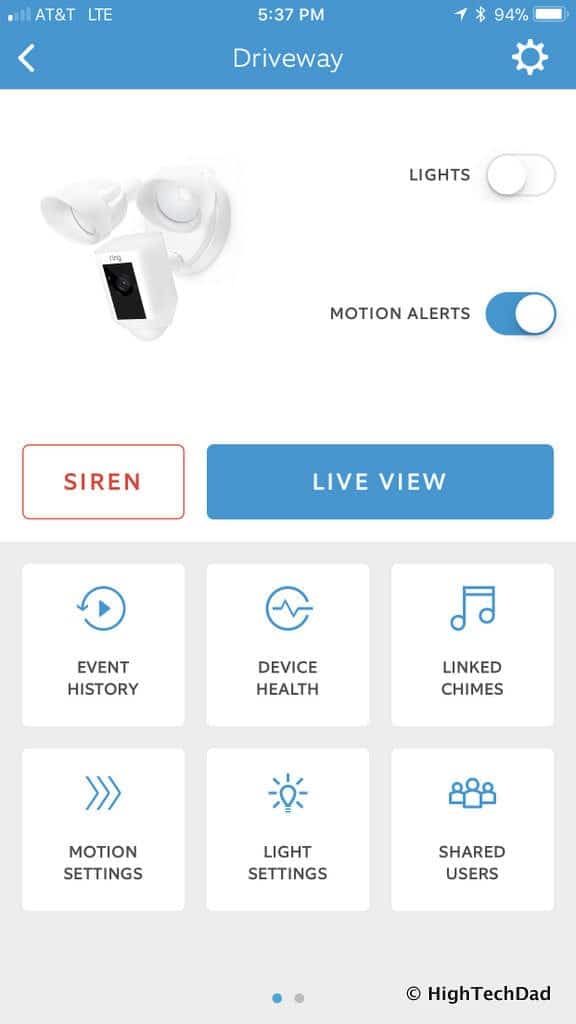
Also, you don’t have to configure a time On or Off setting if you don’t want to. Nor do you have to have the lights triggered by motion. You can simply toggle the lights on or off via the main screen of the Floodlight Cam page.
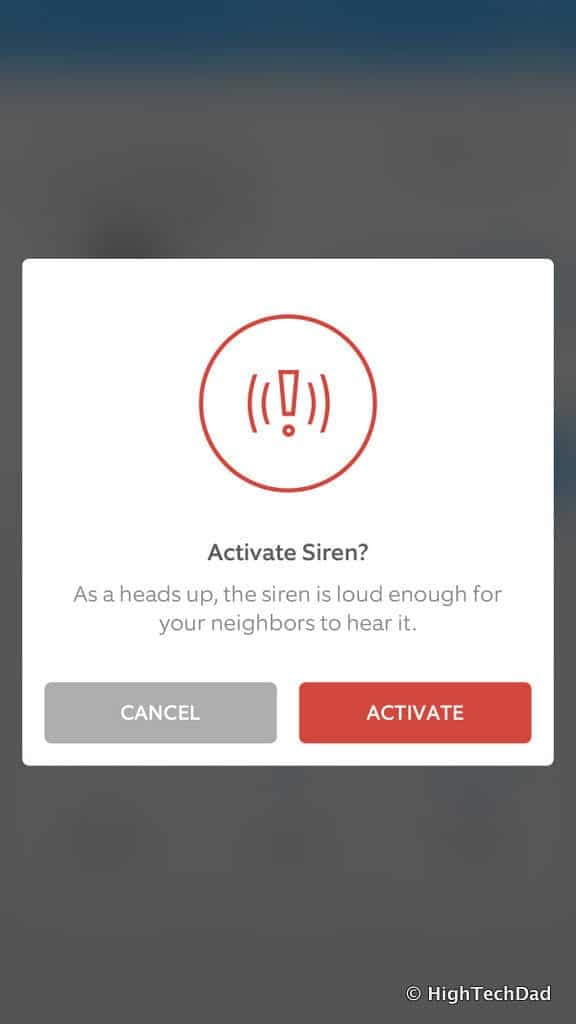
Also on the main page is the Siren button. Pushing this button will trigger the built-in 110-decibel siren. Note, when you push that button, it doesn’t trigger the siren immediately, you have one more screen to confirm. Once the siren is “blasting” (honestly, it’s loud enough to attract some attention but really not that loud), you can cancel it via another button press.
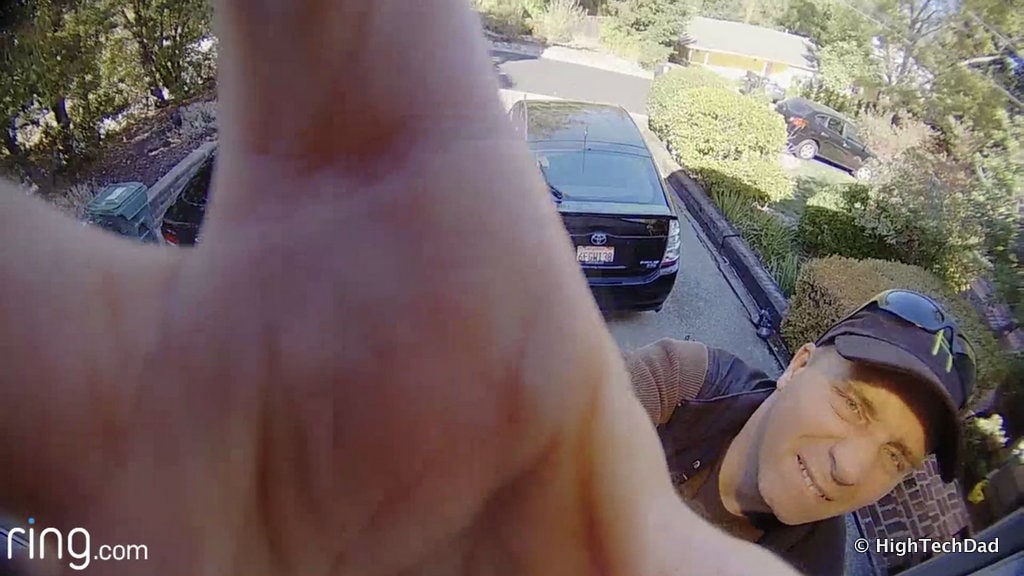
Much like the Ring Doorbell, when motion is detected and an alert is triggered, you receive a notification. You can then “answer” that notification and get a live, streaming view from the Ring Floodlight Cam. If you answer the notification, you can then have a two-way dialog between your device and the Cam. Depending on your WiFi speed and signal strength, the audio may be slightly delayed. For the most part, I found it to be ok and easy to hear and understand.
You don’t need a motion event to drop in on the camera. You can activate a live stream whenever you want. From the main Ring Floodlight Cam screen on your smart device, simply click on the Live View button. Within a few seconds, the live stream from the camera should appear. Do note, it does take a few seconds for the connection to be made. It’s not instantaneous.
If you have a Ring Chime, you can also connect it to your Ring Floodlight Cam so that you get that distinctive (default) wind chime sound when motion is detected. You can if you want, change the default chime sound (there are some great ones for Halloween, for example). One thing that I asked Ring about is if there will soon be the ability to assign distinct chimes to specific Ring devices. For example, I would want the motion detected on my front door to be different than motion detected in my driveway from a different Ring device. I have been told that this is an often requested feature and that it may be coming in a future feature release. (I personally can’t wait!)
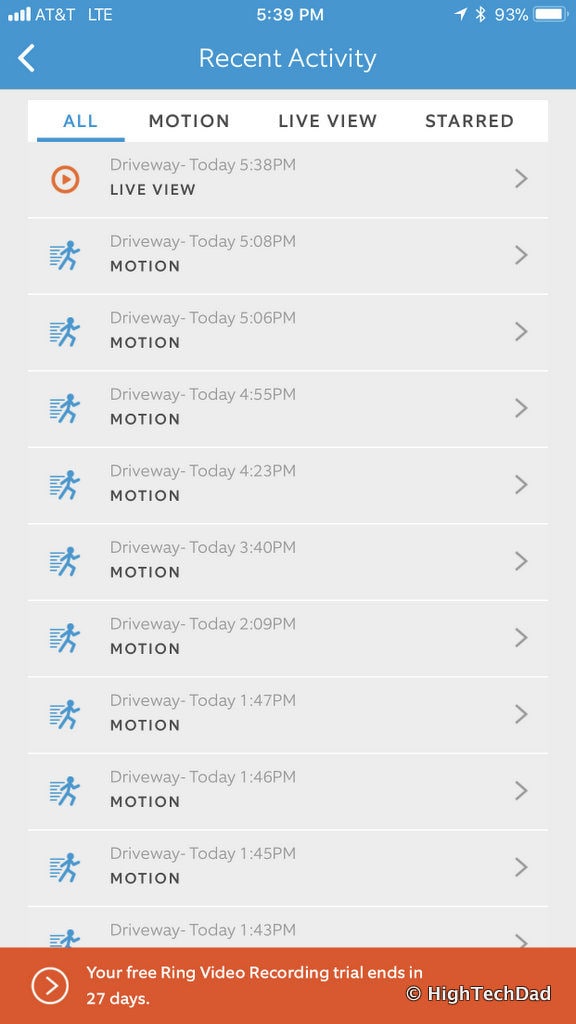
Lastly, if you have subscribed to a Cloud plan, you can take a look back at all of the videos that have been captured for up to 60 days. You will have a listing of all videos, motion, live view, starred (if you saved something), as well as indicators as to if something was answered or not.
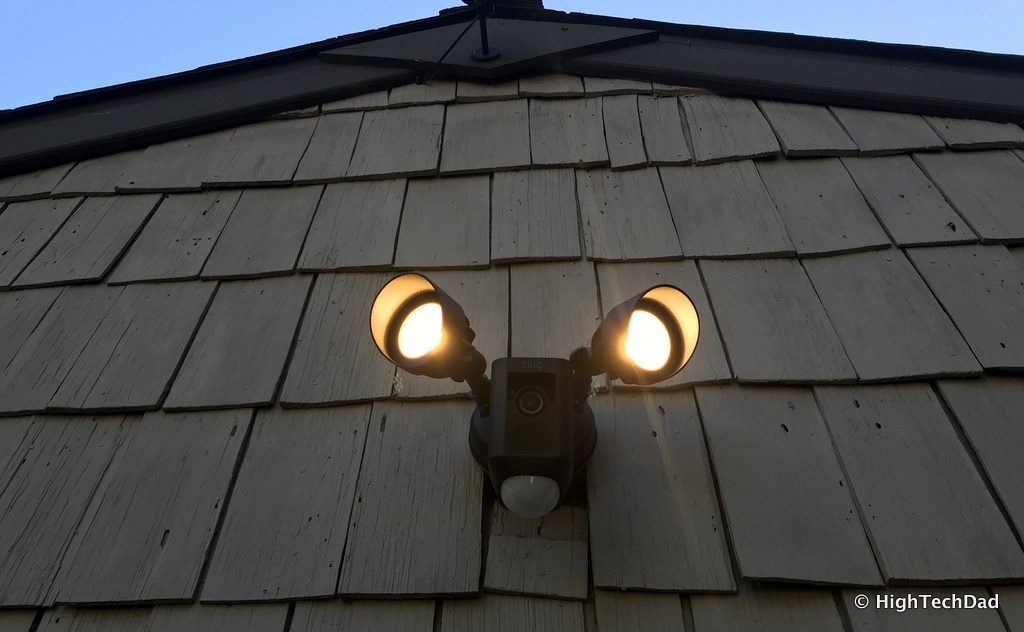
Overall, as I mentioned, the setup and configuration of the Ring Floodlight Cam is quite easy. I found the video streaming to be fairly consistent (sometimes there is a bit of artifacting or pixelation that occurs but this is primarily due to WiFi connectivity, especially when doing HD video streaming). The floodlights themselves throw a good amount of light, enough to light up pretty much my entire driveway. The resolution of the video is good during the day, and at night, fairly decent to see details even in black and white.
Being able to have two-way audio from a smart device directly to the floodlights is awesome. And coupled with the ability to initiate a siren on demand adds to the secure feel of the entire system.
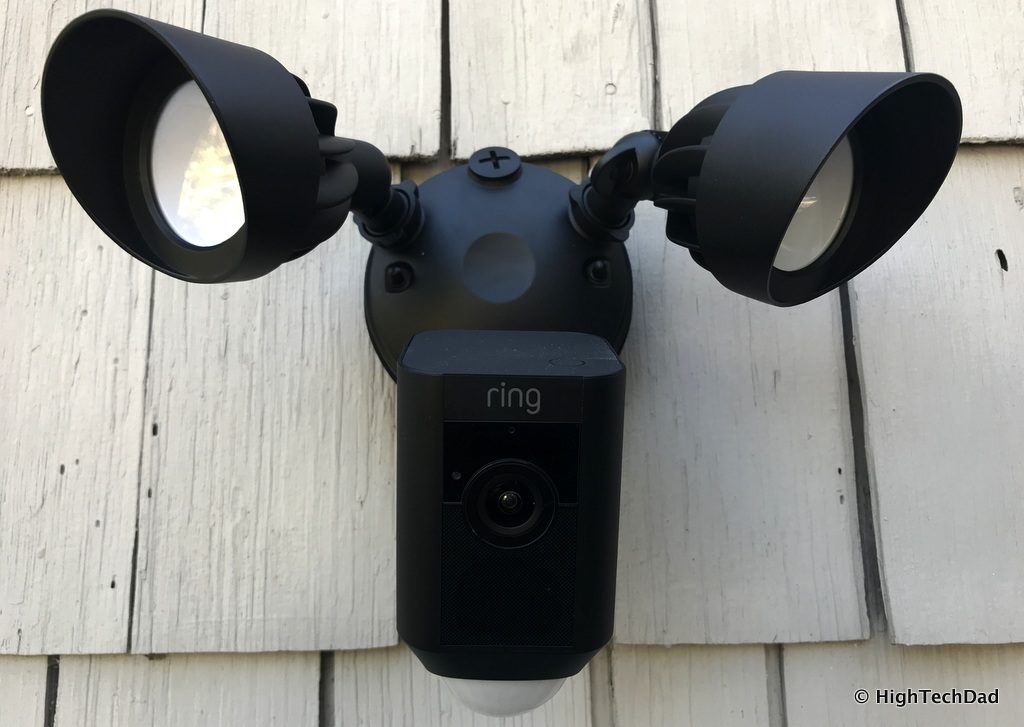
The Ring Floodlight Cam retails for $249 and comes in either a white or black finish. I felt that the black color blended in better for our house. And don’t forget about the monthly or annual plans for your cloud video storage. I do recommend getting one of those and I feel that the price is very good for the service. You can pick up the Ring Floodlight Cam currently on Amazon for $248.83 (in black).
Shop on HighTechDad
The product shown below (and related products that have been reviewed on HighTechDad) is available within the HighTechDad Shop. This review has all of the details about this particular product and you can order it directly by clicking on the Buy button or clicking on the image/title to view more. Be sure to review other products available in the HighTechDad Shop.
With the Ring Floodlight Cam, I now know when people pull into my driveway, if the gardeners are working, or if something suspicious is happening. And, I can directly interact with any of those activities via voice or a siren directly from my smart device. And, it’s just nice in general to keep an eye on my family coming and going.
Disclosure: I have a material connection because I received a sample of a product for consideration in preparing to review the product and write this content. I was/am not expected to return this item after my review period. All opinions within this article are my own and are typically not subject to editorial review from any 3rd party. Also, some of the links in the post above may be “affiliate” or “advertising” links. These may be automatically created or placed by me manually. This means if you click on the link and purchase the item (sometimes but not necessarily the product or service being reviewed), I will receive a small affiliate or advertising commission. More information can be found on my About page.
HTD says: You can never have enough technology security in and around your home. Your family is your most valuable asset and securing your home with a Ring Floodlight Cam is a logical step in providing an additional layer of security.
HTD Rating:
-
Ease-of-Use
-
Family-Friendly
-
Price Point
-
Features
Summary
You can never have enough technology security in and around your home. Your family is your most valuable asset and securing your home with a Ring Floodlight Cam is a logical step in providing an additional layer of security. From its easy setup to ease-of-use, it’s hard to find anything really “wrong” with the Ring Floodlight Cam. If you have a typical electrical setup, you can install it yourself in about 15 minutes (but just in case, budget a bit more time and be prepared for “wrinkles”). Configuring the Floodlight Cam is equally as easy. And the Ring app is just as intuitive. I felt the pricing to be quite reasonable, especially the cloud video storage plans. There are a couple of items that will make it even better, namely, integration with 3rd party hubs and services (Wink and IFFT) as well as being able to assign a different Ring Chime sound to different Ring devices. Other than that, I highly recommend the Ring Floodlight Cam.


1 comment
Aidan S, England
Great article, thank you :-)