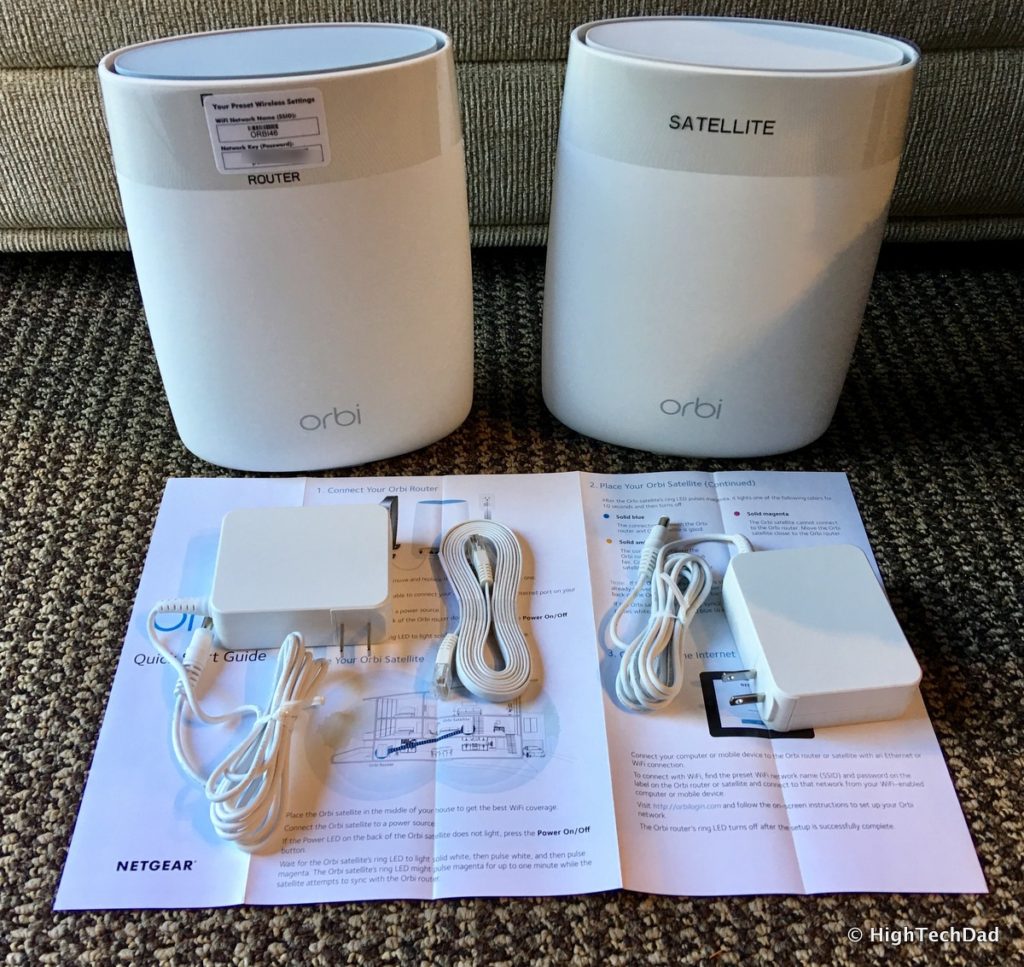
Testing various WiFi routers is starting to become an informal hobby of mine. Although I recently removed multiple WiFi routers from my home and consolidated all of my SSIDs under one name to make things simpler, I do have two NETGEAR routers running currently, the Nighthawk X8 (my primary router – see my review here) and now a NETGEAR Orbi (model RBK50) which provides additional coverage in other areas of my house. The Orbi was added so I could experience a new trend in WiFi- mesh networks. So I decided to “mesh” around. (Sorry.)
Before I dive into my review of the NETGEAR Orbi, let’s talk a bit about what a mesh WiFi network is. With a traditional WiFi router, your wireless network is broadcast from a single source, namely the router. Technology has evolved a bit with traditional routers, with new WiFi standards emerging. The latest mainstream standard is 802.11ac which many modern devices now have. There is a new standard coming, 802.11ad, and a few routers are emerging that support that, but for now, the 802.11ac router is the one to really consider the best for right now.

Disclaimer: I am a NETGEAR Ambassador and I received this product in exchange for my honest, unbiased opinion and review. |
With the Nighthawk X8, it’s pretty easy for me to blanket most of my small (1600 sq ft) home in WiFi goodness. However, at the edges of the home, in my garage, and in my garden area, the WiFi signal is pretty spotty (which is to be expected). But, I wanted to extend my WiFi range a bit further in order to get strong coverage in my garage and garden (to support some NETGEAR Arlo security cameras I have).
Options to Extend your WiFi Coverage
So, I had a couple of options. Option 1) For starters, since I ran Ethernet cabling to my garage, I could simply put another WiFi router out there. To make things simple, I could set the same SSID as my main Nighthawk X8. In this case, you would want to set the WiFi router as an Access Point. An Access Point is similar to a regular WiFi router but some of the features are not available. For example, you would not want the Access Point to be a DHCP server (assigning IP addresses to devices on your network). You normally only want one router doing this management. This is the path that many people take, provided they have an Ethernet connection.
Option 2) I could set up a wireless Extender or Repeater. The idea behind these is they can grab an existing Wifi signal and then amplify it to extend the range of the WiFi signal. There are some drawbacks to this. It is only slightly worse than the best signal it is grabbing. So while you may have full bars of signal when attached to the Extender’s signal, the actual speed and throughput will be dramatically less, which is normally not that desirable.
Now there is a new option, Option 3) known as Mesh WiFi. There are several providers who have recently entered this space. Some of these are managed meaning the Mesh router has to log into the router manufacturer’s mothership and you authenticate with them, and there are others like the NETGEAR Orbi that allows you to directly manage the device.
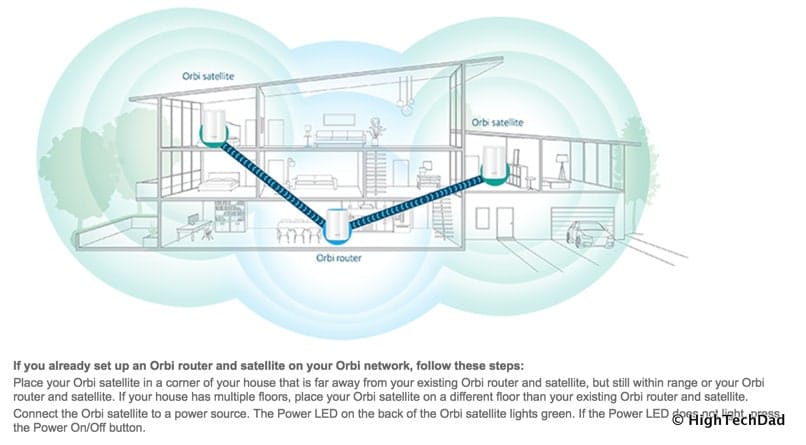
What sets the NETGEAR Orbi apart from others is the fact that it is a Tri-Band Mesh router. One of the bands is dedicated to connecting directly with the satellite and nothing more, while the other two bands are for devices that connect and use the WiFi. With the NETGEAR Orbi, the dedicated channel is a 1.7GBps 5MHz one. There is an informative knowledge base article about this on the NETGEAR site.
Are you a WiFi expert now? (I’m still trying to figure it all out and I geek out on this stuff a lot!) Anyway, let’s take a look at the NETGEAR Orbi and the features.
Setting Up the NETGEAR Orbi
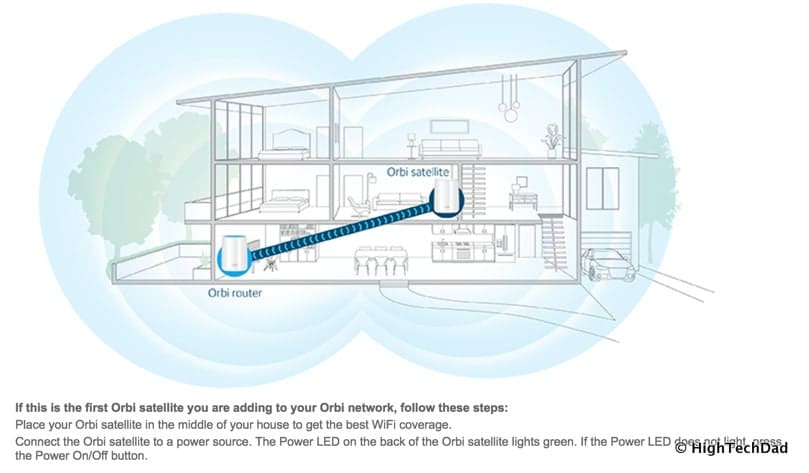
For most people who are looking to upgrade their WiFi environment, you are probably weighing the options between just a simple WiFi router and one of these new Mesh routers. The Mesh routers are typically a bit more expensive because you get a much wider coverage, easy setup and management, and faster throughput (versus older or less-expensive routers). A typical home of about 2000 square feet should only need the 2-pack Orbi (the router and one satellite). You can easily add another satellite and connect it into your Orbi mesh later if you need to.
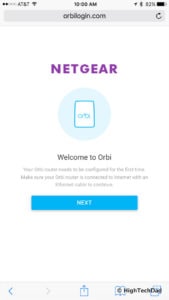
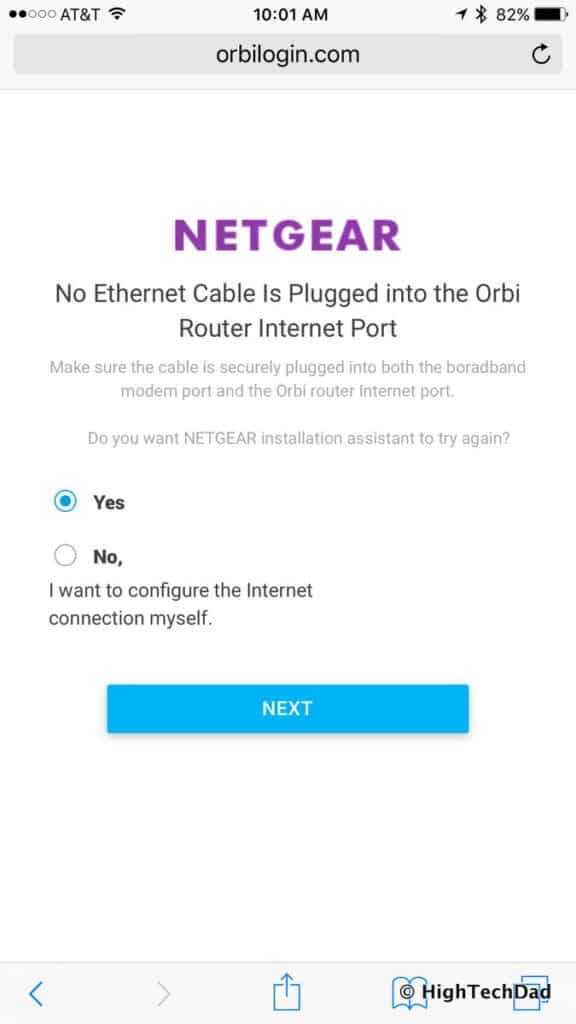
I actual took my own route to set the Orbi up. Instead of plugging into the WAN (the Ethernet connection from the modem) or even my LAN, I decided to configure my Orbi first. So I just plugged in the power to the Orbi router and headed over to the configuration screens.
Using just my iPhone, I went through the various initial setup screens.
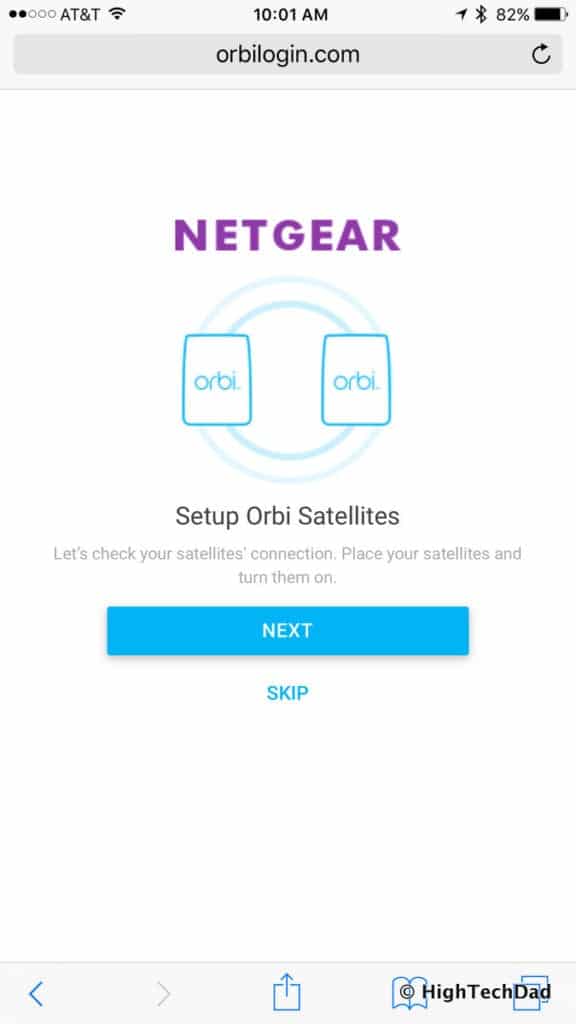
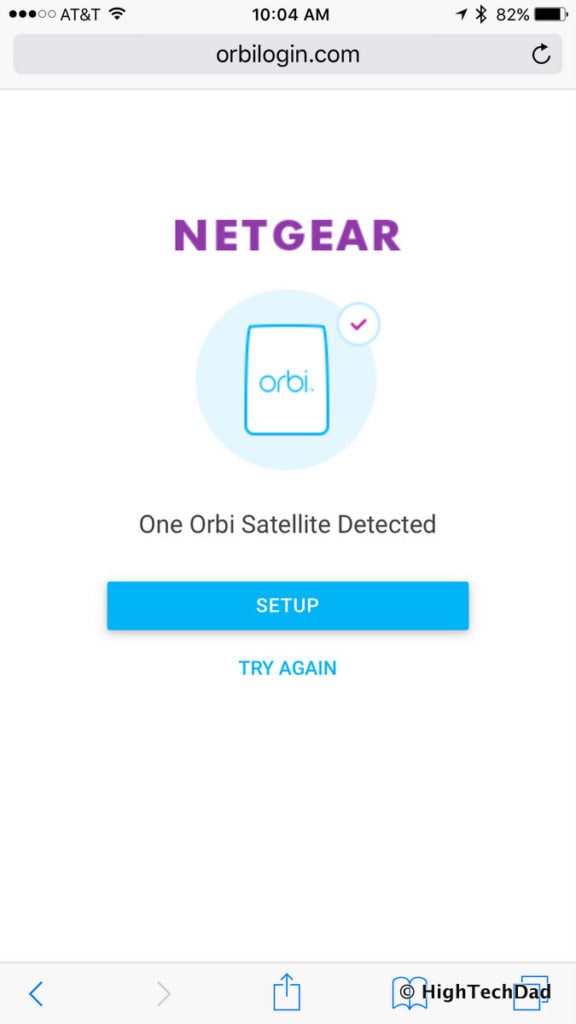
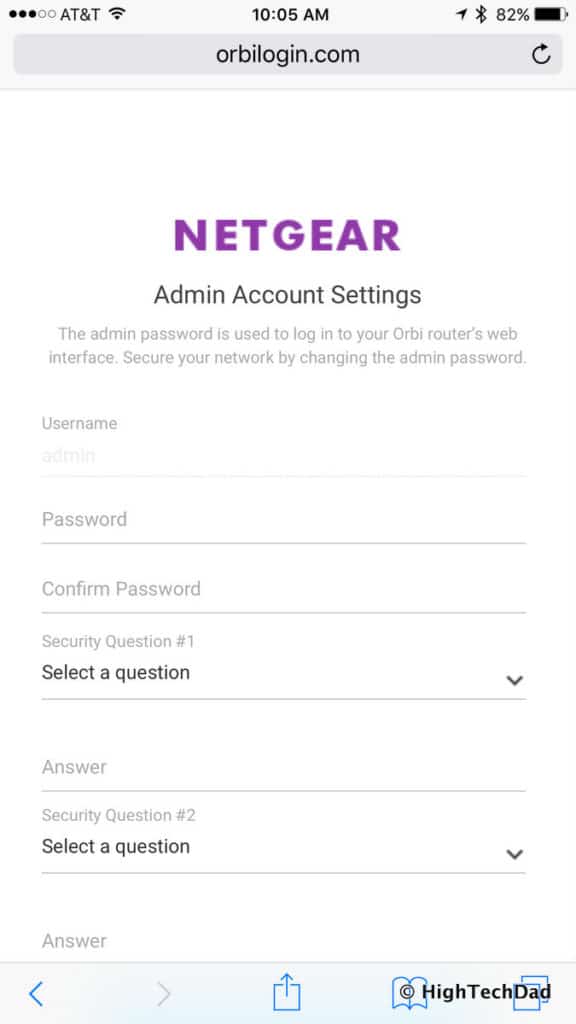
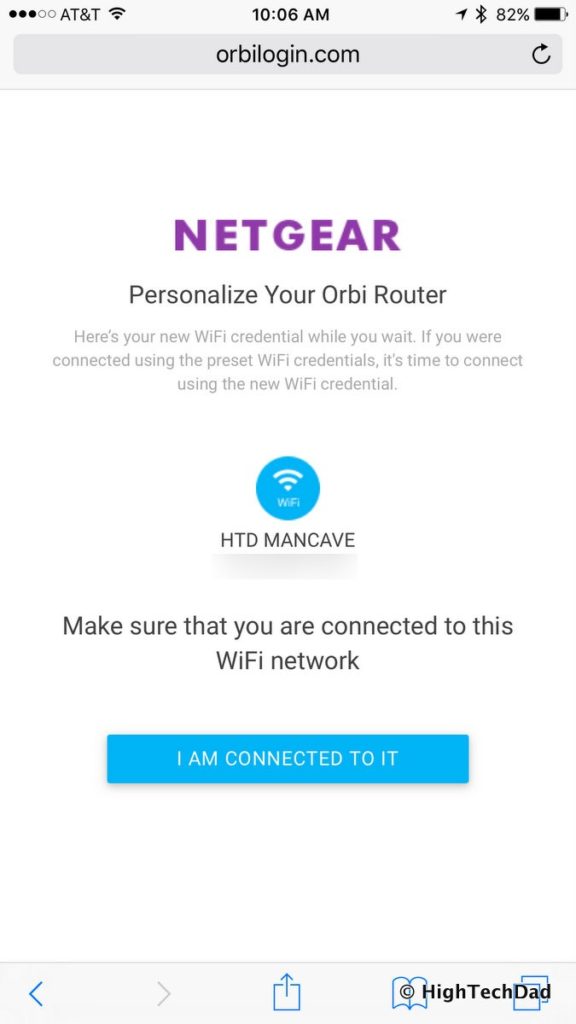
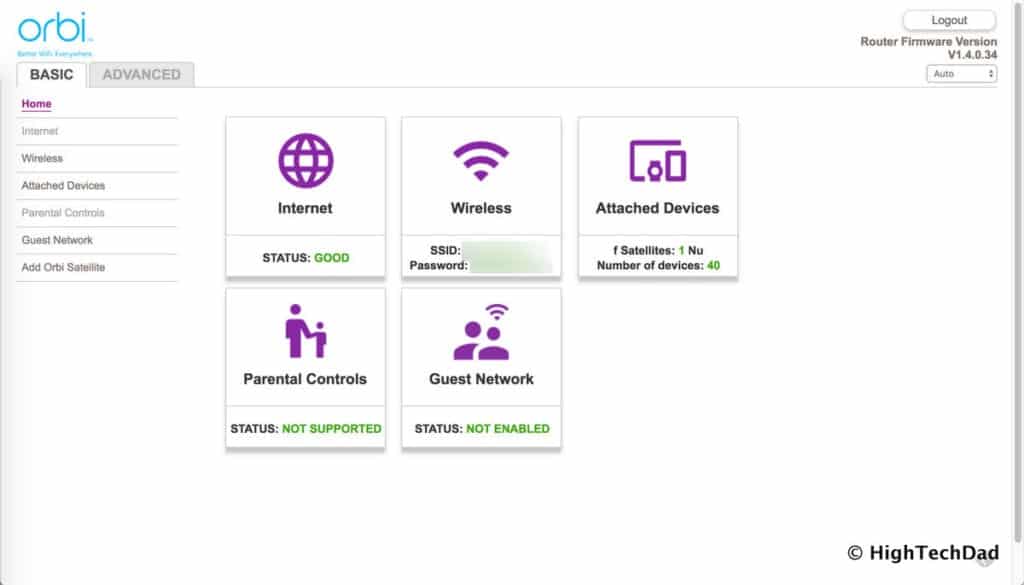
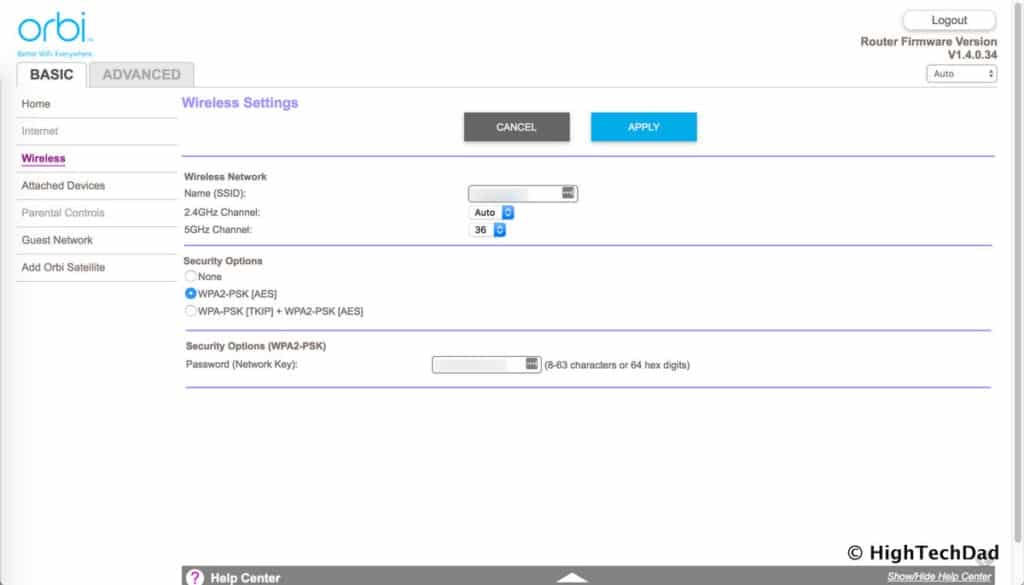
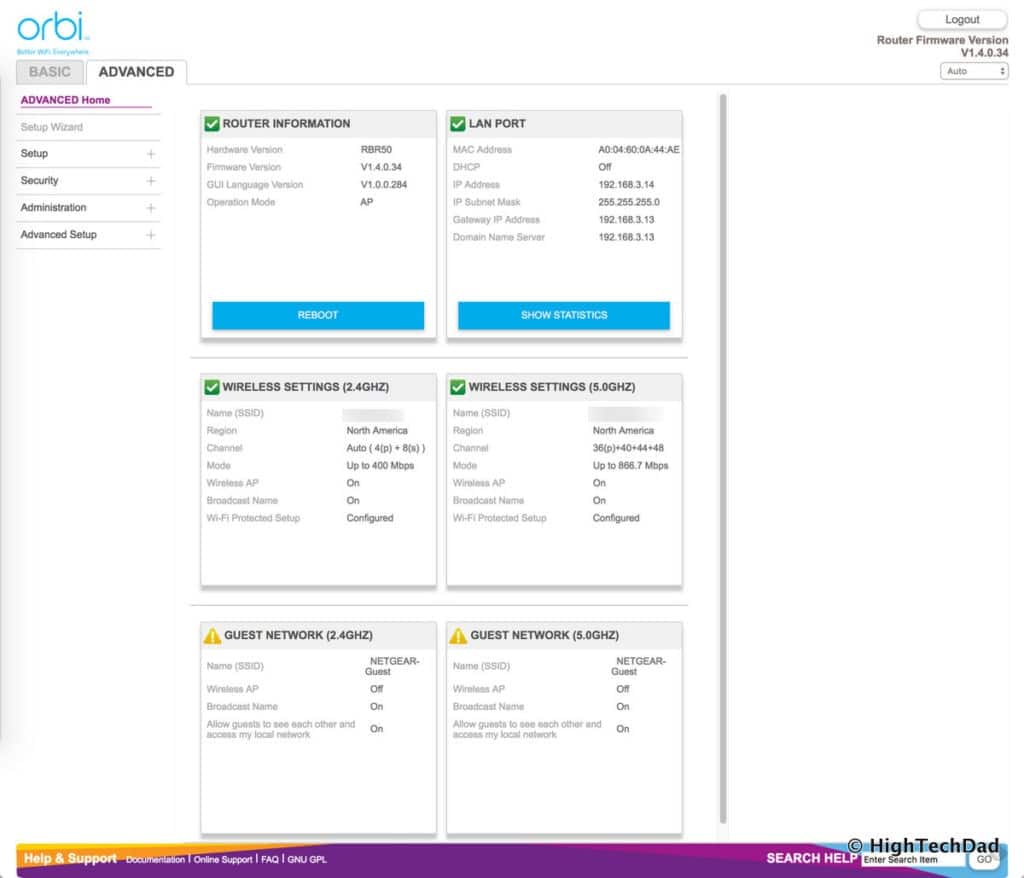
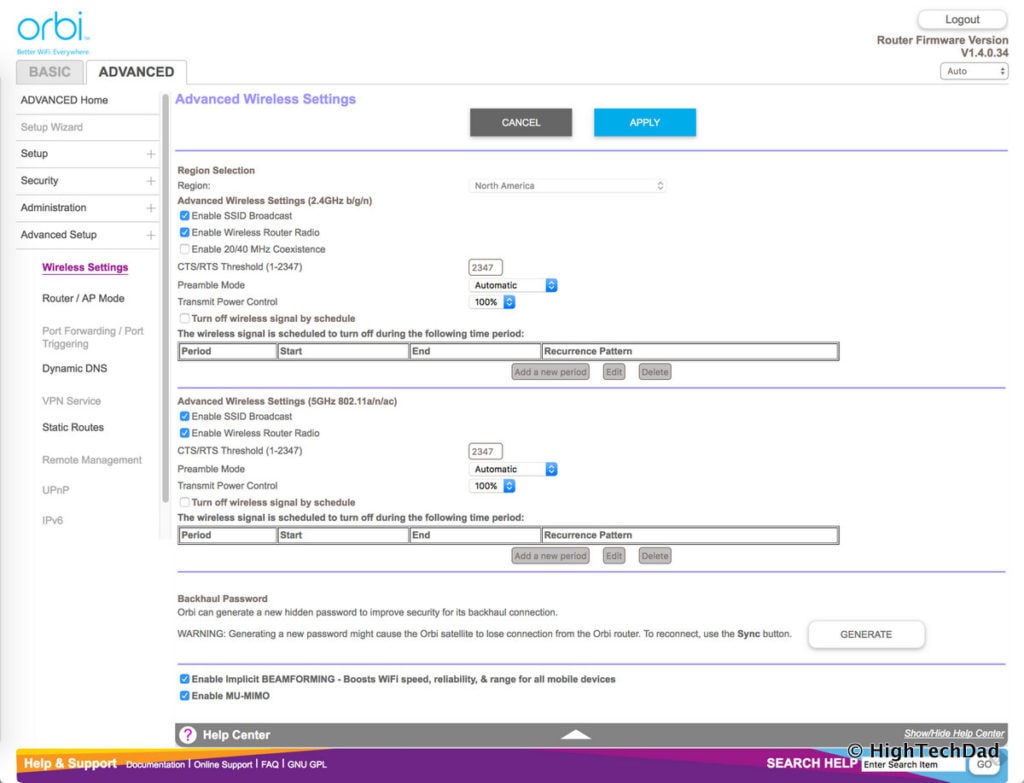
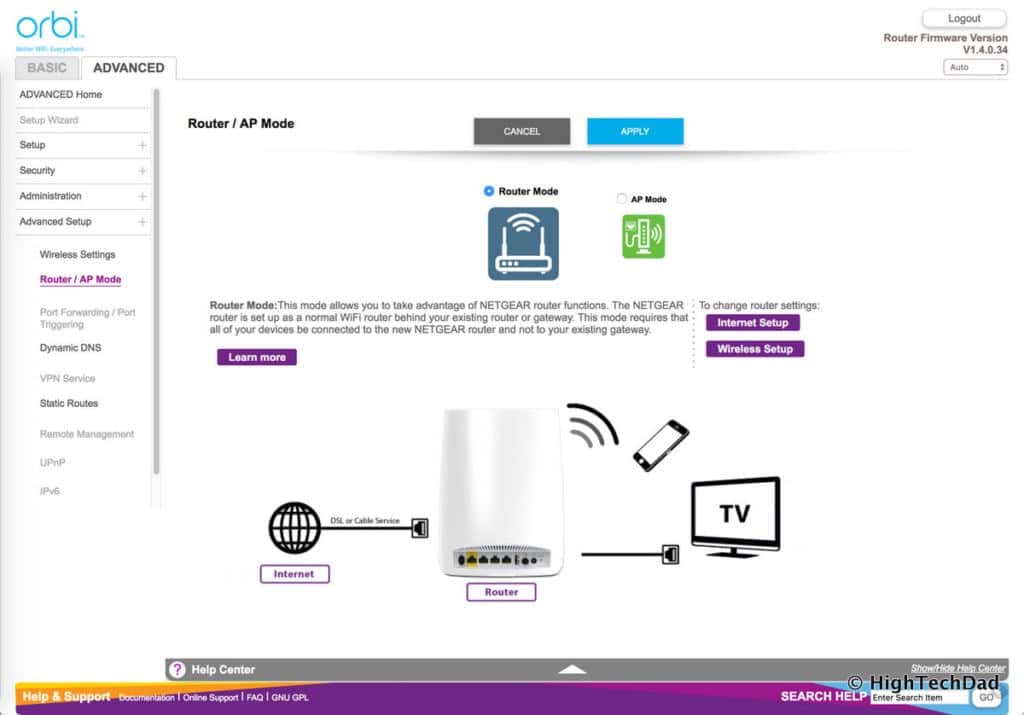
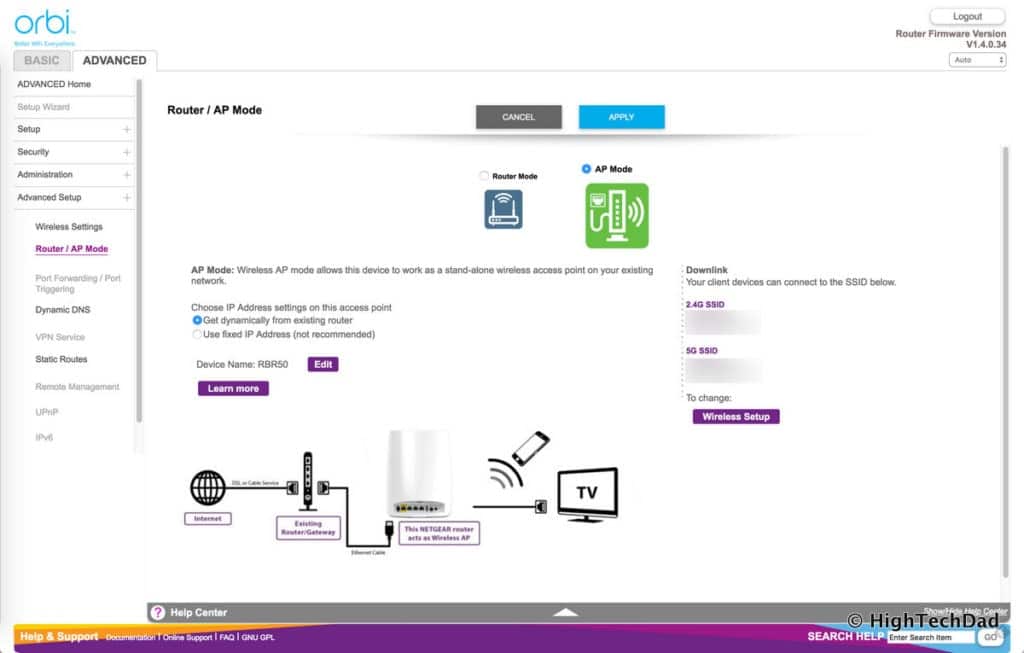
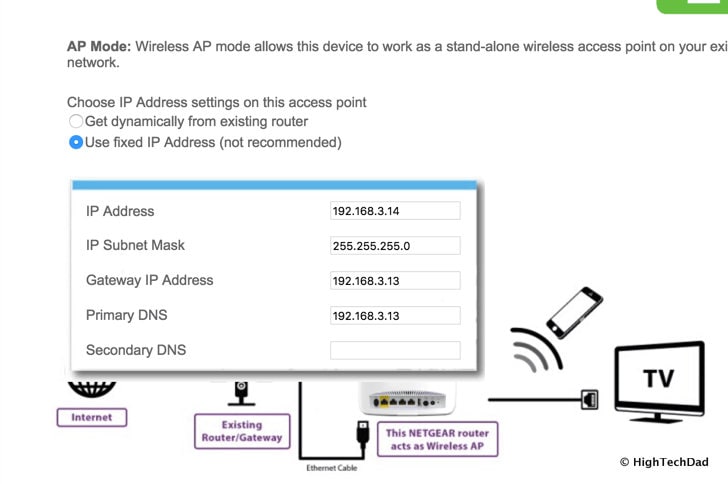
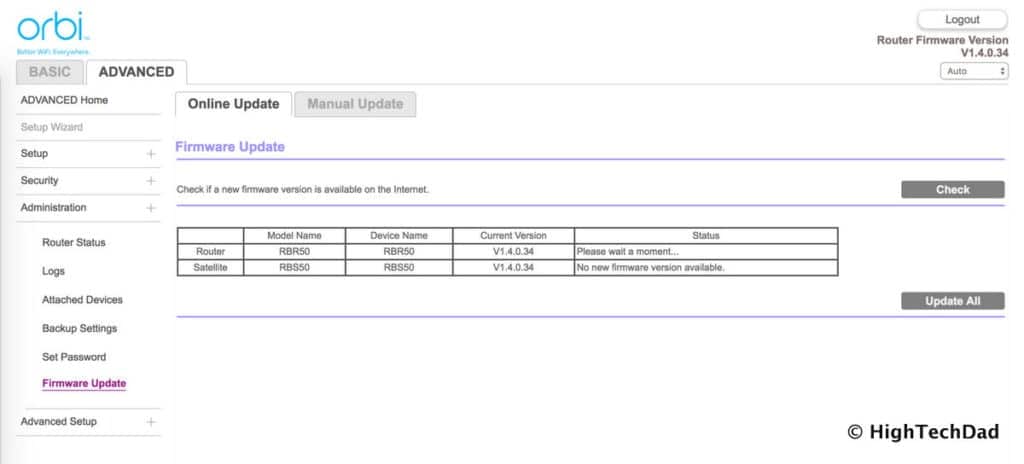
Another nice thing about the NETGEAR Orbi is that firmware updates are fairly regular as new features or fixes are pushed out. Under the Administration > Firmware Update setting, you can automatically check for and update firmware for both the router and satellites.
Using the NETGEAR Orbi
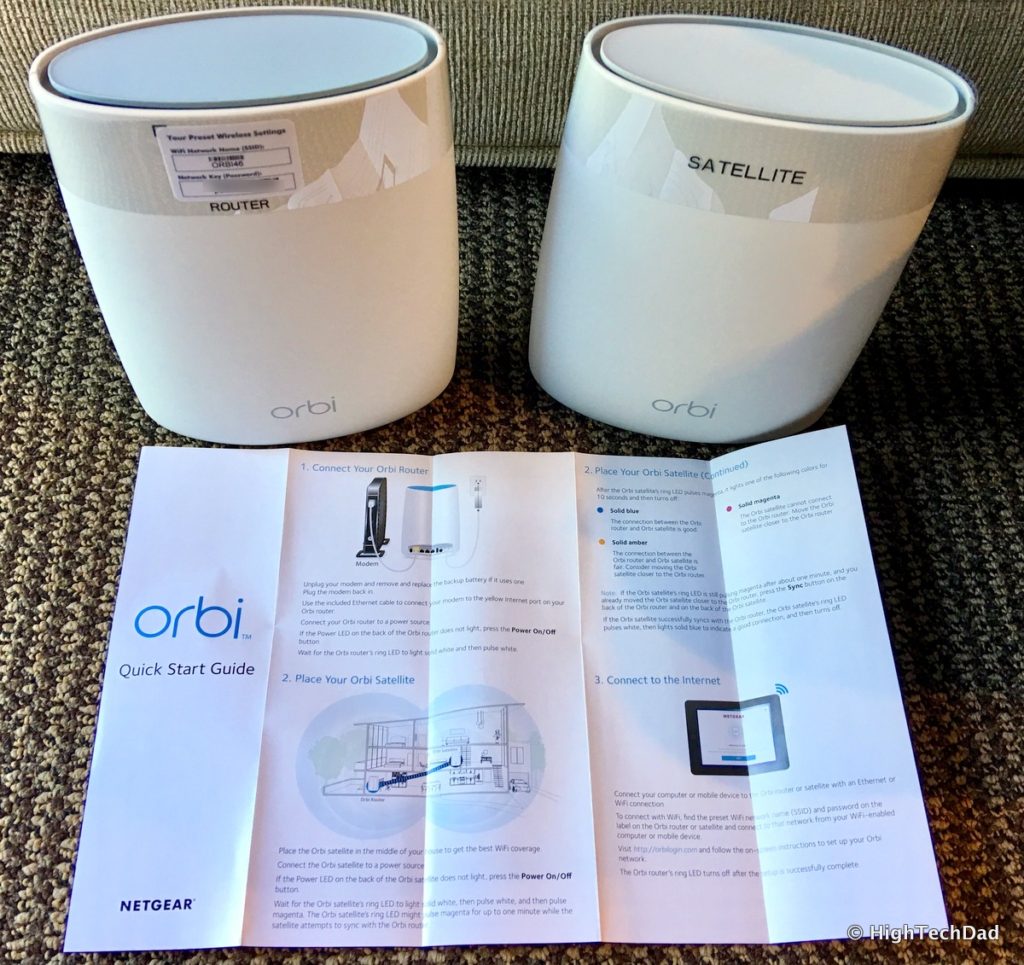
Once you have everything configured to your liking, you can move the Orbi Satellite to a different location. The Orbi Satellite does indicate to you how good of a connection it has with the Orbi Router via a light on the top. If the light is Blue, it is successfully synced and has a strong connection. If the light is Amber, it is still synced but the connection is only fair (and you may want to consider moving the Satellite closer to the Orb Router or positioning it differently). If the light is Magenta, you do not have a connection with the Orbi Router and you need to resync it.
Resyncing is quite easy. Just press the Sync button on the back of the router and then wait a minute or two and do the same thing on the Satellite.
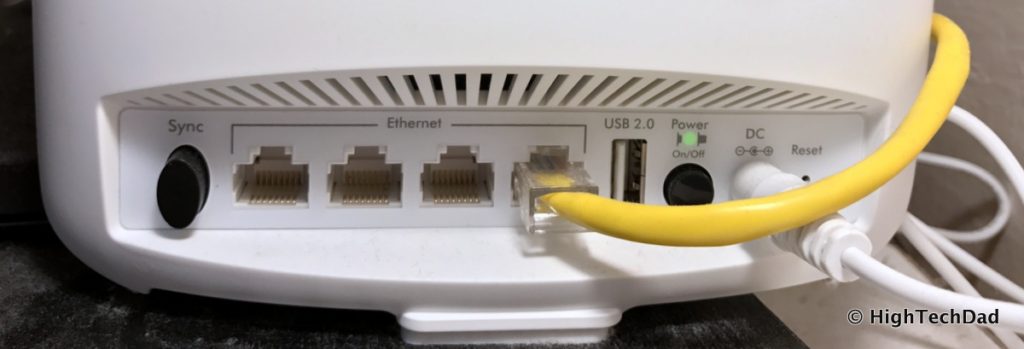
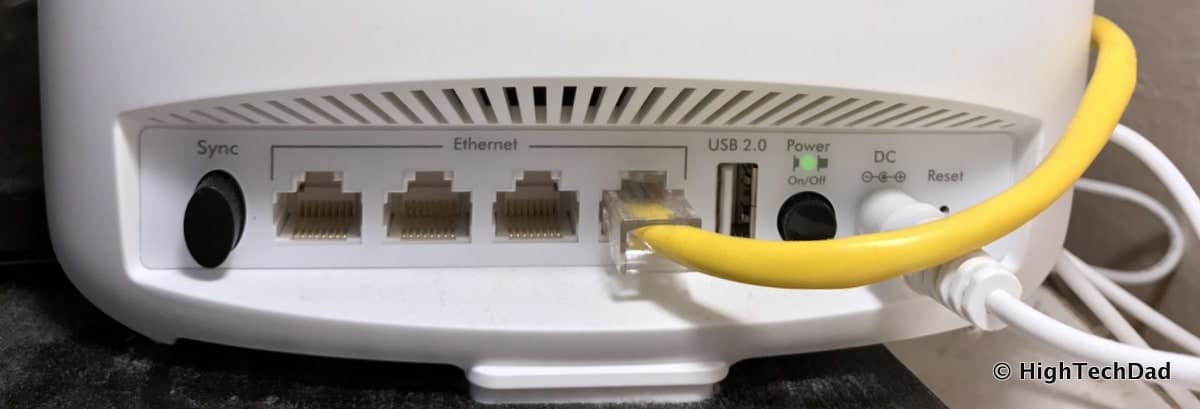
As you can see on the image above of the back of the Orbi satellite is the fact that it comes with a 4-port Ethernet hub. This is also a big differentiator between some of the other Mesh vendors. This allows you to physically connect other devices that might not have WiFi capabilities, or if you want a slightly faster connection option.
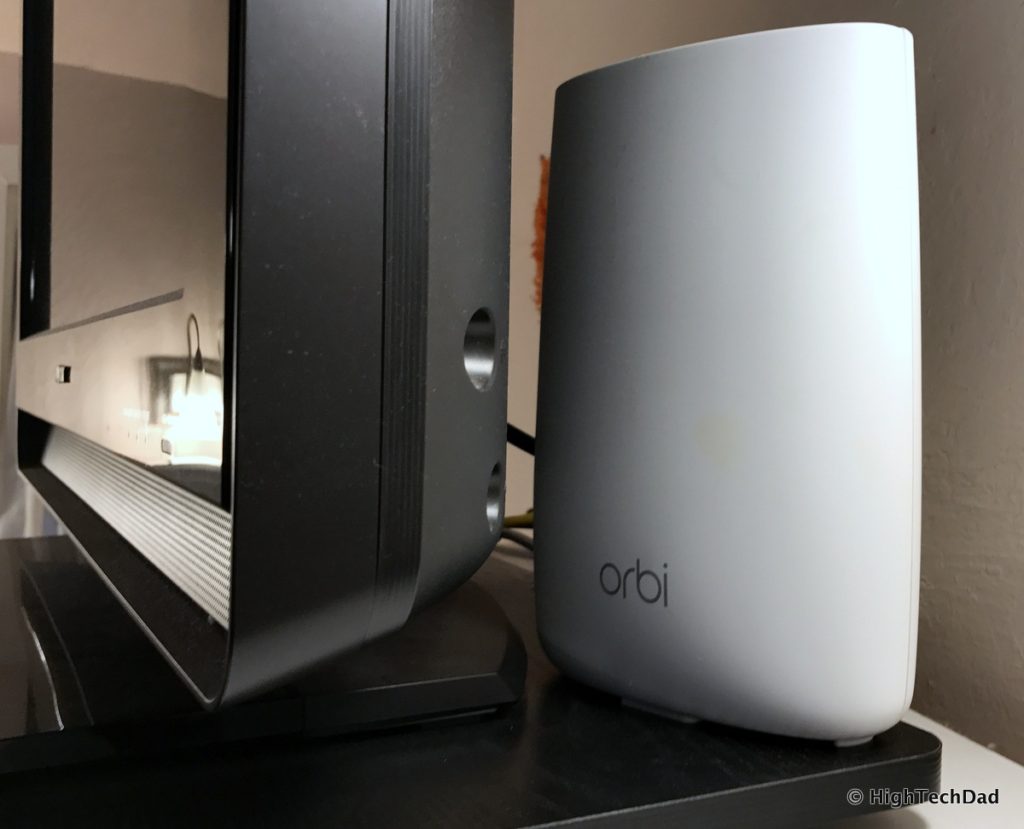
In fact, in our bathroom, I have an Apple TV and a monitor configured and I placed the Orbi satellite in there and wired in the Apple TV.
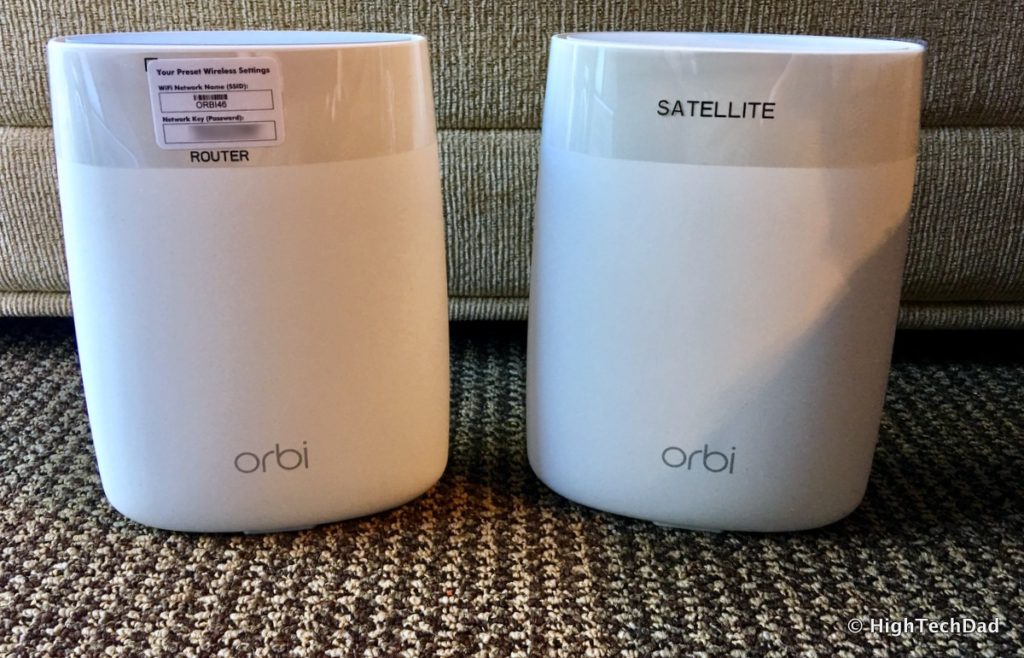
And if you have a larger home, there is a 3-piece Orbi system available for $594.70 on Amazon. This has the main router and two satellites.
[easy-tweet tweet=”I now understand different #WiFi options including #mesh from @HighTechDad’s Review of @Netgear #Orbi” via=”no” usehashtags=”no”]
Overall, while a bit expensive if compared to a traditional WiFi router, the NETGEAR Orbi is a leader within the Mesh WiFi space. It’s extremely easy to set up and configure, has a compelling and unique design, and does a great job blanketing WiFi across homes. It’s one of those set it and forget it devices (apart from regularly checking for firmware updates). Trust me, your family will be pretty happy to have fast WiFi access wherever they are in your home.
Disclosure Text : I have a material connection because I received a gift, sample of a product or service, and/or monetary compensation for consideration in preparing to review the product/service and write this content. I was/am not expected to return this item or gift after my review period. All opinions within this article are my own and are typically not subject to the editorial review from any 3rd party. Also, some of the links in the post above may be “affiliate” or “advertising” links. These may be automatically created or placed by me manually. This means if you click on the link and purchase the item (sometimes but not necessarily the product or service being reviewed), I will receive a small affiliate or advertising commission. More information can be found on my About page.
HTD says: Having fast, reliable WiFi throughout your home is a must these days. Another must is eliminating any types of dead zones. The NETGEAR Orbi gives you all of this and more in an easy-to-use device.
HighTechDad's Ratings
-
Ease-of-Use
-
Family-Friendly
-
Price Point
-
Features
Summary
Having fast, reliable WiFi throughout your home is a must these days. Another must is eliminating any types of dead zones. The NETGEAR Orbi gives you all of this and more in an easy-to-use device. After using the NETGEAR Orbi for a couple of months now, I can truly say that there are fewer dead zones in my house and WiFi has been fast and reliable. With an easy setup and good capabilities, this Mesh WiFi router is solid. Remember, it is expensive but is an investment in happy WiFi users at home.


4 comments
StoneFX
Great review! I’ve been eyeing the Orbi 3-Pack at Costco for some time now… I’m trying to determine what the best wifi system is for someone who plans on using CAT6 ethernet for the backhaul load.
I’ve learned the Netgear Orbi isn’t really a mesh networking system. It’s a hub-and-spoke system as none of the satellites communicate with each other… they all communicate with the router. It’s closer to a traditional router/extender setup except the extender in this case has a dedicated backhaul channel. Apparently Netgear will at one point add the capability to daisy-chain the satellites, but I can’t find a timeline for that yet. For your average user, this isn’t really important :-P.
This Techhive article does a good job describing the difference in it’s review of Netgear Orbi: http://www.techhive.com/article/3162400/network-router/netgear-orbi-wi-fi-router-review-its-not-a-mesh-network-but-its-good-enough-you-wont-care.html
hightechdad
Thanks for the comment. You are absolutely correct. The Orbi does follow the hub and spoke model (but they do have the 3 channel approach with one channel dedicated to connectivity between router and satellites). I’m in the process of writing a review of another mesh router that does do the daisy-chain process and does it quite well automatically. Stay tuned!
Kimo Villar
Like you, I have an X8 and wanted to use it as my main router and use the Orbi’s as APs. However, I could not setup my Orbi’s without connecting to the internet. It would not let me proceed any further. So, my question is; can I still setup my Orbi’s (main router & satellite) without using hardwired Ethernet connection?
hightechdad
Hi Kimo, I ran into the same issue as I too wanted the Orbi to be an AP. You don’t have to plug in the WAN connection. I used the web interface to set it up using the default IP address for the Orbi (not connected to WAN or anything). Then I configured a static IP. And then I switched it to an AP. I tried to document it above (but perhaps I missed a step). But you CAN do it the way you outlined. Let me know if you have any additional or specific questions.