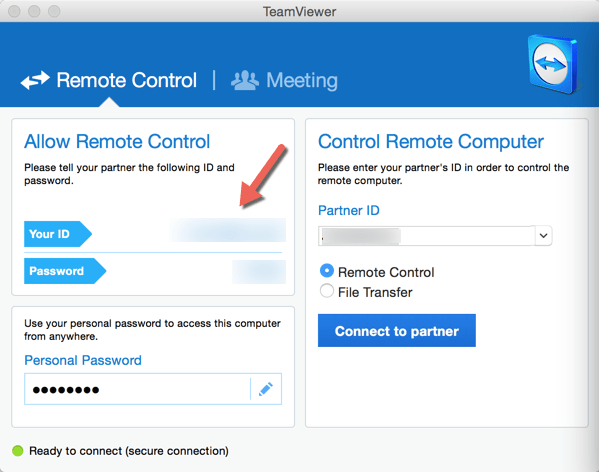
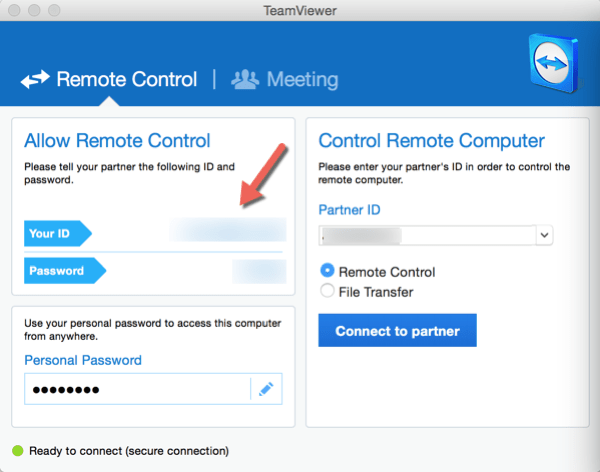
Recently, I set up a new MacBook Pro for my step-mom where I used Apple’s Migration Assistant to easily copy over all of her data, applications and preferences. One of the applications that I actually use on her machine is TeamViewer which is fanstanstic if you need to provide remote assistance to a Mac or PC (you can actually set up a free account – I highly recommend this service). So one of the first things that I do is to configure TeamViewer on any machine that I may need to provide remote assistance to. As part of the Migration Assistant process, TeamViewer was copied over to the new Mac so I didn’t need to reconfigure anything…or so I thought.
There was a problem though. As I was going to reconfigure the old Mac for my daughter, I was also going to set up TeamViewer on that Mac. Sounds great right? Wrong. When TeamViewer sets up the TeamViewer ID, it makes it so that you cannot easily change it. Unfortunately, that means that on cloned Mac systems, the TeamViewer ID will be the same on the old and the new Macs, pretty much rendering TeamViewer useless when both cloned and original Macs are running.
I had read some support posts and tested out some things (like changing the MAC address) to try to reset the TeamViewer ID but until I actually contacted TeamViewer support, none of the other fixes worked. So, instead of having to search for the solution, I figured I would write out the easy steps to reset the TeamViewer ID.
How to Reset the TeamViewer ID After Clonging a Mac
Here are the steps (which I slightly modified by adding some additional lines for the latest version 10 of TeamViewer) to reset the TeamViewer ID. The commands below are for the Mac. (I would expect the process for a PC to be different so I’m not covering how to do this on the PC.)
NOTE: YOU NEED TO RUN THESE COMMANDS ON THE NEW (CLONED) MAC, NOT THE ORIGINAL MAC.
These are terminal commands, meaning you need to launch the Terminal application (usually found under Applications > Utilities).
This is what TeamViewer Support provided me with:
defaults delete ~/Library/Preferences/com.teamviewer.teamviewer9.plist
defaults delete ~/Library/Preferences/com.teamviewer.teamviewer9.Machine.plist
sudo defaults delete /Library/Preferences/com.teamviewer.teamviewer9.plist
rm -f ~/Library/Preferences/com.teamviewer.teamviewer9.plist
rm -f ~/Library/Preferences/com.teamviewer.teamviewer9.Machine.plist
sudo rm -f /Library/Preferences/com.teamviewer.teamviewer9.plist
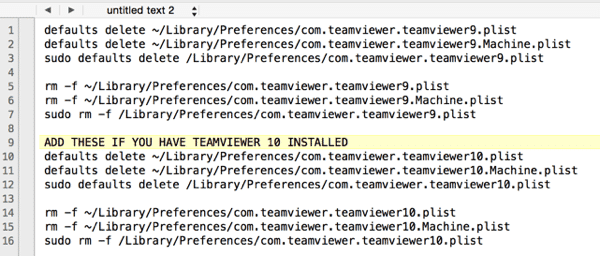
(In case there are questions about the characters, here is an image with the commands.)
However, since I had installed TeamViewer version 10, there were some other .plist files specifically for version 10.
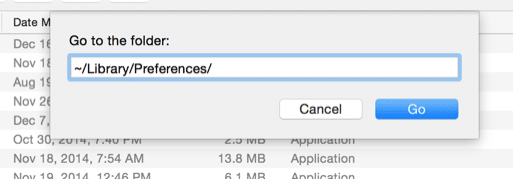
You can check to see which version you have by going to the Finder and choosing the “Go” menu and “Go to Folder…”. You then put in “~/Library/Preferences/“ and look for the “com.teamviewer.teamviewer10.plist” for example.
So if you have TeamViewer 10 installed, you will want to add some of these commands as well.
defaults delete ~/Library/Preferences/com.teamviewer.teamviewer10.plist
defaults delete ~/Library/Preferences/com.teamviewer.teamviewer10.Machine.plist
sudo defaults delete /Library/Preferences/com.teamviewer.teamviewer10.plist
rm -f ~/Library/Preferences/com.teamviewer.teamviewer10.plist
rm -f ~/Library/Preferences/com.teamviewer.teamviewer10.Machine.plist
sudo rm -f /Library/Preferences/com.teamviewer.teamviewer10.plist
Here is the image of the commands to reset the TeamView ID:
Once you run these commands to reset the TeamViewer ID, everything should work ok.
What the various commands mean
You should never run terminal commands unless you know what you are doing and what the commands mean and do. For reference, I explain each of these commands. If you ever need to know what the commands mean, just go into termain and type “man” (for manual) and the command. For example, the first one here was from “man defaults”.
- Defaults – allows users to read, write, and delete Mac OS X user defaults from a command-line shell. Mac OS X applications and other programs use the defaults system to record user preferences and other information that must be maintained when the applications aren’t running (such as default font for new documents, or the position of an Info panel). Much of this information is accessible through an application’s Preferences panel, but some of it isn’t, such as the position of the Info panel.
- Defaults Delete – removes the default information.
- rm – The rm utility attempts to remove the non-directory type files specified on the command line.
- -f – Attempt to remove the files without prompting for confirmation, regardless of the file’s permissions. If the file does not exist, do not display a diagnostic message or modify the exit status to reflect an error.
- Sudo – sudo allows a permitted user to execute a command as the superuser or another user, as specified in the sudoers file. The real and effective uid and gid are set to match those of the target user as specified in the passwd file and the group vector is initialized based on the group file (unless the -P option was specified). If the invoking user is root or if the target user is the same as the invoking user, no password is required. Otherwise, sudo requires that users authenticate themselves with a password by default (NOTE: in the default configuration this is the user’s password, not the root password).
These commands and the process outlined worked as I now have both the cloned and original MacBook Pros with different TeamViewer IDs. Also, there is a setting buried in the Advanced part of the TeamViewer that allows you to uninstall the application including the configuration files.
I didn’t test this process but it try using other 3rd party uninstallers which are supposed to remove all traces of the app including .plists. Unfortunately the uninstallers still produced the same TeamViewer ID.
Regardless, I highly recommend using TeamViewer as a personal support tool for helping remote family members with technology issues. Again, it is free to use for personal use but if you are going to use it in a business or corporate environment, you need to purchase a license.
HTD says: Once you know the commands, it’s pretty easy to reset the TeamViewer ID.


16 comments
Tin Šesni?
I have never tried this on Linux, but it works on windows and I am confident it would work the same on Linux.
You are trying to create image of the PC to be loaded on bunch of different PC-s later on and you would like TV ID to be unique for every new image load?
Solution,
install, set up, do what ever you need without installing TV. Disconnect your PC from the network (TV needs to contact they’re server to obtain ID). Install TV, create inage/clone. When you load this clone on another computer TV will ask server for ID for the first time and receive unique one.
BR,
Lee
After trying all of the below, the only solution for me was to uninstall from the original computer. My original computer was assigned a new ID, and the secondary computer kept my original ID.
Nick Müller
I used a way simpler method which did the trick without any terminal commands and so on. in fact it takes two steps only. A long time ago i found an app in the Hackstore called appcleaner. A very handy lightweight app which allows you to remove apps completely from your machine including all those pesky hidden .plist files and so on. You can also choose which files should be deleted and which ones you want to keep. heres the official site of the developer. https://freemacsoft.net/appcleaner/
stevenjklein
We have a corporate license, and I use images to prep all our Macs. The steps I use are much simpler:
1. Quit TeamViewer.
2. Open the terminal and type these two commands:
sudo rm /Library/Preferences/com.teamviewer*.*
sudo rm ~/Library/Preferences/com.teamviewer*.*
That’s it! When you restart TeamViewer, it will have a new ID. (You do not need to restart the Mac.)
desertman
stevenjklein – This does not work on my machine. I suppose that Teamviewer looks not only at the content of some configuration files but also some other criteria (i. e. MAC addresses) to determine the ID.
hightechdad
Thanks for this. They may have made changes to how the app writes to the system. It was more complicated before.
Bushpossum
Try this:
Goto Teamviewer Preferences Advanced.
Scroll to the bottom and choose Uninstall,
being sure to tick “Also delete configuration files”.
Then re-install Teamviewer.
I did this on both Macs at once (I’m not sure if that is crucial).
Cheers, BP
maestro72x
This did not work
Bushpossum
Oh well, it worked for me, so it’s worth a try.
If it does work it’s better than messing with .plists.
It’s not clear why Teamviewer doesn’t ensure that the “Also delete configuration files” option erases all the pesky .plist files. Cheers, BP.
Nick Müller
Try using Appcleaner for Clean Removal and ReInstall it then. Worked for me. https://freemacsoft.net/appcleaner/
bugaboo
Thanks, worked great.
John
I tried the above several times and couldn’t get it to work. I then contacted teamviewer and they sent me the following instructions, which did work but only after I did it to the original machine as well. In fact, the cloned machine kept the original Id and the original machine changed to a new one:
Please delete the plist file of TeamViewer on the cloned system. To make sure we would recommend, deleting the files on both systems.
You will find this file under:
Finder | Home directory | Library | Preferences. Here, delete all plist entries of TeamViewer.
Please also remove all entries starting with “com.TeamViewer” from
usersUSERNAMELibaryPreferences
Please note that on OS X Lion and later, the library folder is hidden.
Here is a simple way to unhide the Library folder on the new Mac OSX Lion:
1) Open a terminal window
2) Type the following command : chflags nohidden /users/”username”/Library
After doing this, you should be able to find the folder under the users directory.
After a restart of your system, you will have a different ID.
hightechdad
Thanks for sharing.
Edward Bebee
An alternative to the command line method is…
1) navigate to the two folders
(root of hard drive)/Library/Preferences/
(username)/Library/Preferences/
— hold down the Option key while choosing the “Go” menu in Finder to see the user Library in the list of available folders to go to.
2) delete all Teamviewer files (the filenames start with “com.teamviewer” and end with “.plist”
3) restart the mac
4) start TeamViewer. It will treat you as a new user and give you a new ID.
But I wouldn’t have known any of this without the above article. Good work, Dad! :)
And Thanks!
Wigwam2
Wow. WOW. So simple. Totally worked. Dec 31 2016 Teamviewer version 10. Thank you !
Bello2950
It’s works perfect. Thank you very much !