So by now you have gone through the Slingbox Pre-installation tasks of setting up your network (wired, wireless or over the powerlines) and you have checked through the box to be sure that you know what connectors you need and how to use them. Let’s take a look at the steps of setting up and configuring your Slingbox PRO-HD for the first time. The following screenshots and setup steps come from a Windows Vista Ultimate box that has a wired connection to the Slingbox.
Before you go into the setup, here are some quick recommendations. These aren’t critical and are things that you might want to consider.
- You will get better performance (potentially faster setup time) if your Slingbox and computer are on a wired network together.
- If you have a wifi connection to your devices, see if you can get at least one of them on a wired connection
- Be sure that you download the latest version of the SlingPlayer software. (Windows version & Mac version – note, Mac version does not yet support streaming HD as of this writing)
Let’s take a look at the steps that I had to follow when I was setting up.
-
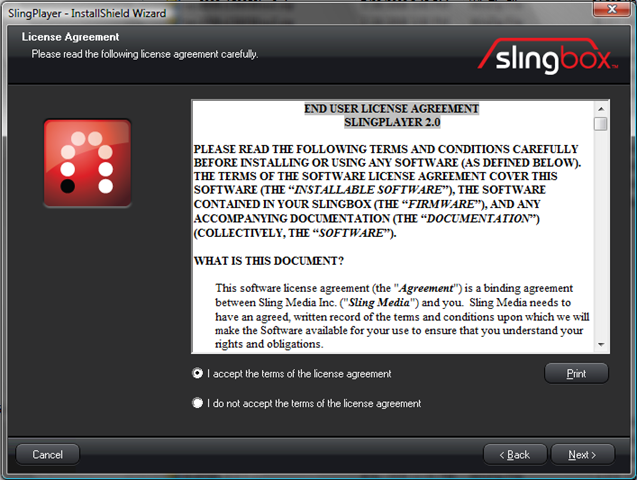
Accept the Terms of Service – go ahead and read this…if you want.
-
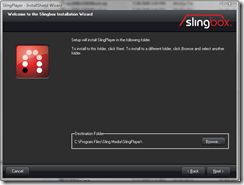
Decide on the installation location – best bet is to just accept it and move on.

-
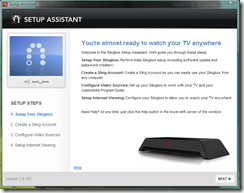
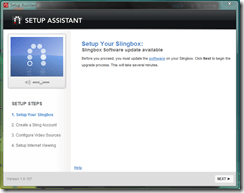
Start the Setup Assistant – Note, this Assistant may become your friend in the future as you will use to to reconfigure your Slingbox, Apply firmware update, set up additional components that you may add later and other items.

-
Check for Software Updates – at this point, if you Slingbox needs a firmware update, it will let you know. Note: you must have an internet connection for this.

-
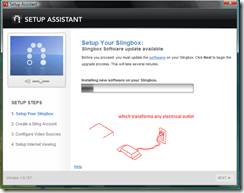
Applying the Updates – this may take a bit of time as the software flashes the device. While you are waiting you can try to figure out the details of your TV service (e.g., the name of the area of coverage, etc.) as you will be asked that later. Best place for that is to go to your service providers website.

-
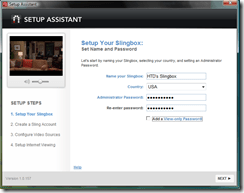
Set up your Slingbox Name & Password – this is the primary account (administrator) that you will use to manage your Slingbox. The steps that follow are for a new user setup. You can optionally check the “View Only” box and then you can create a password for those types of users. Essentially, you have 2 users: 1) Administrator who controls everything about your Slingbox and 2) Viewers who can use your Slingbox but can’t make any changes to it. REMEMBER: you can have only 1 user total using a Slingbox at a time. As soon as someone tries to access it, any other users are bounced off. So, 1 at a time. Also, for the first time, you see a small video streaming from your new Slingbox on the left window.

-
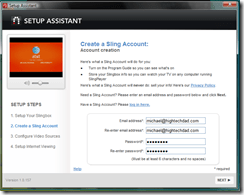
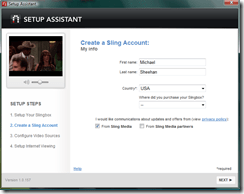
Set up a Slingbox Account – Here is where you create an account with Slingbox. By doing this, you can set up program guides as well as store information about your Slingbox(s). This is particularly handy if you have multiple Slingboxes and want to view different ones at different times. You can also add Slingboxes from your friends or family here (later).

-
Name and Marketing Preferences – just some additional details captured about you for marketing purposes.

-
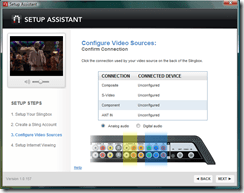
Configure Video Sources – this is where you hook up up to 3 Video source (e.g., Cable/Satellite box, DVD player, Game Console). The options are: Composite, S-Video, Component and Antenna In.

-
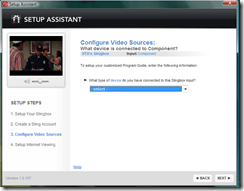
Selecting Components – In this screen, since I have only my Satellite box connected to the component input, I chose that.

-
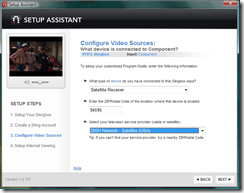
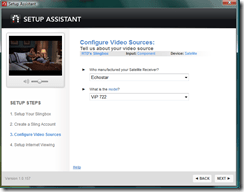
Configuring Cable/Satellite – here you select what type of receiver you have (I chose Satellite Receiver) and you enter in your zip code in order to retrieve the appropriate Television Service for you area. Once the zip is entered, you will be presented with a dropdown selection of service providers for the particular device (e.g., for Satellite, Dish or DirecTV).

-
Drilling down on the device details – here you need to define the exact make and model of your device. Sometimes you can find this on the front of your receiver, other times, you may have to look on the back and view the manufacturer and model.

-
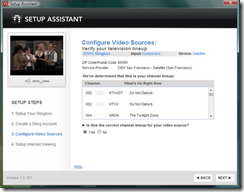
Channel Lineup – based on your previous selection, you will see the appropriate channels for your Service Provider in your area. I had a bit of trouble here in that I didn’t choose one with a City or Area name (e.g., San Francisco). When that happened, local channels didn’t show up. So be careful when you make your choice. It’s easy enough to change though.

-
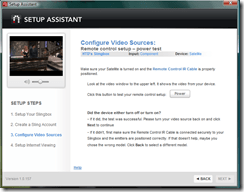
Testing Remote Control/Power – When you were connecting your devices to the Slingbox, one of the items that you needed to carefully place is the IR blaster. This tiny cord basically controls all of the components plugged into your Slingbox. You need to be sure that the IR blaster is positioned so that it can send signals to your components. Some people have had to create “tents” to direct the signal properly. I simply positioned one above and below my Satellite receiver. In this test, you will push the power button within the Slingbox setup software to see if it turns your device off.

-
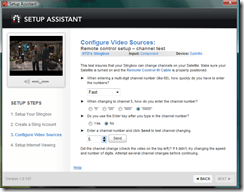
Configure Remote Control/Channel Test – this is one area where you may find yourself spending a bit of time. This part is a bit finicky so be patient. You will be setting how quickly numbers can be entered, the format for entering numbers (e.g., 5, 05, 005, 0005), if you use the Enter button normally or not and then testing changing channels based on your settings. Tivo does this as well when you are configuring their boxes and remotes so this may be familiar to some.

-
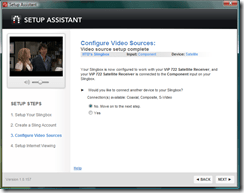
Configure More Devices? – if you have other devices you want to hook into the Slingbox, you can say “Yes” here and go through the process again. If you are done, just click No to move on.

-
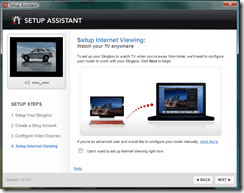
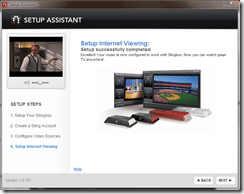
Setting up Internet Viewing – This is an optional step, but come on, isn’t one of the reasons you got a Slingbox was to be able to watch from work or a hotel or somewhere away from home? If so, click the Next button. Otherwise, check off that you don’t want to set it up.

-
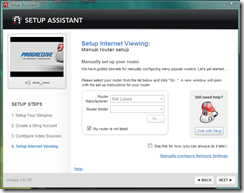
Setting up your Router – there are many different paths that you can take here. I decided to take the one less travelled (setting up my router connection manually) since I have a modified Linksys router with Tomato firmware running on it.

-
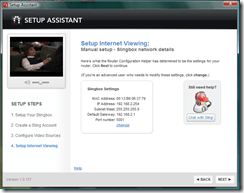
Router Network Details – the Slingbox will attempt to make a connection to your router. You should probably have UPnP (Universal Plug and Play) enabled within your router to have this work. Basically, you Slingbox will communicate with your Router to say, Hey, open up this port for me to use to transmit my media stream. Alternatively, you can manually configure your firewall port to be open for the Slingbox.

-
Internet Viewing Complete! – That’s all folks.

-
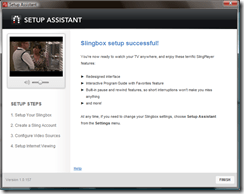
Slingbox Setup Complete – You are done! Start watching TV via you Slingbox!

Overall, the setup process is fairly quick (between 10-20 minutes depending if you know all of your required broadcast information and whether you have all of your firmware updated). SlingMedia has really thought this process out and made it almost an afterthought. The only part where it may get tricky (the Router setup process), they seemed to have planned for by including a Click to Chat icon (see #18 & #19 above). This wizard is pretty forgiving, and you can run it again at any time.
HTD says: Now that you are done setting up, let’s see the Slingbox PRO-HD in action!


6 comments
guest
did you use 5001 port?ive heard some isp’s like comcast,are throttling the upload….and its better to use a different port like 443 or 80 among a few
ugg boots
Thanks a landlord it! I acquired yet some insight. Life is so colorful, we should be able to live in, such as Korea and honor the planet. Human life is like rivers, slowly flowing, flowing rivers, flowing through the snow, flows through the prairie and ultimately into the sea, return to the embrace of nature, start a new reincarnation. Allow us to feel the meaning of life will come only to those you have those memories http://www.chaneloutletstores.com/chanel-travelbags.html
hightechdad
The Slingbox doesn't have a built-in tuner so you need to connect to a video source. You do need an IR-blaster to control those sources too, I believe (e.g., issue commands to change channels or play a dvd). The Slingbox simply takes the video and prepares it for streaming and controls the various devices, as far as I know.
akiyoshimatsune
Can I setup two sources with out using IR sensor like TV ant in and composite in ?