
Now this was not my first experience with a NAS as I currently own a Western Digital My Book World Edition 11 (with a Terabyte of space). The Western Digital is ok…but just ok. I got it because Costco had a great deal with a rebate. This is actually my second one, since the first one I managed to “brick” because I tried to install some 3rd party tools on the Linux portion of it…but that is another story altogether. The WD is loud but does its job (since it has two hard drives in it, and they are replaceable, it seems like a good device to get). But I digress…
I learned about the LaCie Ethernet Disk Mini – Home Edition when I was at MacWorld 2008. I had a long conversation with Barry Katcher, the LaCie PR guru and explained to him my “issue.” For several months, I had been searching for a solution for centralizing my media (music and photos). I wanted a place to simply offload all of my photos for storage (and redundancy) and an area to put my measly 30 gigs of music. The real thing that I was looking for was a way to create a media server for all of the computers in my house to have access, a centralized music server, so to speak. I went through countless free and paid “solutions” (I currently have a FireFly media center running off of one of my computers) but I wasn’t really happy with the results. I think I must have spent 15 hours looking for a solution, but nothing really grabbed me as working and simple. This is what Barry and I discussed. After listening to my “pain” he suggest that I look at the Ethernet Disk Mini – Home Edition (which I will simply call the “Mini” from now on in this review).
Shortly after the show, I received one from LaCie to review. Mine arrived yesterday. Several hours later, the Mini is installed, running and I am truly impressed. Before I dive into a detailed analysis of the system that drives it, let me go through the set up process.
The Set Up & Product Shots
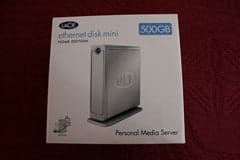
The mini comes in a box about the size of a toaster. The packaging is clean and neat, with a clear product shot on the front.
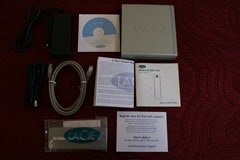
Inside the box, you find the essentials.
The contents are:
- The drive
- Ethernet cable
- Power cord (with brick)
- Manual/Warrant/Support Card
- Base stand
- Installation software
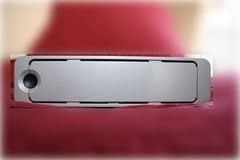
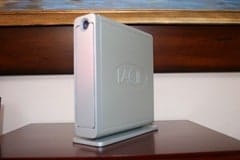
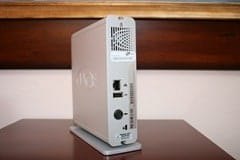
The Mini itself is about 7 inches tall, 1.75 inches wide and 6.5 inches deep (with the base attached). It is a nondescript dull gray color with a blue power button/activity light on the front.
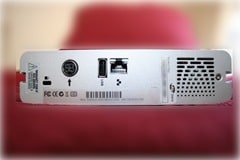
It feels incredibly solid to the touch. The back of the Mini has an Ethernet port, a power port, a USB port and an area to attach a cable to lock the device down.
Setting it up was incredibly easy, in fact, the manual just lists out three steps for connecting: 1) Connect the power supply, 2) connect the Ethernet and 3) push the power button. If it was THAT is, I would have been floored. However, there was much more to the set-up as I was soon to find out.
The Software Setup
Once the device was powered up and connected, the next step is to install the management software. The Mini comes with a Mac/Windows CD that lets you set up the device fairly easily. I decided to take the Mac route and used that installer (I did later install the Windows Management software to evaluate as well).
What follows is a series of screen shots of the installation process. These are taken from my actual install and I provide these for people to understand the process. Commentary is provided as appropriate, however, this is NOT to be viewed as Documentation. This is simply my experience, documented. Not every screen is provided, just the ones that made sense. [Be sure to click the image for a closer view.]
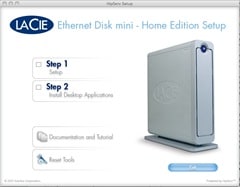
The CD installer launched with “Two Steps,” Setup and Install Desktop Applications. I followed direction and started with Step 1. (It was interesting to note, however, that on my network, there was already a device called “HipServ.” Navigating to it, I found some directories but I could not access them without a user name and password.)
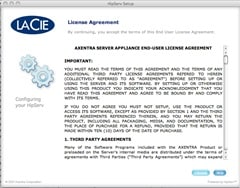
Accept the License Agreement.
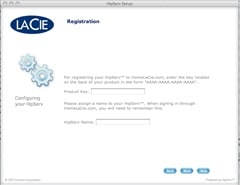
Register your HIPSERV by entering the Product Key on the back and entering the “name” of your device. This name can be anything that you chose, provided you follow the naming format (which I guess I didn’t initially).
I had put in an underscore (“_”) between some of the words in the name. This is a no-no, so I changed it to a hyphen (“-“) and all worked fine.
After a minute or so, my HipServ was registered on the “HomeLacie” site. This was a good sign…at least I thought it was.
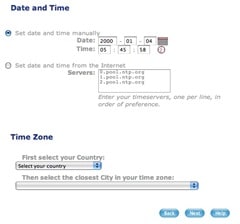
You are then prompted to set the Date and Time of your Mini. I chose the automatic setting and the entered my appropriate Timezone and City.
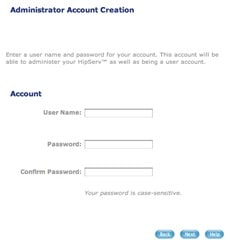
The next step was to set up an administrator for the Mini. Pretty straight forward.
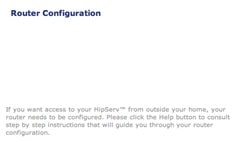
This is where things got interesting. I’m not big on reading manuals so I just flew threw this step. In my opinion, this is an area where users who don’t really understand networking or computers might get a bit tripped up. I would recommend reading the Help documentation here (although I must admit, I didn’t).
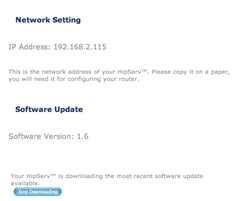
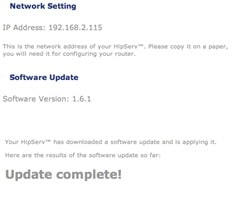
After a few minutes, the Mini was able to obtain an IP address from my router. It also detected that my device needed a software update. I particularly liked how this process worked. It got the IP, connected to the “mother ship” and then automatically started downloading the latest software.
After a few minutes, the software was automatically downloaded and installed to the device. I had no issues with this process and everything worked flawlessly (a pleasant surprise).
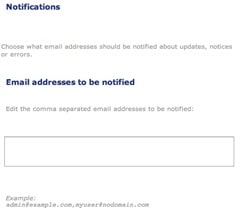
This was another nice configuration screen. I guess that by entering in your email address, the Mini can notify you when there are issues or your device needs updating. Very nice to have. Basically, I don’t have to worry about things until I’m notified.
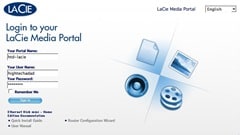
So with everything “configured,” I was ready to log into my system. This screen came up after all the other configurations were done. I didn’t have to hunt around for an IP address or something to keep me going. But this is also where things came to a screeching halt. I tried logging in and found that I simply could not. What was happening was that the HomeLacie site could not connect to my Mini on my network. Luckily there was at the bottom of the web page, a link called “Router Configuration Wizard”. Also, there was an area to test your connection. This is what I did first.
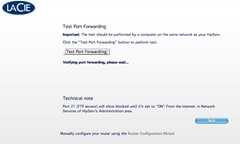
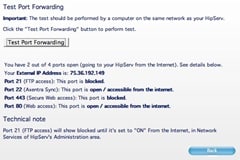
Started the Port Forwarding test…
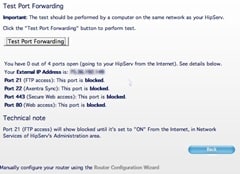
…the results were that everything seemed to be blocked.
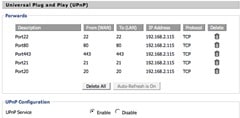
So, I looked at the Router Configuration Wizard again. I fired this up and was presented with quite a few common brands of routers. Unfortunately, mine was not there because I have a Linksys that I installed DD-WRT on (an open source firmware for various routers that extends their functionality dramatically). So, I chose the Linksys router because I was familiar with the interface. The pages that followed on the “wizard” were that of screen shots from the router. Eventually I found that all that I had to do was to enable Universal Plug-and-Play (UPnP) on the router. I did this.
Finally, my Port Forwarding tests worked…
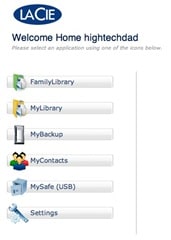
…and my router found and logged the ports that had been triggered. After that, I tried logging into the HomeLacie.com site again. And I was greeted with this.
So, it looked like I was good to go!
Working with the Device
I never really read Documentation simply because I try to gauge usability by simply using it. There is something always to be said on well written documentation, but as of this writing, I only had to look at the PDF manual once. Now, I only played around with the functionality for about an hour or so, but I feel that I got a pretty good understanding for how the Mini works.
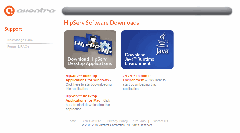
First of all, the HipServ is essentially a Linux operating system running on the device. HipServ, from my understanding, is produced and maintained by Axentra, a partner of LaCie. They provide the software and updates to it. The Mac and Windows tools are branded by them. Note that my Western Digital also includes software that does something similar, however, I never installed it after reading what other users had to say. This time though, I wanted to experience the full functionality of the device. Here is the tools download page as branded by Axentra.
The HipServ mounts on your network as an attached device. When you browse it, 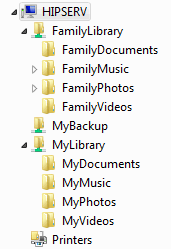
Using the directory structure is probably the easiest way to get files and media to your HipServ. However there are other ways to do so, namely through a web browser. For the screen shots that I took for this review, I saved all of the images directly to the FamilyPhotos directory. Everything worked flawlessly.
So, how else can you get media on to the device. Well, before I go there, here is a quick snapshot of what the media browser built into HipServ looks like:
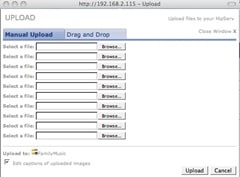
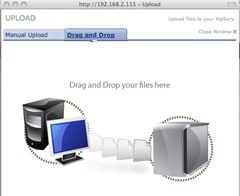
To upload, all that one simple has to do is to navigate to the directory (or create a new one) where you want to store your files and click “upload.” By doing this, you are presented with two options, a file by file upload or a java-based drag and drop upload.
File based upload.
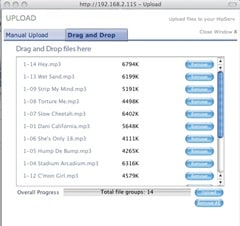
Drag and drop upload. This is the way I chose to upload a full album of the Red Hot Chili Peppers. I simply selected the files that I wanted to upload, and dragged them over to the web page.
You can chose to remove individual files from this batch upload.
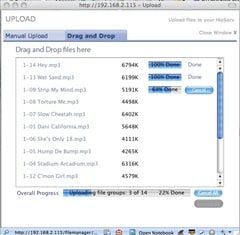
Clicking “Upload” starts the process. After a few minutes, my entire album was loaded to the HipServ. For the sake of speed, I uploaded other albums simply through the file browser and not the web browser. This is the method you should choose if you want to do things in bulk. However, if you are away from your home network and want to upload a file or series of files, the web-based methods are really great! If you are at work and want to get a file to your home network, you just simple log into your device and upload all the files you want. It’s extremely easy.
Once I had a few albums on the HipServ, I wanted to see how it solve my initial issue of setting up a media server. I was extremely surprised at the positive result. Not only are all of the albums there, but the server appeared in my iTunes as a shared library:

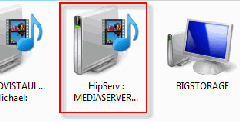
And within my Windows Vista Ultimate system, as a media device:
And within Windows Media Player, all of the albums showed as expected:
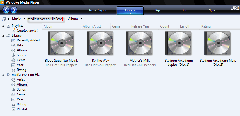
Now this was GREAT! There was no need for me to set up some crazy and complicated setup in order for other people in my household to get at my music, it just magically appeared without any configuration. (Well, I think that I did specify a Workgroup within the HipServ admin so that the device would be part of my home network workgroup.) Here are the admin options:
Viewing the media was easy to do from within the browser. And, you could easily play your mp3 files and browse your albums as well. (Note: I did have some issues with playback on Firefox on my Mac but it could have been due to some ad-blocking software that I had installed on Firefox. Playback worked fine on Safari on my Mac and on Firefox on Windows Vista.)
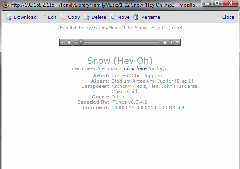
When you clicked on an MP3, you actually got quite a bit of detail as well as the song actually started to play:
Pretty slick, if you ask me. But here is where I was really astounded. When I was talking to Barry at MacWorld, I asked what differentiated this product from many of the others out in the market. He told me (among other things) that the media sharing function was really unique. Basically, you could choose to share photos or music with whomever you wanted by simply sending them an email with an invitation to log into your HipServ as a “guest.” Also, he said that compared to other services, this one was better for one main reason, it was free. So I had to test this out for myself.
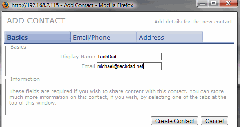
First, I created a contact.
Once created, this contact shows in the management area:
All that you have to do after that is click on one of these icons:

The one on the left is Private, the one on the middle is shared with a specific users and the one on the right is Public. By clicking on the icons, you set the state of the folder. When you click on the middle one, you are presented with the following:
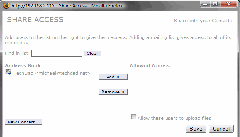
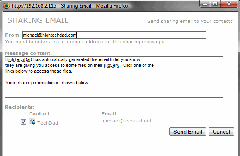
In this screen, you choose whatever contacts you want to share the directory with. You are then presented with a screen for the “invite.”
Once you email this invite, the recipient gets an email similar to this:
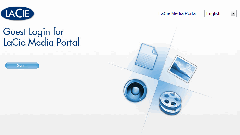
When the recipient clicks on the link, they can log in as a “guest” on your HipServ. They have the ability to view or play your media, as well as download it.
I see this as a fantastic way for extended families to share photos with one another, or for friends to “illegally” share music (cough cough, I don’t condone that but the functionality is there and is extremely easy).
If you ever want to turn off the sharing, simply click on the icon on the left to make the folder private again. It’s that simple.
Summing it all up
With an MSRP of $189, this is a GREAT addition to any household that wants to share music or photos within the home as well as outside to extended contacts. It is extremely easy to use and seems to be a solid product. I could definitely write a lot more about this device, but then there would be no more surprise. That is part of the magic of buying any gadget or device, in my opinion.
Update: I thought that it might make some sense to include a bit about iPhone compatibility since this was something that I did test as well. It is very easy to navigate through your files using the browser on your iPhone or iPod Touch. The UI could be a bit better (or perhaps a new UI specific for the iPhone could be developed based on the user agent passed by the iPhone Safari browser). However, I could view photos easily and navigate through the system. On a traditional browser on a computer, when you click on an MP3, the QuickTime controls allowing for playback of the music file show up. On the iPhone browser, the controls show as a broken QuickTime image, meaning that probably with some minor tweaking, this could probably work…hope you guys are listening. This would be a GREAT win!
Briefly, some positives and negatives that I see:
Positives:
- Ease of use
- Ability to share files easily with others remotely
- Automatically appears as Media servers within iTunes and Windows
- Quiet hardware (especially compared to the Western Digital, this device is very silent)
- Ability to remotely manage, upload and download files
- Set up process is quick
- Easy to do backups with supplied software
- Ability to attach other USB hard drives for copying or additional storage or backup
Negatives:
- Cannot easily swap out the hard drive
- Cannot easily play albums via web browser (at least I couldn’t figure it out easily, it might exist though)
- Only one hard drive so no ability to set up RAID arrays for redundancy
- Only currently comes in 500 GB version. Would like a larger version or one with 2 drives.
Honestly, I will be sad to part with the Ethernet Disk Mini – Home Edition at the end of my 30 day evaluation. The price point may make me consider buying one at a later date, especially if I didn’t already have the Western Digital. However, I really view the Mini as a requirement to any family or home network.
HTD says: The LaCie Ethernet Disk Mini- Home Edition deserves a SOLID A-! It could easily get an A with just a few feature changes.









20 comments
50 ft Ethernet Cable
This is so interested! Where can I find more like this?
hightechdad
Well, I still have my LaCie, although I must admit, I did too have to send it back to get repairs/replacement as well. The power button had issues as well and did not work. They were able to swap out the drive though so I didn't lose my data.
Mike
Techdad should have kept one of these for longer than 30 days; he would have found out they are difficult to “keep alive,” which is a problem for a device that is meant to be a server. I purchased three of these devices about 2 years ago, one for myself and one each for distant family members so that we could share large files that we could not email. The set up is like giving birth, and the portal access process for anyone you grant access to your files is so klooogy that most of my friends have given up trying to access. Without a user-friendly access process, you are left with a very pricey external storage device that you have to keep restarting. Good luck with that. I have had to send several of my Lacie units back to get rebuilt due to inability to access the portal, or they just died. And like any hard drive, there is no guarantee any of your data will remain when you get the device back. The attractive blue power buttons work sporadically, there is no positive engagement signal, and these concave buttons are difficult to access unless you use a pencil eraser. Tech support is hit or miss. I have purchased 7 Lacie-made devices over the past 5 years, but none in the last two years. I can't recommend these products. There must be other solutions out there that are not so problematic as these.
itjobs1
Thanks again. good work. using it now.
www'staffingpower.com
itjobs1
Thanks again. good work. using it now.
www'staffingpower.com
50ft_ethernet_cable
This blog is so usefully, Thanks for the posted ;)
Pascal
Hi,
I'm sorry to say that I'm also not satified by this product and I don't think I use it for the wrong reasons. I use it as a network storage, a place to store my movies and music. That shouldn't be to difficult. First, the drive needs a restart once per month, because it 'gets' inaccessible. Second, the speed for quick copying is really terrible, and no it isn't my router or network. I have 2 nas's one maxtor and one, which name will never be mentioned, and with the maxtor I have no issue's. The interface is fine, and the fact u can use it in iTunes is great, if it al works in the basics. And third, there is no way to shut it down properly, the blue button doesn't do anything, I have to pull the plug each time. I have a mini as well… great stuff from apple ;-)
Cheers,
Pascal
Pascal
Hi,
I'm sorry to say that I'm also not satified by this product and I don't think I use it for the wrong reasons. I use it as a network storage, a place to store my movies and music. That shouldn't be to difficult. First, the drive needs a restart once per month, because it 'gets' inaccessible. Second, the speed for quick copying is really terrible, and no it isn't my router or network. I have 2 nas's one maxtor and one, which name will never be mentioned, and with the maxtor I have no issue's. The interface is fine, and the fact u can use it in iTunes is great, if it al works in the basics. And third, there is no way to shut it down properly, the blue button doesn't do anything, I have to pull the plug each time. I have a mini as well… great stuff from apple ;-)
Cheers,
Pascal
hightechdad
@Simon,
Thanks for your comments. I agree that this isn't a perfect product for everybody. However, for what I use it for, it seems to do its job. I have put my mp3 collection on it and when I launch iTunes, the media server is recognized as a shared library. There was practically zero configuration for that. I have my Mini running all of the time and just it mainly for storing media. For the price, it is hard to beat. What other ones would you recommend? I might try to get one for review as a comparison. I am surprised about the support so I may reach out to them on your behalf to see what can be done.
Thanks,
HTD
hightechdad
@Simon,Thanks for your comments. I agree that this isn't a perfect product for everybody. However, for what I use it for, it seems to do its job. I have put my mp3 collection on it and when I launch iTunes, the media server is recognized as a shared library. There was practically zero configuration for that. I have my Mini running all of the time and just it mainly for storing media. For the price, it is hard to beat. What other ones would you recommend? I might try to get one for review as a comparison. I am surprised about the support so I may reach out to them on your behalf to see what can be done.Thanks,HTD
Simon
Sorry I bought this product about 2 months ago and it sucks!!! Really the media streaming doesn't work properly logging on to it to admin it is problematic and unreliable.
The support is worse than useless, they referred me to the manual, told me to change the lan cable or the power supply (because there are lot of those available).
If I knew what I knew now I wouldn't have paid a cent/penny or grot for this rather attractive piece of junk.
The blue light looks nice though … but there it ends. Do not buy this useless piece of ****, I am so disappointed with it I will never buy anything from Lacie again.
hightechdad
@Raff,
It's my understanding that the device isn't designed to do direct FTP. The web-interface is really nice (meaning you can access your data/files/media via the portal that comes with it.) I personally cannot address the Linux side of things, however I have reached out to LaCie and they will respond.
Thanks,
HTD
hightechdad
@Raff,It's my understanding that the device isn't designed to do direct FTP. The web-interface is really nice (meaning you can access your data/files/media via the portal that comes with it.) I personally cannot address the Linux side of things, however I have reached out to LaCie and they will respond.Thanks,HTD
mhall
The Ethernet Disk Home Edition is a combination product and service
that was not designed for FTP purposes. Since we are offering
customers an easy-to-use and secure remote access to their personal
content and because FTP can be a complex process for consumers and
is not considered a fully secure transport tool, we believe our
service is the best and most secure way for consumers to access
their files. As for Linux users, although we have many products that
support Linux for professionals, its penetration into the home
market is (while growing slowly) still small as compared to Windows
and Mac. As the Linux market matures, we obviously will evaluate its
potential.
Needless to say, we disagree with this one Linux user's assessment
of a LaCie product and service that was not designed or intended for
his purposes. We do have many, many satisfied consumer users of
LaCie Ethernet Disk Home Edition who are using it as it was intended.
Mark Everett Hall
Public Relations
mhall
The Ethernet Disk Home Edition is a combination product and service that was not designed for FTP purposes. Since we are offering customers an easy-to-use and secure remote access to their personal content and because FTP can be a complex process for consumers and is not considered a fully secure transport tool, we believe our service is the best and most secure way for consumers to access their files. As for Linux users, although we have many products that support Linux for professionals, its penetration into the home market is (while growing slowly) still small as compared to Windows and Mac. As the Linux market matures, we obviously will evaluate its potential. Needless to say, we disagree with this one Linux user's assessment of a LaCie product and service that was not designed or intended for his purposes. We do have many, many satisfied consumer users of LaCie Ethernet Disk Home Edition who are using it as it was intended. Mark Everett Hall Public Relations
color_chart
Is this true? i was thinking about getting one but if you cannot transfer files from linux then there really is no point… surely this would be a basic feature of such a device.. can anybody shed some light on this for me?
color_chart
Is this true? i was thinking about getting one but if you cannot transfer files from linux then there really is no point… surely this would be a basic feature of such a device.. can anybody shed some light on this for me?
Raff
I have been using Ethernet mini disk before, but not home edition. I bought by mistake home edition lately and it is crap. It not have ftp, or http. It uselles. You can not copy files from linux. I can return it to shop, thus it will go to trash.
Raff
Raff
I have been using Ethernet mini disk before, but not home edition. I bought by mistake home edition lately and it is crap. It not have ftp, or http. It uselles. You can not copy files from linux. I can return it to shop, thus it will go to trash.Raff