


Recently, my Windows 7 computer started running a CHKDSK each and every time that it booted up. For those that don’t know, the CHKDSK utility is a way that Windows validates the system file structure and integrity of your computer’s hard drive. You can scan your hard drive with it or run it with a fix (/f) flag to correct issues on your local hard drive. But, when time is critical, many of us don’t want to wait around while the system is scanned, especially if for some reason, it is happening each and every time you start up. When that happens, you either have a serious problem with your computer, or somehow your system has been automatically set to do this scan.
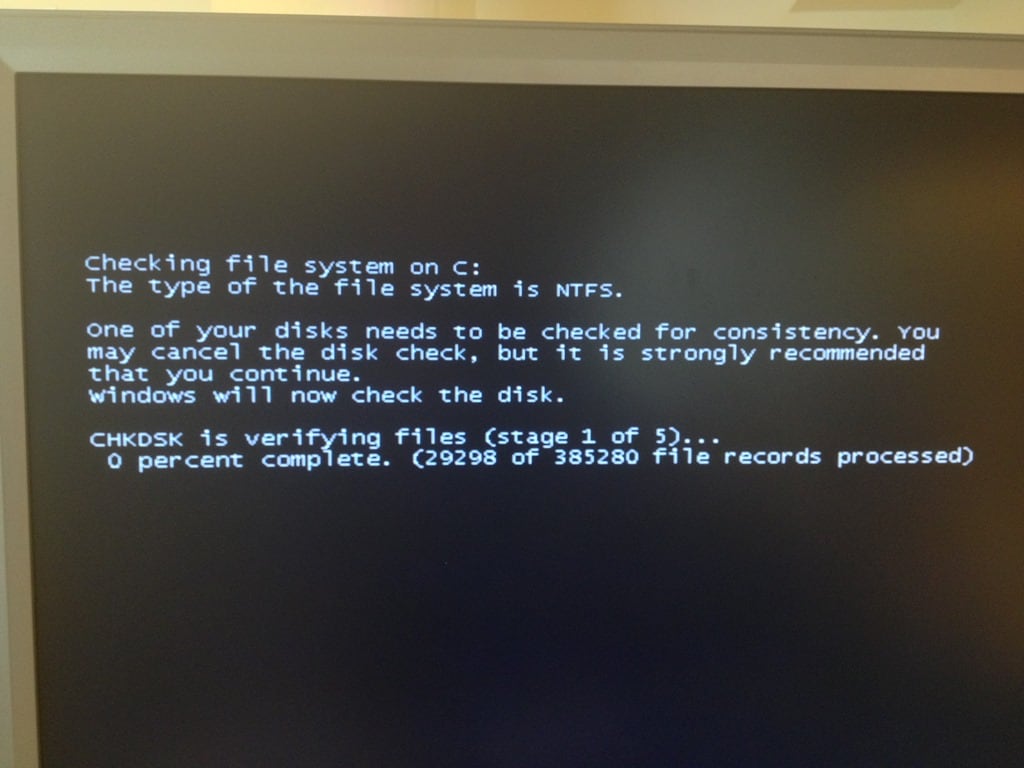
While I don’t condone stopping these scans, especially if your system does indeed have problems, having this run every single time you start up borders on maddening! So after some digging, research and testing, I have found the way to prevent this from happening.
Just a little disclaimer, while I did test this on my machine and it, thus far, did work, if something goes horribly wrong while you do the steps below, I’m not responsible for any data loss or corruption or any issues in general…you are assuming all the risks associated with these steps.
Steps to Prevent CHKDSK from Running on Every Computer Restart
Below are the steps and command you need to do to get this to work. As I mentioned, I tested this on Windows 7 but I believe this will work on Windows XP as well. I do not know for sure about Windows 8.
“Dirty” Hard Drive Check
The first step is to see if you have a “dirty” hard drive. If this test does say that you do, it could be the reason why you continually see a CHKDSK running on every restart. To test this, you need to launch a Command prompt as the Administrator of your computer.
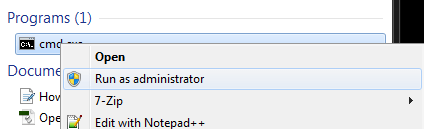
Go to Windows Button, and type in “CMD” in the “Search for Programs and Files” box.
When the application shows, right-click on it and choose “Run as Administrator.”
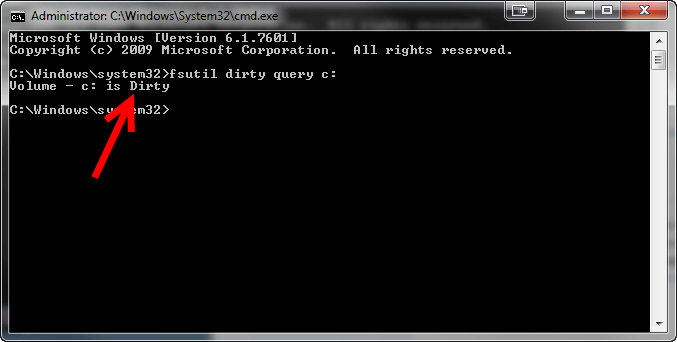
Next you will type in the following command to check to see if your hard drive is “dirty” or not:
fsutil dirty query x:
Where “x:” is actually the drive letter of your hard drive. For me it was “c:” but in this article, I will refer to it as “x:”.
Run the command and if your hard drive is indeed “dirty,” you will see something like this:
If your drive is “not dirty,” then you may have something else going on. You might still want to go through the following steps though.
Tell Windows NOT to Scan at Next Reboot
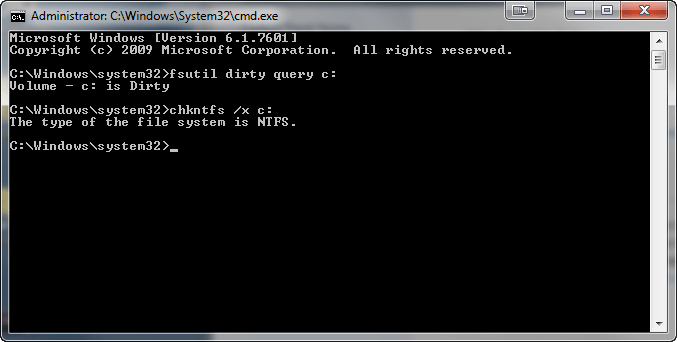
The next thing that you will do is instruct Windows to not execute the CHKDSK command at the next reboot using the CHKNTFS command. To do this, in the command prompt, type in:
chkntfs /x x:
Again, be sure to change the “x:” to whatever drive you are checking.
Now reboot your computer. Hopefully, CHKDSK will not run this time. But you need to go on with the following instructions to ensure your hard drive is ok.
Optional: you might want to run the “dirty” check again. When I did, it still said that my drive was dirty.
Tell Windows to do a DEEP CHKDSK Scan at Next Reboot
I will preface this set of instructions with a warning. This deep CHKDSK scan will take several hours to run. On my 500 GB hard drive, it took over 3 hours to complete…but with success in the end.
What you are going to do here is tell Windows to do a CHKDSK scan but do a very thorough job at it. If you already have your command prompt open (running as Administrator), issue the following command:
chkdsk x: /f /r
Remember to replace the “x:” with the drive letter of your hard drive.
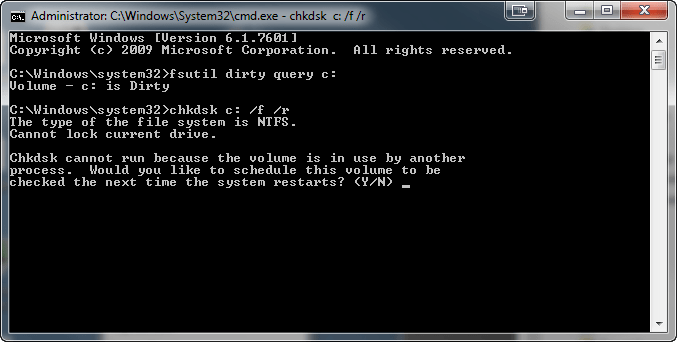
The /f flag tells windows to fix any issues and the /r flag tells it to do a deep scan. It locates bad sectors and recovers whatever information is readable.
Now, restart your system. When it reboots, it will start the CHKDSK process:
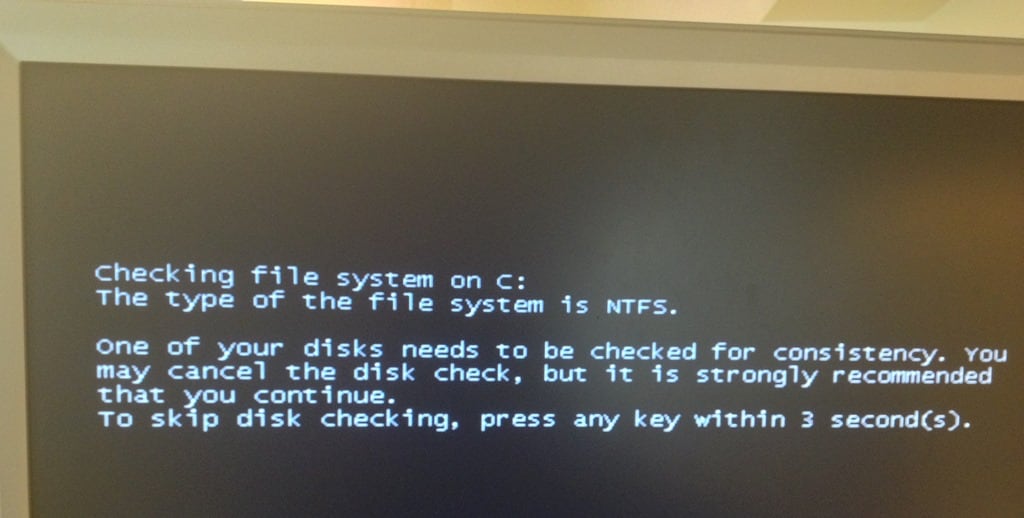
Head off to do something else, hopefully fun, during this time. It will take a long time for this to complete.
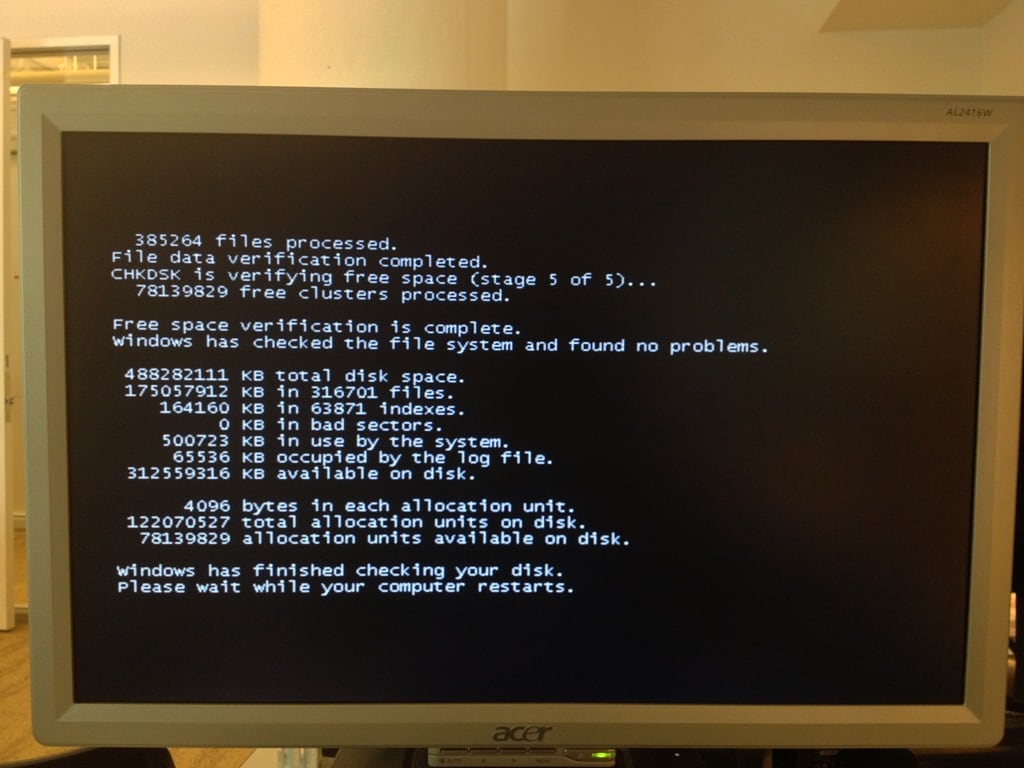
Your computer will automatically restart when it is completed. If there are issues, you will see a message on the screen and you may have to do something else or run CHKDSK again.
Once you boot back up into Windows, launch the Command prompt again (as Administrator) and check to see if your hard drive is dirty or not. Here is the result of my check:
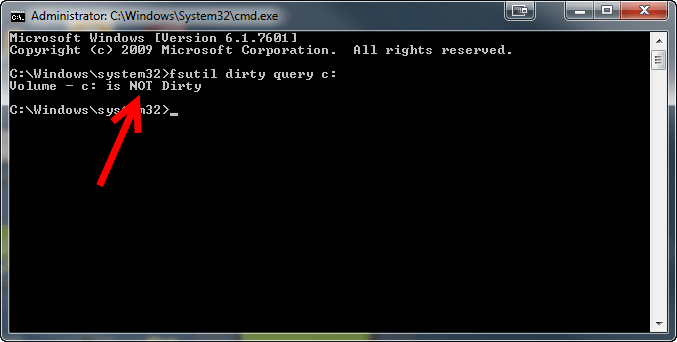
Yay! My hard drive is NOT dirty! I did some more reboots just to be sure that the CHKDSK didn’t pop up again and as of this writing, everything seems to be running as expected.
So there you have it. Hopefully this worked for you. Please leave a message to let me know if this fixed your CHKDSK issues on reboot.
HTD says: With tech issues, when there is a desire to fix something, there always is some sort of solution.


9 comments
Blade
thank you so much I was very worried a virus was causing my computer to run the chk disk every time. This solution worked perfect
slimhun
that is a great and working solution, you saved me a lot of time and from a headache
Hmliks
HELLLLP When the CHKDSK is verifying files already, my computer restarts automatically at some point (like in 11 percent) disabling the process to continue and finish. :(((
Stergios
Thanks a loot !
Rikplay
I had a dual boot win 10 and win 7. Each time I booted into 7, it wanted to chkdisk the win 10 drive. Very annoying. Hopefully this will fix.
souren
Thank you very much u save my day…thnkx a lot..
Lingga Adi Atmadja
CHKDSK keep restarting after stage 1 done. How to fix this problem?
Blacke
… And then ensure this is done too. Why, because if your drive is not dirty and yet still chkdsk runs from bootup, clear off what triggers it through regedit (Registry Editor). The trigger could also be from a third party program if you didn’t schedule the disk check by yourself. You have to set it back to default where chkdsk won’t run again automatically from boot up.
If you feel you can’t be careful in Regedit, backup your registry by exporting it first to a separate area in your disk. Then if anytg goes wrong after you changed it, you can return to Regedit and then import that backed up reg file again to restore to your previous state. Always do this before you make changes to your registry…. if you’re a beginner or rare to use the technical side of Windows.
You do this after :
1. Press Win + R, (or click the start button and click on the “search programs and files” box ) type regedit, and press Enter.
2. Go to the following path:HKEY_LOCAL_MACHINE\SYSTEM\CurrentControlSet\Control\Session Manager
3. Look for the key named BootExecute.
4. Double-click it and change the data from autocheck autochk * or any lingering entries to just what is required, or clear a stuck scheduled flag.
(By default, it should read autocheck autochk *).
5. Then close the regedit. There’s no need to save anything as it will have already accepted whatever changes you’ve made in the registry and furthermore there are no ‘save’ in the File menu. That’s why you will need to be a little careful not to modify something else by mistake in Regedit and remember what and where you changed it, in case you want to revert to its last values. Else, something that you changed there by mistake may behave differently in your system after.
6. Check to see if chkdsk won’t run at next bootup after. It shouldn’t if you have done the change correctly as its default in that key stated above from the registry too.
Michael Sheehan
Great point! While a “dirty bit” is usually the main culprit, third-party software (such as old disk utilities or defrag tools) often leaves orphaned flags in the BootExecute key that trap Windows in a perpetual boot-check loop.
Resetting that value back to the default autocheck autochk * cleans out those stuck triggers without disabling Windows’ ability to check the drive when it actually needs to. Appreciate you adding that step, especially the heads-up to back up the Registry first—regedit doesn’t have an “undo” button!